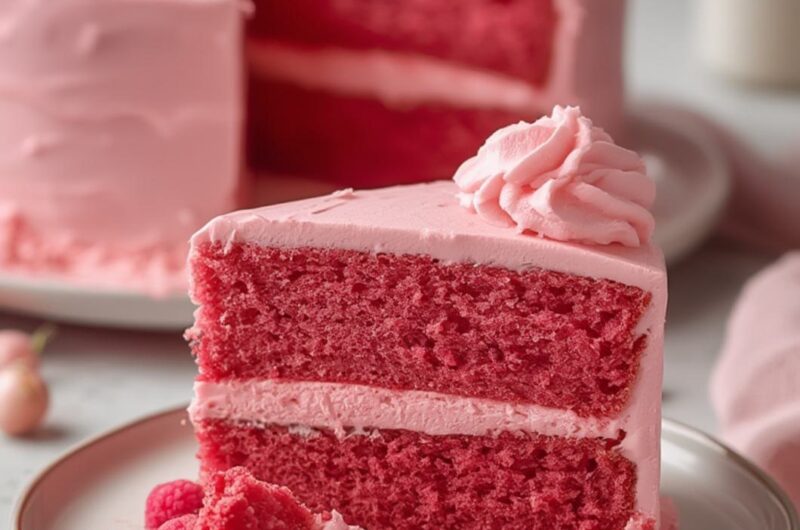
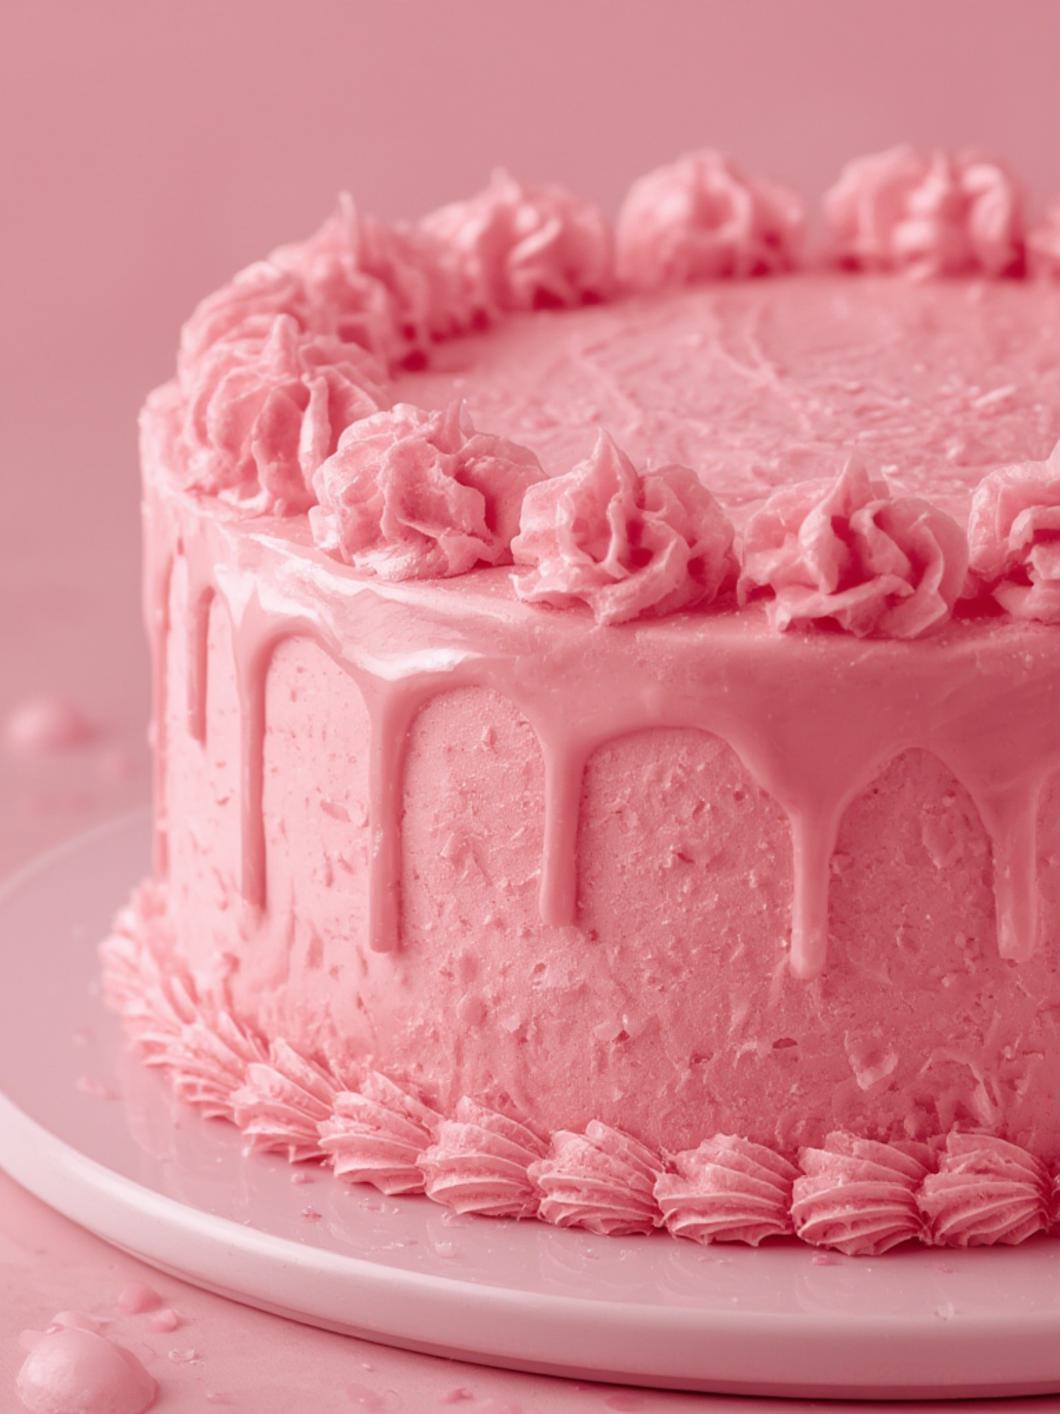
2-Layer Pink Velvet Cake (Moist, Fluffy & Perfectly Sweet!)
Dreamy 2-Layer Pink Velvet Cake: Moist, Fluffy & Perfectly Sweet!
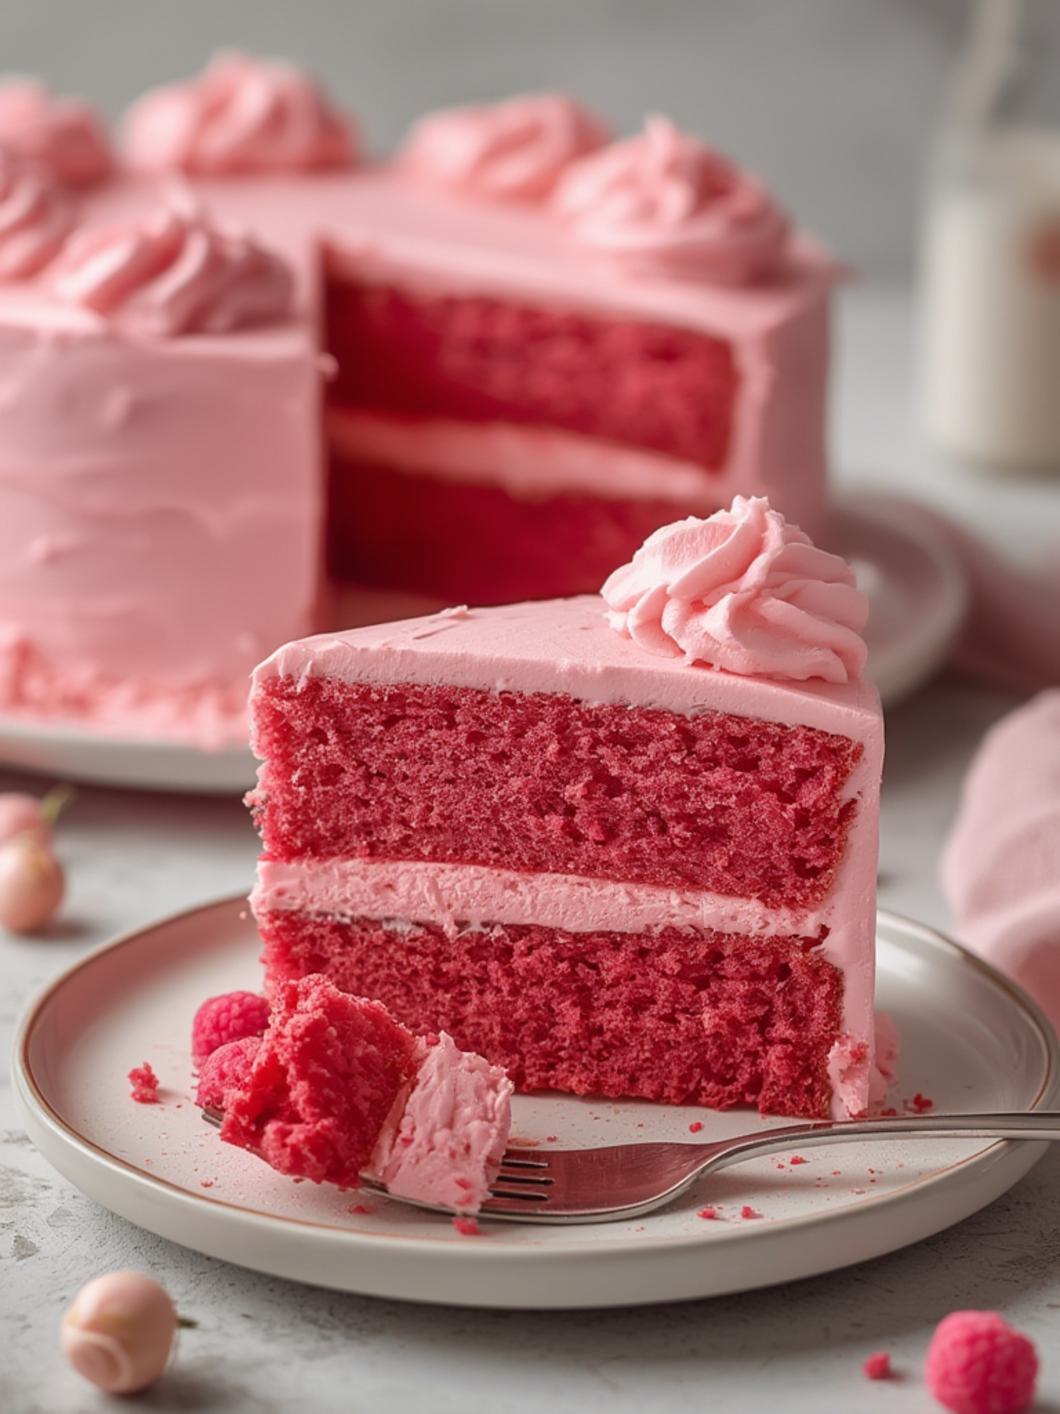
Step into a world of enchanting flavors and vibrant hues with our irresistible 2-Layer Pink Velvet Cake recipe! This delightful dessert takes the classic red velvet concept and bathes it in a charming pink, making it perfect for celebrations, baby showers, or simply adding a touch of whimsy to your day. With its tender, moist crumb and decadent, tangy cream cheese frosting, it’s a guaranteed crowd-plepleaser. Forget dry, crumbly cakes; our recipe ensures a fluffy texture and rich flavor that pairs exquisitely with the creamy frosting, embodying everything you love about a classic buttermilk cake with cream cheese frosting.
Quick Glance Summary
This stunning 2-layer pink velvet cake boasts a tender, moist crumb with a subtle hint of cocoa, beautifully contrasted by a generous slathering of classic cream cheese frosting. It’s an elegant dessert that’s surprisingly easy to make and perfect for any festive occasion, offering a delightful balance of sweetness and tang.
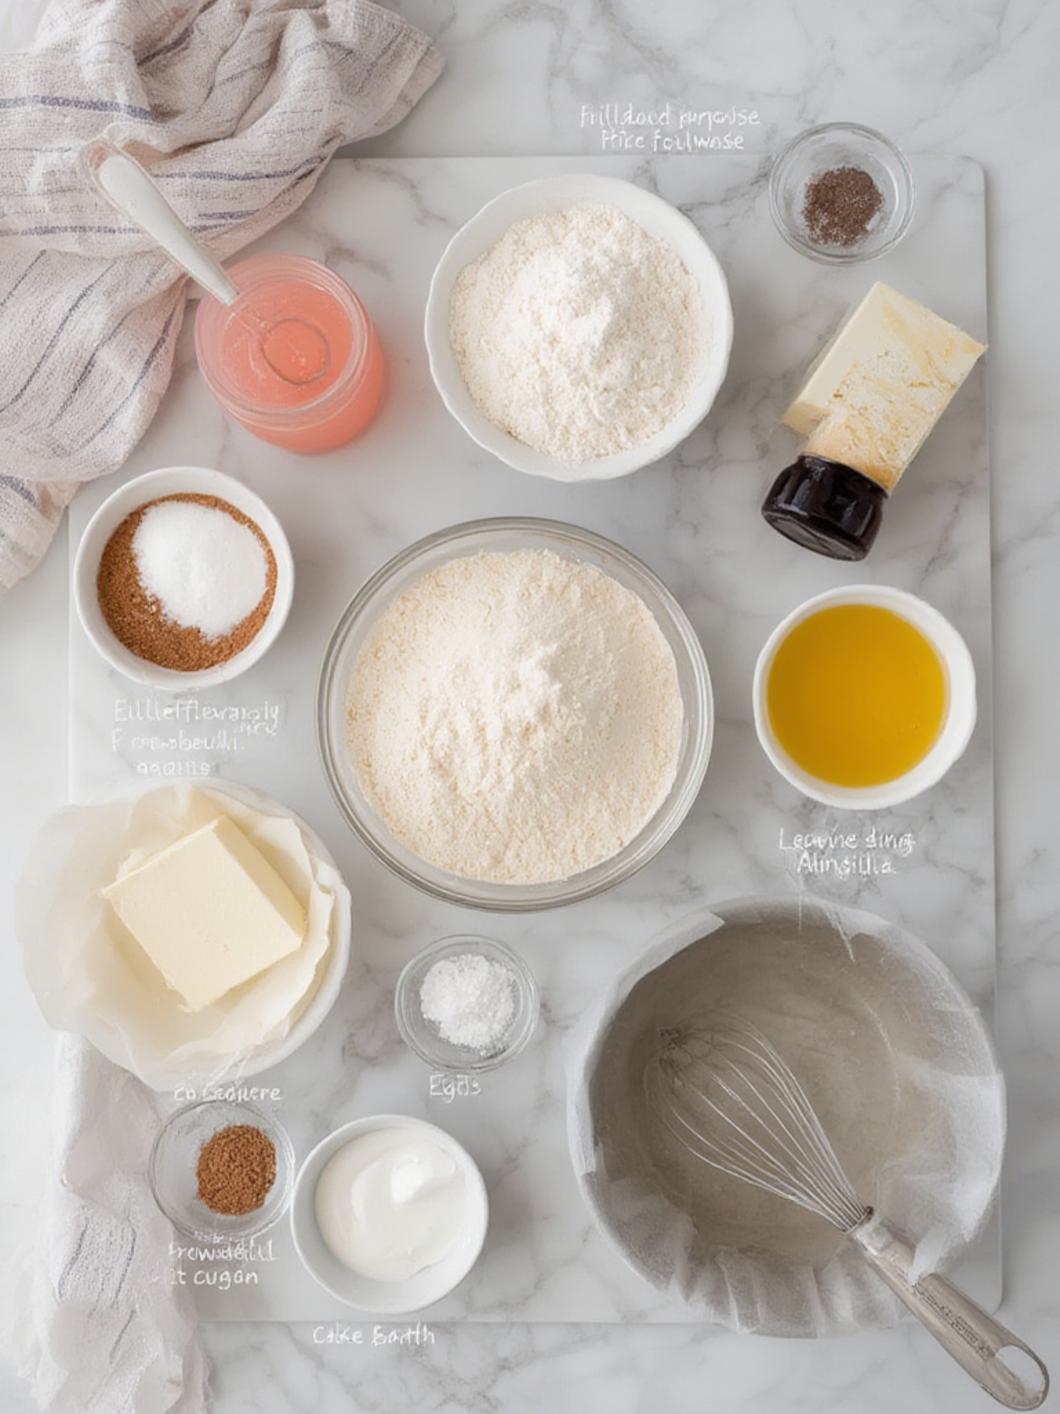
What You’ll Need
Gathering your ingredients ahead of time makes the baking process smooth and enjoyable. Here’s everything you’ll need to create this gorgeous pink confection:
For the Cake:
- ✦ 2 ½ cups all-purpose flour
- ✦ 1 teaspoon baking soda
- ✦ 1 teaspoon unsweetened cocoa powder
- ✦ ½ teaspoon salt
- ✦ 1 cup (2 sticks) unsalted butter, softened
- ✦ 2 cups granulated sugar
- ✦ 2 large eggs
- ✦ 1 teaspoon vanilla extract
- ✦ 1 cup buttermilk
- ✦ 1 tablespoon white vinegar
- ✦ Pink gel food coloring (enough for desired shade)
For the Cream Cheese Frosting:
- ✦ 1 (8 ounce) package cream cheese, softened
- ✦ ½ cup (1 stick) unsalted butter, softened
- ✦ 4 cups powdered sugar, sifted
- ✦ 1 teaspoon vanilla extract
- ✦ 2-3 tablespoons milk or heavy cream (as needed for consistency)
Preparation Instructions
Creating this delightful 2-layer Pink Velvet Cake is a joyful experience from start to finish. Follow these steps for a perfectly baked, moist, and fluffy cake that rivals any bakery creation. The combination of ingredients, especially the buttermilk, is key to its tender texture, much like a traditional buttermilk cake with cream cheese frosting.
1. Preheat your oven to 350°F (175°C). Grease and flour two 8-inch round cake pans. For easier removal, line the bottoms with parchment paper.
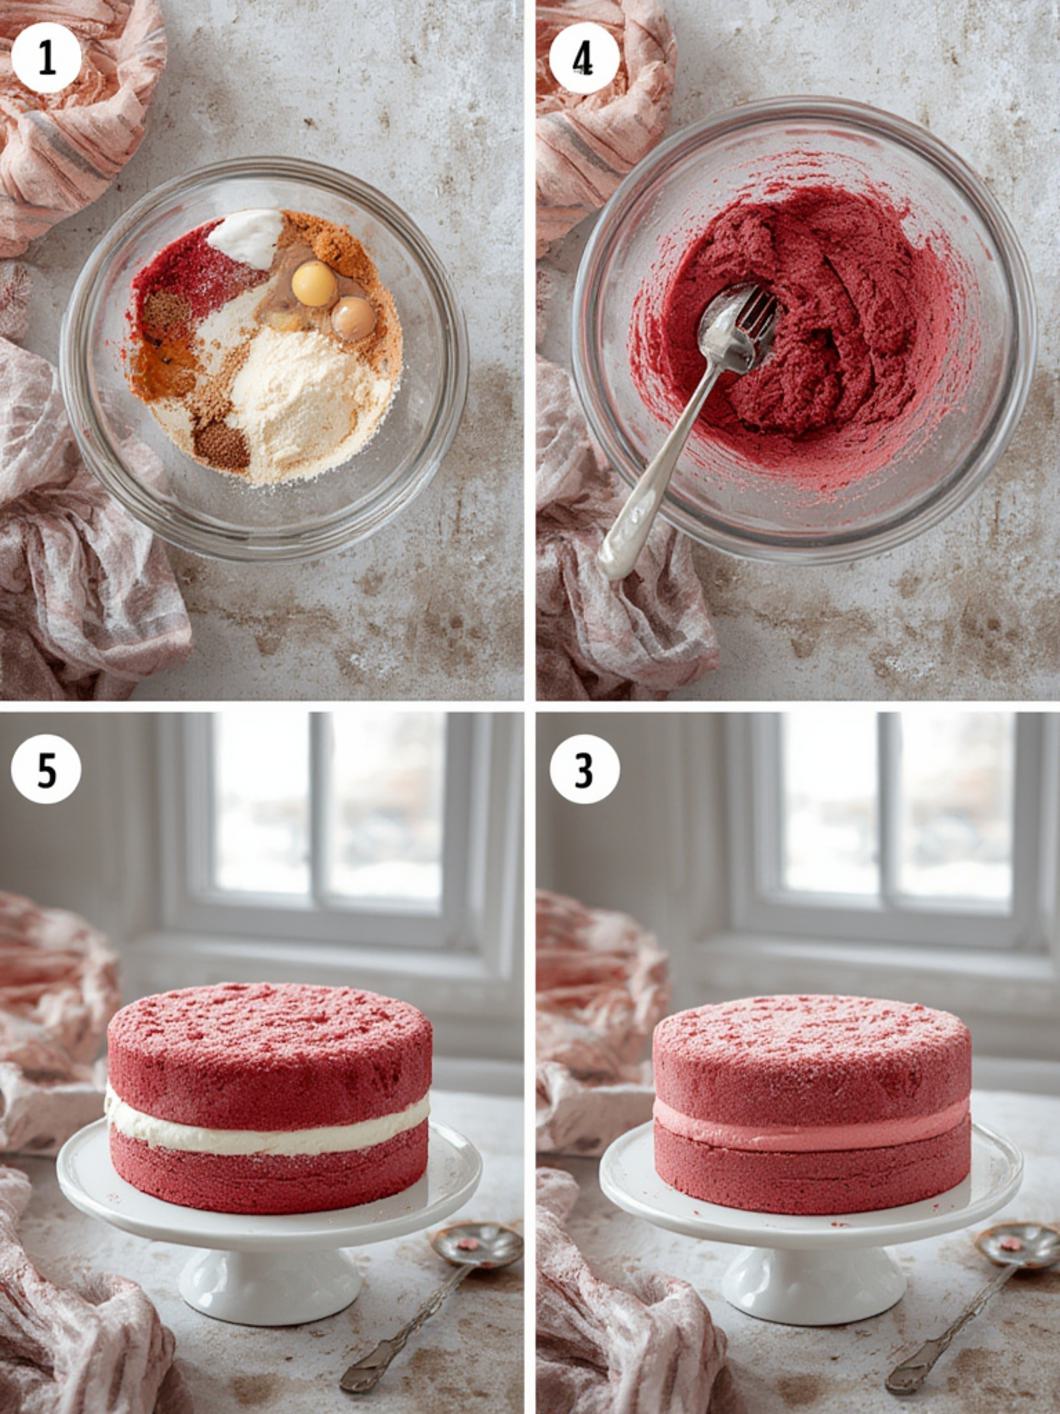
2. In a medium bowl, whisk together the flour, baking soda, cocoa powder, and salt. Set aside.
3. In a large mixing bowl, using an electric mixer, cream together the softened butter and granulated sugar until the mixture is light and fluffy, which usually takes about 3-5 minutes.
4. Beat in the eggs one at a time, ensuring each is fully incorporated before adding the next. Stir in the vanilla extract.
5. In a separate small bowl, combine the buttermilk, white vinegar, and pink gel food coloring. Mix well until the color is uniform and achieves your desired vibrant pink shade.
6. Gradually add the dry ingredients to the wet ingredients, alternating with the pink buttermilk mixture. Begin and end with the dry ingredients, mixing on low speed until just combined. Be careful not to overmix, as this can lead to a dense cake.
7. Divide the vibrant pink batter evenly between your two prepared cake pans.
8. Bake for 25-30 minutes, or until a wooden skewer inserted into the center of the cakes comes out clean.
9. Let the cakes cool in their pans for 10-15 minutes before carefully inverting them onto a wire rack to cool completely. This cooling step is crucial before frosting.
10. Prepare the Cream Cheese Frosting: While the cakes cool, make your frosting. In a large bowl, beat the softened cream cheese and butter with an electric mixer until they are smooth and creamy, without any lumps.
11. Gradually add the sifted powdered sugar, starting on low speed to prevent a sugar cloud, then increase to medium speed and beat until the frosting is light and fluffy.
12. Stir in the vanilla extract. If your frosting seems too thick, add milk or heavy cream one tablespoon at a time until you reach your desired spreadable consistency.
13. Once the cake layers are completely cool, level them with a serrated knife if needed to create flat surfaces. Place one cake layer on your chosen serving plate. Spread a generous amount of cream cheese frosting evenly over the top.
14. Carefully place the second cake layer on top. Use the remaining cream cheese frosting to frost the top and sides of the entire cake, creating a smooth, elegant finish. Decorate with sprinkles, fresh berries, or edible flowers as desired.
Fun Twists & Serving Ideas
- ✦ Ombre Effect: Divide the batter into three portions and add varying amounts of pink food coloring to create light, medium, and dark pink layers for a stunning ombre effect.
- ✦ Raspberry Swirl: Gently fold a ½ cup of fresh raspberry puree (strained to remove seeds) into a portion of the frosting for a fruity twist, or swirl it into the batter for a marbled cake.
- ✦ Champagne Infusion: Replace a few tablespoons of buttermilk with non-alcoholic sparkling cider or champagne for an elegant, subtle flavor.
- ✦ Rosewater Essence: Add a few drops of food-grade rosewater to the cake batter or frosting for a delicate floral aroma that complements the pink theme beautifully.
- ✦ Garnish Galore: Top with fresh raspberries, delicate pink macarons, white chocolate shavings, or edible rose petals for an extra touch of sophistication.
FAQ
Q: Can I make this cake ahead of time?
A: Yes, you can bake the cake layers a day in advance. Once completely cooled, wrap them tightly in plastic wrap and store at room temperature. The frosted cake can be refrigerated for up to 3-4 days.
Q: What’s the difference between red velvet and pink velvet?
A: Primarily the color! Red velvet typically uses red food coloring and a touch more cocoa powder to create a reddish-brown crumb. Pink velvet uses pink food coloring to achieve its distinctive hue, often with a similar, subtle cocoa flavor profile.
Q: Can I use regular milk instead of buttermilk?
A: While buttermilk is highly recommended for its tenderizing properties and tang, you can make a substitute: add 1 tablespoon of white vinegar or lemon juice to a measuring cup, then fill the rest with regular milk to make 1 cup. Let it sit for 5 minutes before using.
Q: Why is my cream cheese frosting too runny/too thick?
A: If it’s too runny, you likely need to add more sifted powdered sugar, one tablespoon at a time, beating until desired consistency. If it’s too thick, add milk or heavy cream, one teaspoon at a time, until it’s spreadable. Ensure your cream cheese and butter are properly softened, not melted.
Q: Can I freeze this cake?
A: Yes, you can freeze individual cake layers (unfrosted) wrapped tightly in plastic wrap and then foil for up to 2-3 months. You can also freeze slices of the frosted cake in an airtight container for up to 1 month. Thaw in the refrigerator overnight.
Conclusion
There’s something truly magical about serving a slice of this gorgeous 2-layer Pink Velvet Cake . It’s a feast for the eyes and the palate, delivering a tender crumb and the perfect balance of sweet and tangy flavors with every bite. Whether you’re celebrating a special occasion or simply indulging in a homemade treat, this recipe promises to impress. It takes the beloved elements of a classic buttermilk cake with cream cheese frosting and elevates them with a playful, vibrant twist. Enjoy the process of creating this stunning dessert, and prepare for endless compliments!
Recipe Note
For the most vibrant pink color, opt for gel food coloring over liquid, as it provides more intense pigment without adding excess moisture to your batter.