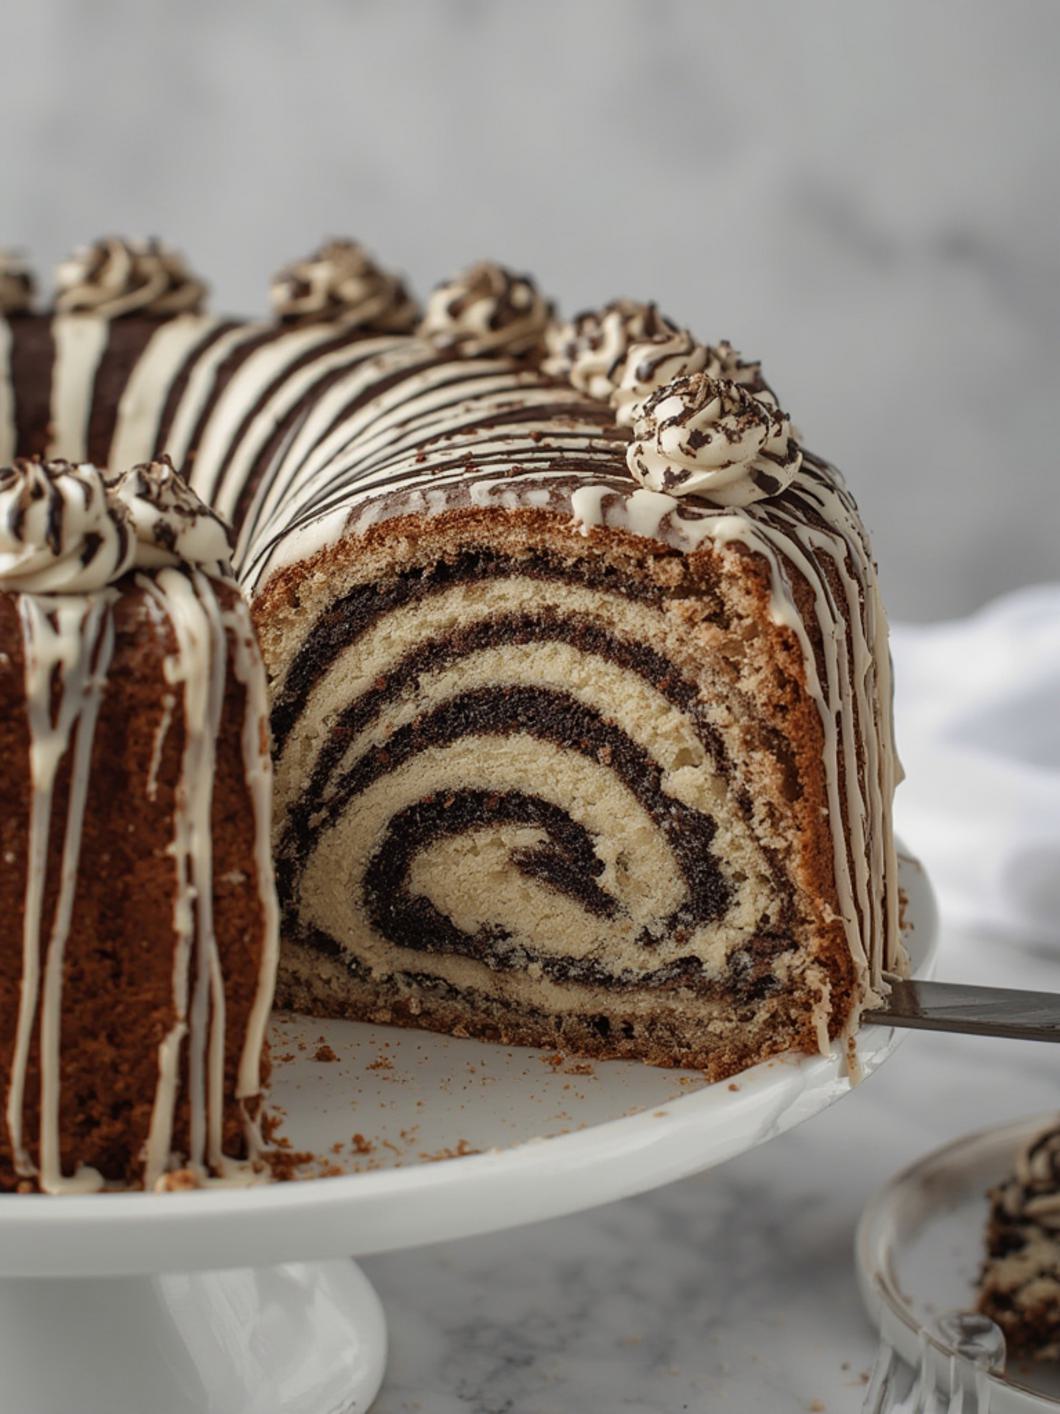
3-Layer Zebra Cake (Fun, Striped & Moist!)
Zebra Cake
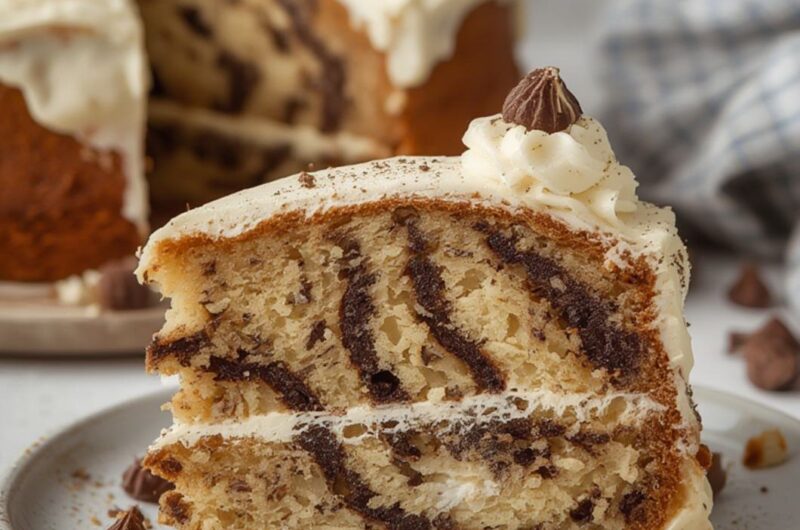
A beautiful striped cake combining vanilla and chocolate flavors in every bite.
3-Layer Zebra Cake: Fun, Striped & Incredibly Moist – A Showstopping Dessert for Any Occasion!
Prepare to be mesmerized by this show-stopping Zebra Cake! With its distinct alternating stripes of vanilla and chocolate, this isn’t just a cake; it’s a masterpiece that promises both visual delight and an explosion of flavor. Forget the fuss of intricate designs; achieving this stunning pattern is surprisingly simple, making it a perfect project for bakers of all skill levels. If you love the classic swirl of a marble layer cake but crave an even more striking presentation, this recipe is about to become your new favorite. Get ready to bake a cake that’s as delicious as it is Instagram-worthy!
Quick Glance Summary
This 3-Layer Zebra Cake is a truly unforgettable dessert, boasting a light, moist texture with a perfect balance of rich chocolate and delicate vanilla flavors. Its iconic striped pattern makes it a fantastic centerpiece for birthdays, parties, or any special gathering. The cake comes together with ease, creating a stunning visual effect with minimal effort, and is topped with a luscious, creamy buttercream frosting.
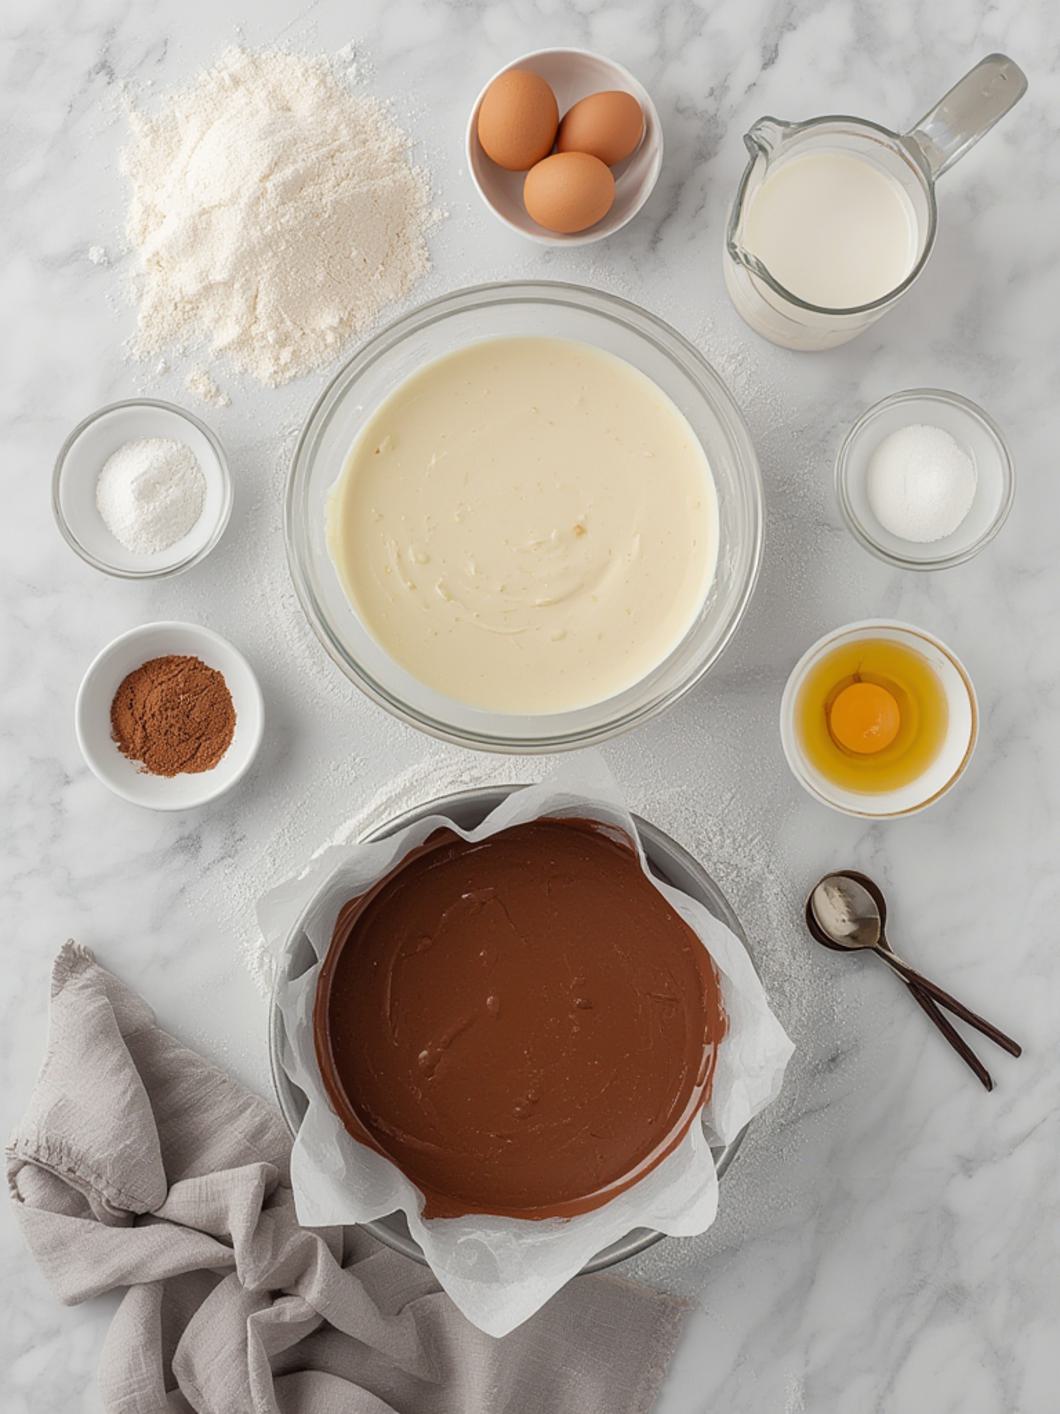
What You’ll Need
Gathering your ingredients ahead of time makes the baking process smooth and enjoyable. Here’s everything you’ll need to create this impressive striped cake:
For the Cake:
- ✦ 3 cups all-purpose flour, sifted
- ✦ 1 tablespoon baking powder
- ✦ 1/2 teaspoon salt
- ✦ 1 cup (2 sticks) unsalted butter, softened
- ✦ 2 cups granulated sugar
- ✦ 4 large eggs, at room temperature
- ✦ 1 1/2 teaspoons vanilla extract
- ✦ 1 1/4 cups whole milk, at room temperature
- ✦ 1/2 cup unsweetened cocoa powder, sifted
- ✦ 1/4 cup hot water
For the Buttercream Frosting:
- ✦ 1 cup (2 sticks) unsalted butter, softened
- ✦ 4 cups powdered sugar, sifted
- ✦ 1/4 cup heavy cream or milk
- ✦ 1 teaspoon vanilla extract
- ✦ Pinch of salt
Preparation Instructions
Creating the iconic stripes of this Zebra Cake is simpler than you might think, yielding a dramatic effect that will impress everyone. Follow these detailed steps to bake your perfect cake. Much like a traditional marble layer cake, the key is careful layering, but with an even more pronounced visual result.
1. Prepare Pans: Preheat oven to 350°F (175°C). Grease and flour three 8-inch round cake pans. Line the bottoms with parchment paper.
2. Combine Dry Ingredients: In a medium bowl, whisk together the sifted flour, baking powder, and salt. Set aside.
3. Cream Butter and Sugar: In a large bowl, cream together the softened butter and granulated sugar with an electric mixer until light and fluffy (about 3-5 minutes).
4. Add Eggs and Vanilla: Add the eggs one at a time, beating well after each addition. Stir in the vanilla extract.
5. Alternate Wet and Dry: Gradually add the dry ingredients to the wet ingredients, alternating with the milk, beginning and ending with the dry ingredients. Mix on low speed until just combined, being careful not to overmix.
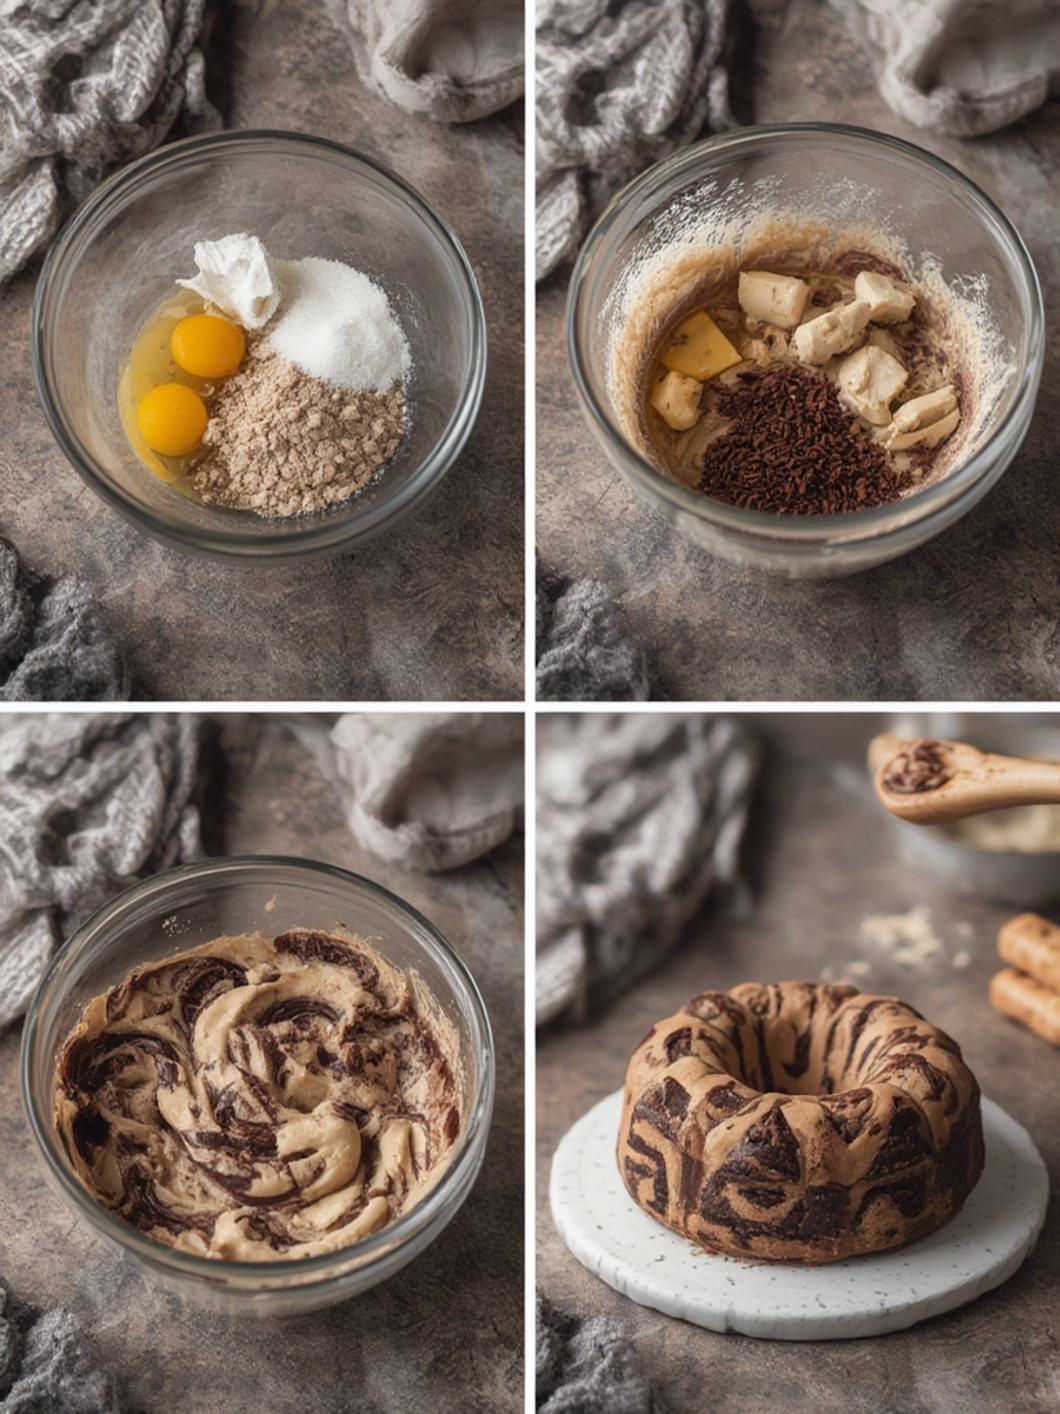
6. Divide Batter: Divide the cake batter evenly into two separate bowls.
7. Prepare Chocolate Batter: In a small bowl, dissolve the cocoa powder in the hot water to create a thick paste. Add the cocoa paste to one half of the cake batter and mix until fully combined and no streaks remain. You now have one plain (vanilla) batter and one chocolate batter.
8. Create Zebra Pattern: To create the zebra pattern, drop alternating spoonfuls of vanilla and chocolate batter into the prepared cake pans. Start with a spoonful in the center, then drop a spoonful of the other color directly on top, and continue alternating, letting the batter spread outwards to form concentric circles.
9. Bake: Bake for 25-30 minutes, or until a wooden skewer inserted into the center comes out clean.
10. Cool Cakes: Let the cakes cool in the pans for 10 minutes before inverting them onto a wire rack to cool completely.
11. Prepare Frosting: While cakes cool, prepare the buttercream frosting: In a large bowl, cream softened butter until smooth. Gradually add sifted powdered sugar, beating until combined. Add heavy cream, vanilla extract, and salt. Beat on high speed until light and fluffy.
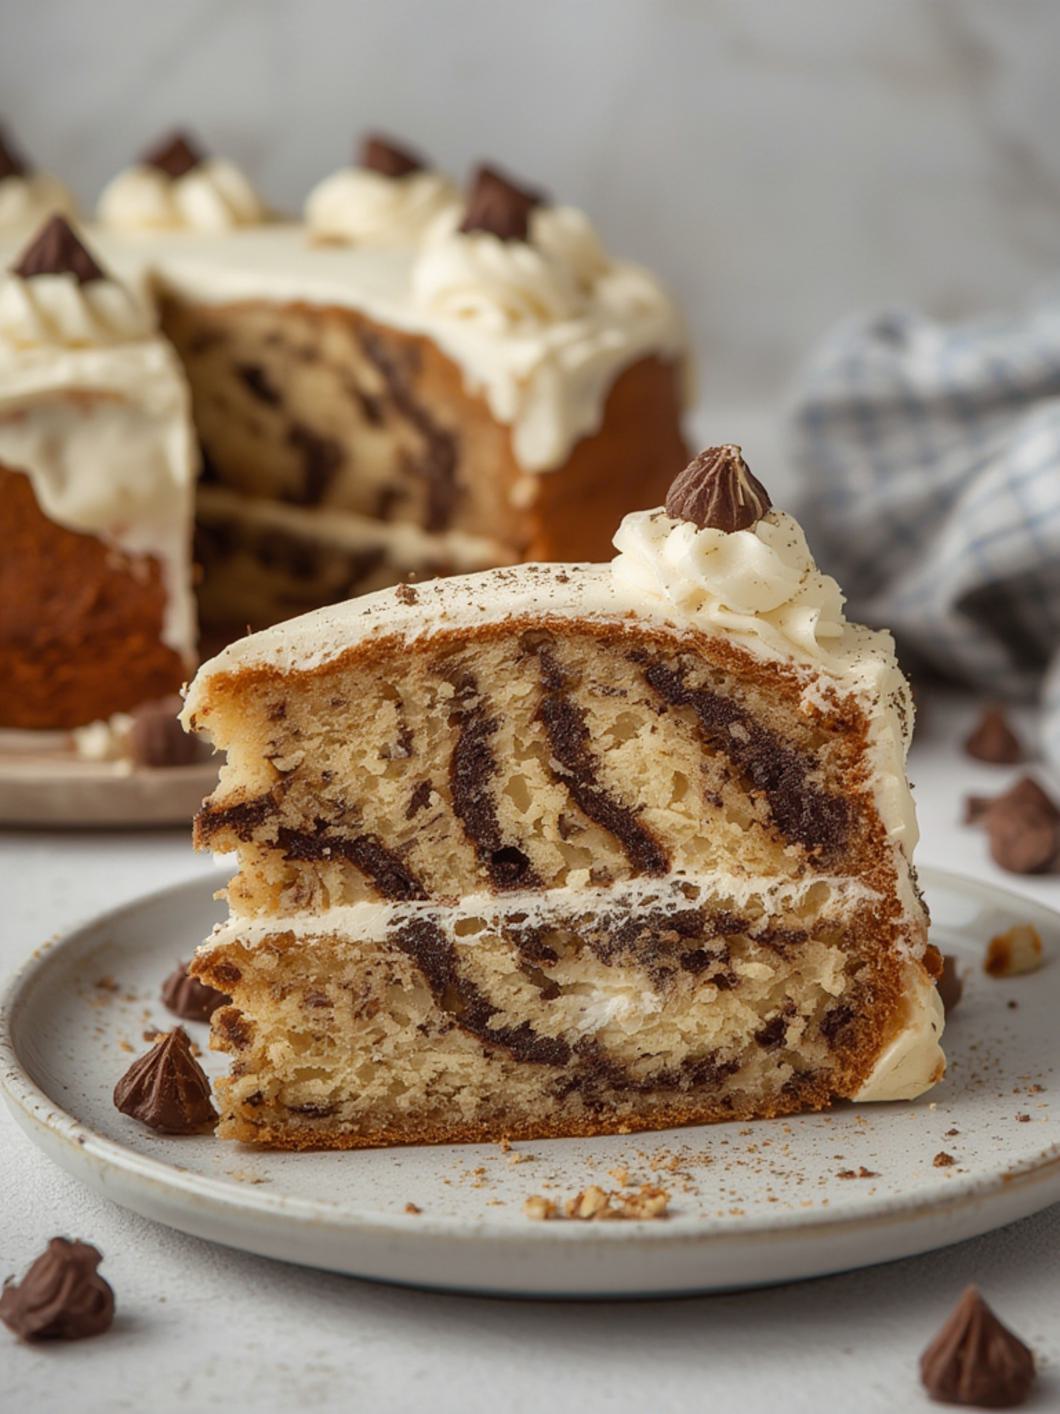
12. Assemble Cake: Once cakes are completely cool, level them if necessary. Place one cake layer on a serving plate or cake stand. Spread about 1/2 cup of buttercream over the top. Place the second cake layer on top and repeat with more frosting. Add the third layer and frost the top and sides of the entire cake.
13. Serve: Decorate as desired. Slice and serve!
Fun Twists & Serving Ideas
- ✦ Chocolate Ganache Drizzle: After frosting, let the buttercream chill slightly, then drizzle warm chocolate ganache over the top, letting it drip down the sides for an extra touch of decadence.
- ✦ Colored Stripes: Instead of chocolate, try coloring one half of the vanilla batter with food coloring (e.g., pink or blue) for a vibrant, kid-friendly version.
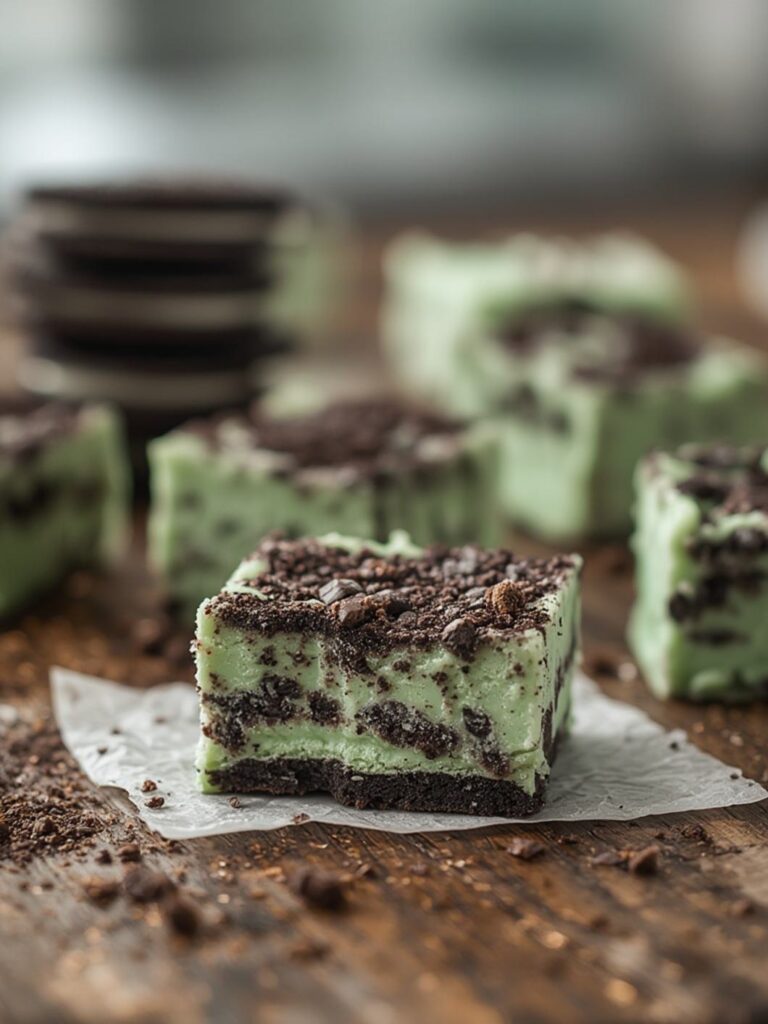
- ✦ Mint Chocolate Twist: Add a few drops of peppermint extract to the chocolate batter and/or the buttercream for a refreshing mint-chocolate flavor profile.
- ✦ Cream Cheese Frosting: For a slightly tangy contrast, substitute the buttercream with a classic cream cheese frosting.
- ✦ Mini Zebra Cupcakes: Prepare the batter as directed and spoon alternating dollops into cupcake liners for individual striped treats. Adjust baking time accordingly.
Reviews
- ✦ “I made this Zebra Cake for my daughter’s birthday, and it was an absolute hit! Everyone was so impressed with the stripes, and it tasted even better than it looked. So moist and delicious!” – Sarah K., ⭐⭐⭐⭐⭐
- ✦ “Never thought I could make something so fancy! The instructions were really clear, and the cake came out perfect. Definitely a new family favorite.” – Mark T., ⭐⭐⭐⭐⭐
- ✦ “This recipe is fantastic! The buttercream is just right, and the cake itself is wonderfully tender. It’s now my go-to for special occasions.” – Emily R., ⭐⭐⭐⭐⭐
FAQ
Q: Can I use different sized pans?
A: Yes, you can use two 9-inch pans, but the layers will be slightly thinner, and the baking time may be reduced. Keep an eye on the cake and test for doneness.
Q: Can I make this cake ahead of time?
A: Absolutely! The unfrosted cake layers can be baked a day or two in advance, wrapped tightly, and stored at room temperature. You can also freeze the layers for up to a month.
Q: Why do my stripes look swirled instead of defined?
A: The most common reason for swirled stripes is over-swirling the batter after dropping. Resist the urge to swirl with a knife; the batter spreads naturally to create the pattern.
Q: Can I make this gluten-free?
A: While we haven’t tested it, you can try substituting a 1:1 gluten-free all-purpose flour blend. The texture might be slightly different.
Q: How do I get the cocoa paste consistent?
A: Ensure your water is hot enough to fully dissolve the cocoa powder without lumps. Whisk vigorously until you have a smooth, thick paste before adding to the batter.
Conclusion
The 3-Layer Zebra Cake is more than just a dessert; it’s a delightful experience that combines simple techniques with stunning results. Its captivating stripes and irresistible flavor make it a true crowd-pleaser, perfect for any celebration or just a special weekend treat. While a marble layer cake offers a lovely swirl, this zebra pattern provides an undeniable ‘wow’ factor that will have everyone asking for the recipe. We hope you enjoy baking and sharing this beautiful and delicious cake as much as we do!
Recipe Note
For the most defined stripes, make sure your batters are of similar consistency. If one batter is significantly thicker, thin it slightly with a teaspoon of milk until it matches the other. This helps them spread evenly when dropped.
🍴 Zebra Cake 🍴
🌍 American Cuisine | 🥣 Dessert
30 minutes prep,
30-35 minutes cook time
10-12
380 calories per serving
🛒 Ingredients
- 🥄 2 ½ cups all-purpose flour
- 🥄 1 ½ cups granulated sugar
- 🥄 1 tablespoon baking powder
- 🥄 ½ teaspoon salt
- 🥄 1 cup (2 sticks) unsalted butter, softened
- 🥄 1 cup milk (whole or 2%)
- 🥄 4 large eggs
- 🥄 2 teaspoons vanilla extract, divided
- 🥄 ½ cup unsweetened cocoa powder
- 🥄 ¼ cup hot water
📝 Instructions
1
Preheat oven to 350°F (175°C). Grease and flour a 9-inch round cake pan.
2
In a large bowl, cream together softened butter and granulated sugar until light and fluffy.
3
Beat in the eggs one at a time, then stir in 1 teaspoon of vanilla extract.
4
In a separate bowl, whisk together flour, baking powder, and salt.
5
Gradually add the dry ingredients to the wet ingredients, alternating with the milk, beginning and ending with the dry ingredients. Mix until just combined, being careful not to overmix.
6
Divide the batter evenly into two separate bowls.
7
In one bowl, stir in the remaining 1 teaspoon of vanilla extract to ensure a pure vanilla flavor. This will be your vanilla batter.
8
In the second bowl, combine the cocoa powder with ¼ cup hot water to form a smooth paste. Stir this cocoa paste into the batter in the second bowl until fully incorporated. This will be your chocolate batter.
9
To create the zebra pattern, place 2 tablespoons of vanilla batter in the exact center of the prepared cake pan. Then, spoon 2 tablespoons of chocolate batter directly on top of the vanilla batter in the center. Continue alternating colors, adding each new spoonful directly on top of the previous one, allowing the batters to spread naturally into concentric rings. Do not spread with a spatula.
10
Continue until all batter is used. The rings will grow larger as you add more batter.
11
Bake for 30-35 minutes, or until a wooden skewer inserted into the center comes out clean.
12
Let the cake cool in the pan for 10-15 minutes before inverting onto a wire rack to cool completely.
13
Once cooled, frost with your favorite vanilla or chocolate frosting, if desired.