Classic Danish Butter Cookies – Melt-in-Your-Mouth
The Golden Standard: Authentic Danish Butter Cookies Recipe
Step into a world where simple ingredients transform into pure culinary magic. Imagine the intoxicating aroma of butter, sugar, and vanilla wafting through your kitchen, a symphony of scents that promises warmth and comfort. These aren’t just cookies; they are an invitation to slow down, savor, and create cherished memories. Our Danish Butter Cookies recipe isn’t merely a set of instructions; it’s a journey back to the heart of home baking, where every bite whispers tales of tradition and indulgence. Get ready to experience the unparalleled delight of homemade Danish Butter Cookies, crisp, tender, and utterly irresistible.
⏱️ Quick Glance Summary
⏱️ Prep Time: 30 minutes (plus 1 hour chilling), 🍽️ Servings: 4 dozen, 💥 Vibe: Buttery, Classic, Nostalgic
Jump Ahead
- What You’ll Need
- How to Make Danish Butter Cookies
- Fun Twists & Serving Ideas
- What Our Readers Are Saying
- Frequently Asked Questions
- Conclusion
What You’ll Need
Crafting the perfect batch of Danish Butter Cookies begins with understanding the power of quality ingredients. For a treat this simple yet profound, each component plays a crucial role. Opt for real butter, fresh eggs, and pure vanilla extract – these are the pillars that build the signature flavor and delicate texture of truly magnificent Danish Butter Cookies.
- 1 cup (2 sticks) unsalted butter, softened
- ¾ cup granulated sugar
- 1 large egg yolk
- 1 teaspoon pure vanilla extract
- 2 cups all-purpose flour
- ½ teaspoon salt
- 1 tablespoon milk (for brushing, optional)
- Extra granulated sugar or turbinado sugar (for sprinkling, optional)
How to Make Danish Butter Cookies
Embark on this delightful baking adventure and discover how effortlessly you can create these iconic cookies. Follow these detailed steps to ensure your Danish Butter Cookies come out perfectly golden, crisp, and unbelievably buttery every time. This recipe is designed to guide you through each stage, from mixing to baking, ensuring a joyful and successful culinary experience.
1. Cream the Butter and Sugar: In a large mixing bowl, using an electric mixer, cream together the softened unsalted butter and granulated sugar until light and fluffy. This step is crucial for incorporating air and achieving a tender crumb in your Danish Butter Cookies.
2. Add Wet Ingredients: Beat in the egg yolk and pure vanilla extract until fully combined. Scrape down the sides of the bowl to ensure everything is well incorporated.
3. Combine Dry Ingredients: In a separate medium bowl, whisk together the all-purpose flour and salt. Gradually add the dry ingredients to the wet ingredients, mixing on low speed until just combined. Be careful not to overmix, as this can lead to tough Danish Butter Cookies.
4. Chill the Dough: Divide the dough in half, flatten each half into a disc, wrap tightly in plastic wrap, and refrigerate for at least 1 hour. Chilling is essential for firming up the dough, making it easier to handle and pipe or roll, and preventing your Danish Butter Cookies from spreading too much during baking.
5. Prepare for Shaping: Preheat your oven to 375°F (190°C). Line baking sheets with parchment paper or silicone baking mats.
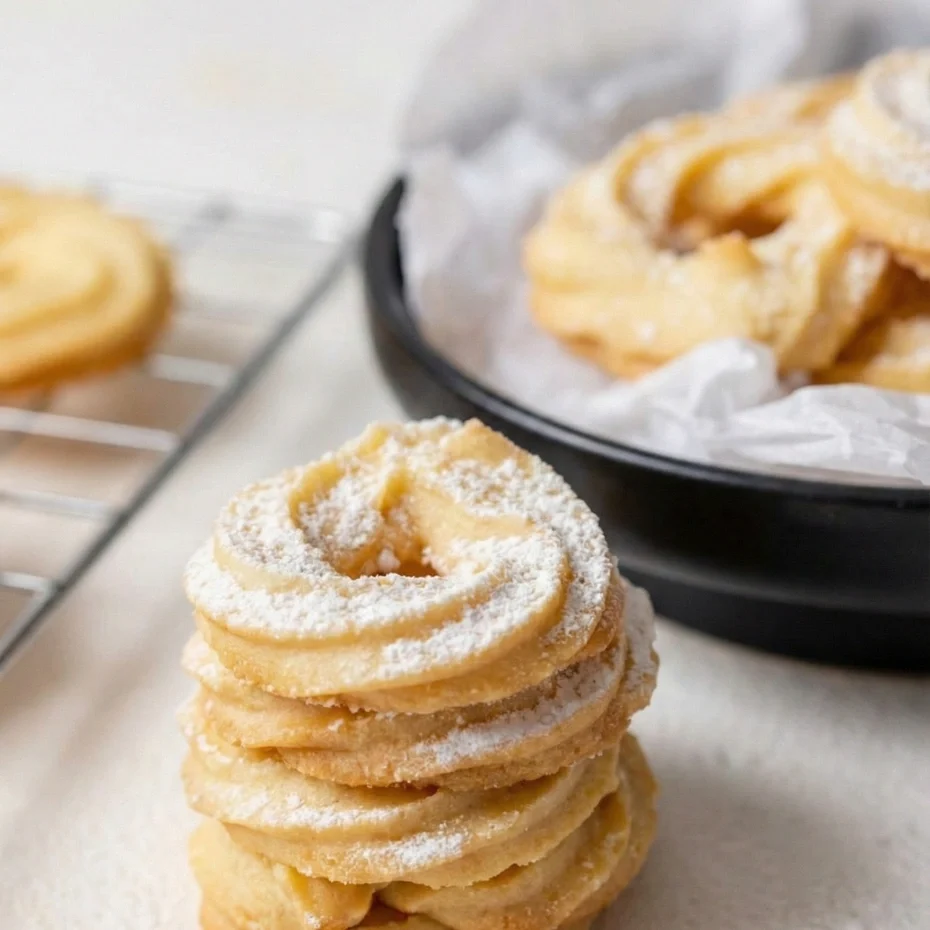
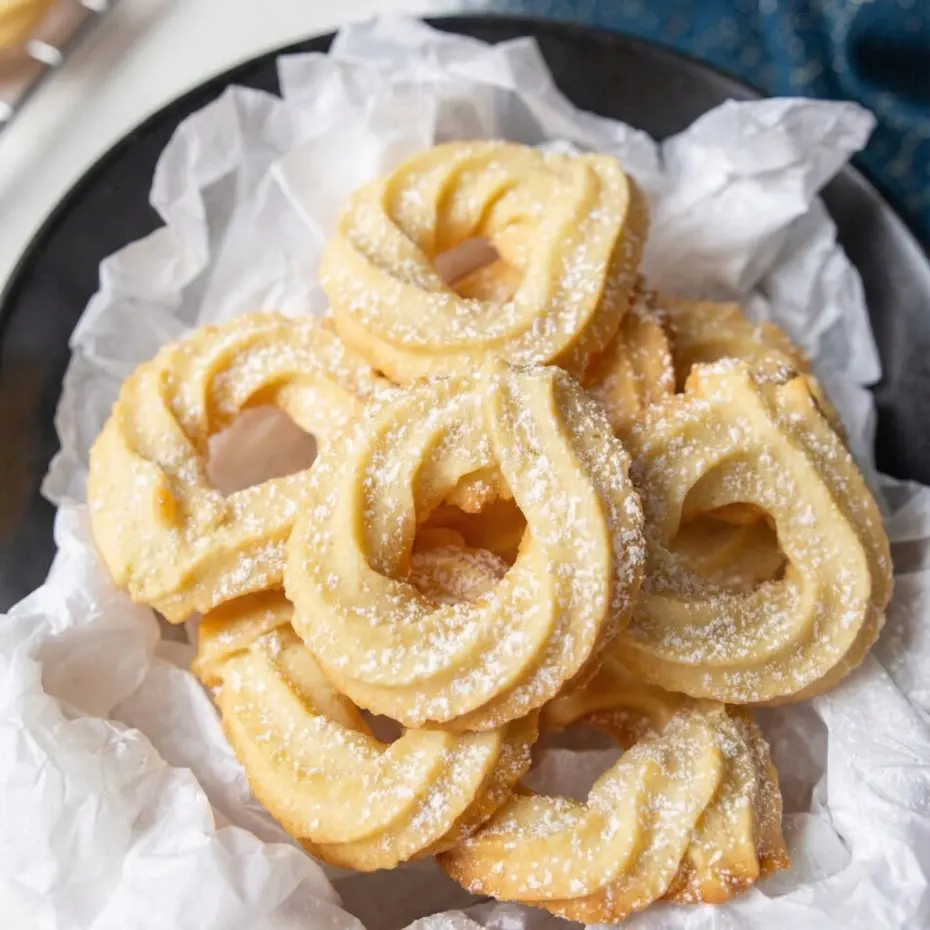
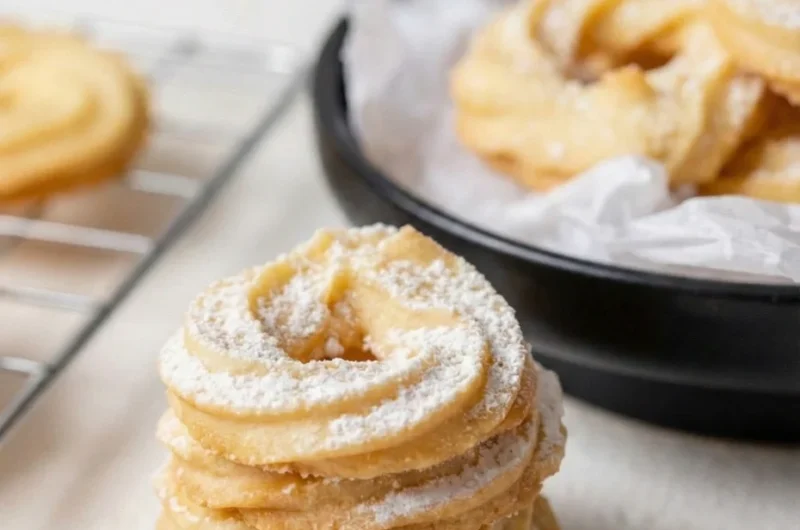
6. Shape the Cookies:
Piped Cookies: If piping, place the chilled dough into a pastry bag fitted with a large star tip (like an Ateco 826 or 1M). Pipe various shapes onto the prepared baking sheets, such as rosettes, S-shapes, or figure-eights.
Rolled & Cut Cookies: On a lightly floured surface, roll out the dough to about ¼-inch thickness. Use your favorite cookie cutters to cut out shapes. Gently transfer them to the prepared baking sheets.
Drop Cookies: For a simpler approach, scoop rounded tablespoons of dough onto the baking sheets and slightly flatten them with the back of a spoon or fork.
7. Optional Finishing Touches: For extra shine and crunch, lightly brush the shaped Danish Butter Cookies with milk and sprinkle with a little extra granulated sugar or turbinado sugar before baking.
8. Bake: Bake for 12-15 minutes, or until the edges are lightly golden brown. Baking time may vary depending on your oven and the size/thickness of your cookies.
9. Cool: Let the Danish Butter Cookies cool on the baking sheets for a few minutes before transferring them to a wire rack to cool completely. This helps them firm up and prevents breakage. Store cooled cookies in an airtight container at room temperature for up to a week.
Fun Twists & Serving Ideas

While the classic Danish Butter Cookies are perfect in their simplicity, a little creative flair can elevate them further.
- Chocolate Dipped Delight: Melt your favorite dark, milk, or white chocolate and dip half of the cooled Danish Butter Cookies. Sprinkle with sea salt or chopped nuts for an extra touch.
- Citrus Zest Zing: Add 1-2 teaspoons of finely grated lemon or orange zest to the dough along with the vanilla extract for a bright, refreshing flavor profile.
- Almond Essence: Substitute half a teaspoon of vanilla extract with almond extract for a delicate nutty aroma that pairs beautifully with the buttery base.
- Spiced Winter Warmth: Incorporate ½ teaspoon of ground cardamom or cinnamon into the dry ingredients for a cozy, festive twist on these classic Danish Butter Cookies.
- Glazed Perfection: Whisk together powdered sugar and a touch of milk or lemon juice to create a simple glaze. Drizzle over cooled cookies for a sweet finish.
Frequently Asked Questions
Q: Can I use salted butter instead of unsalted?
A: While unsalted butter is generally recommended for baking to control the salt content, you can use salted butter. Just be sure to omit the ½ teaspoon of added salt in the recipe to avoid making your Danish Butter Cookies too salty.
Q: How long do Danish Butter Cookies stay fresh?
A: When stored in an airtight container at room temperature, these cookies will stay fresh and crisp for up to a week. For longer storage, you can freeze them for up to 2-3 months.
Q: Why did my cookies spread too much?
A: Over-spreading can be due to several factors: not chilling the dough sufficiently, using butter that was too soft (or melted), or using an oven that isn’t hot enough. Ensure your butter is softened but still cool to the touch, and always chill the dough for at least an hour.
Q: Can I make the dough ahead of time?
A: Absolutely! The dough for these Danish Butter Cookies can be made up to 2-3 days in advance and stored, tightly wrapped, in the refrigerator. You can also freeze the dough for up to a month; just thaw it in the refrigerator overnight before shaping and baking.
Conclusion
There’s something truly special about the simple elegance of a perfectly baked Danish Butter Cookie. They are more than just a dessert; they are a timeless testament to the joy of baking, a delightful whisper of tradition that brings smiles and comfort. We hope this comprehensive guide inspires you to create your own batch of these golden treasures. Share the warmth, savor the flavor, and make these classic Danish Butter Cookies a cherished part of your culinary repertoire. For more inspiring recipes and baking wisdom, always turn to magicinkitchen.com, where culinary dreams come true.
Recipe Note
For the crispiest Danish Butter Cookies, ensure your butter is softened but not melted. The consistency should be like soft serve ice cream – easily pliable but still holding its shape. This prevents overspreading and results in that signature crisp texture.
Danish Butter Cookies
Cook Time: 10 minutes
Total Time: 45 minutes
Course: Dessert
Servings: 3-4 dozen cookies
Calories: 80 per cookie (approximate)
Ingredients
- 1 cup (2 sticks) unsalted butter, softened
- 3/4 cup granulated sugar
- 1 large egg
- 1 teaspoon vanilla extract
- 2 1/4 cups all-purpose flour
- 1/2 teaspoon baking powder (optional, for a slightly softer cookie)
- 1/4 teaspoon salt
Instructions
1.Preheat your oven to 375°F (190°C). Line two baking sheets with parchment paper.
2. In a large bowl, using an electric mixer, cream together the softened butter and granulated sugar until light and fluffy, about 3-4 minutes.
3. Beat in the large egg and vanilla extract until fully incorporated. Scrape down the sides of the bowl as needed.
4. In a separate medium bowl, whisk together the all-purpose flour, baking powder (if using), and salt.
5. Gradually add the dry ingredients to the wet ingredients, mixing on low speed until just combined and a soft, uniform dough forms. Be careful not to overmix.
6. Transfer the dough to a pastry bag fitted with a large star tip (such as an Ateco 826 or Wilton 1M) or a large round tip for simple piped cookies. You can also use a cookie scoop for drop cookies.
7. Pipe desired shapes onto the prepared baking sheets, leaving about 1 inch between each cookie. Common shapes include rosettes, S-shapes, or simple mounds.
8. Bake for 10-12 minutes, or until the edges are lightly golden brown and the centers are set. Baking time may vary depending on the size and thickness of your cookies.
9. Remove the baking sheets from the oven and let the cookies cool on the sheets for 5 minutes before transferring them to a wire rack to cool completely.
10. Store cooled cookies in an airtight container at room temperature for up to one week.
Chef’s Notes: For the best flavor, use high-quality unsalted butter. Chilling the dough for 15-30 minutes before piping can make it easier to handle, especially in warmer environments. These classic cookies are often enjoyed plain, but you can add a simple egg wash or a sprinkle of coarse sugar before baking for extra shine and crunch.