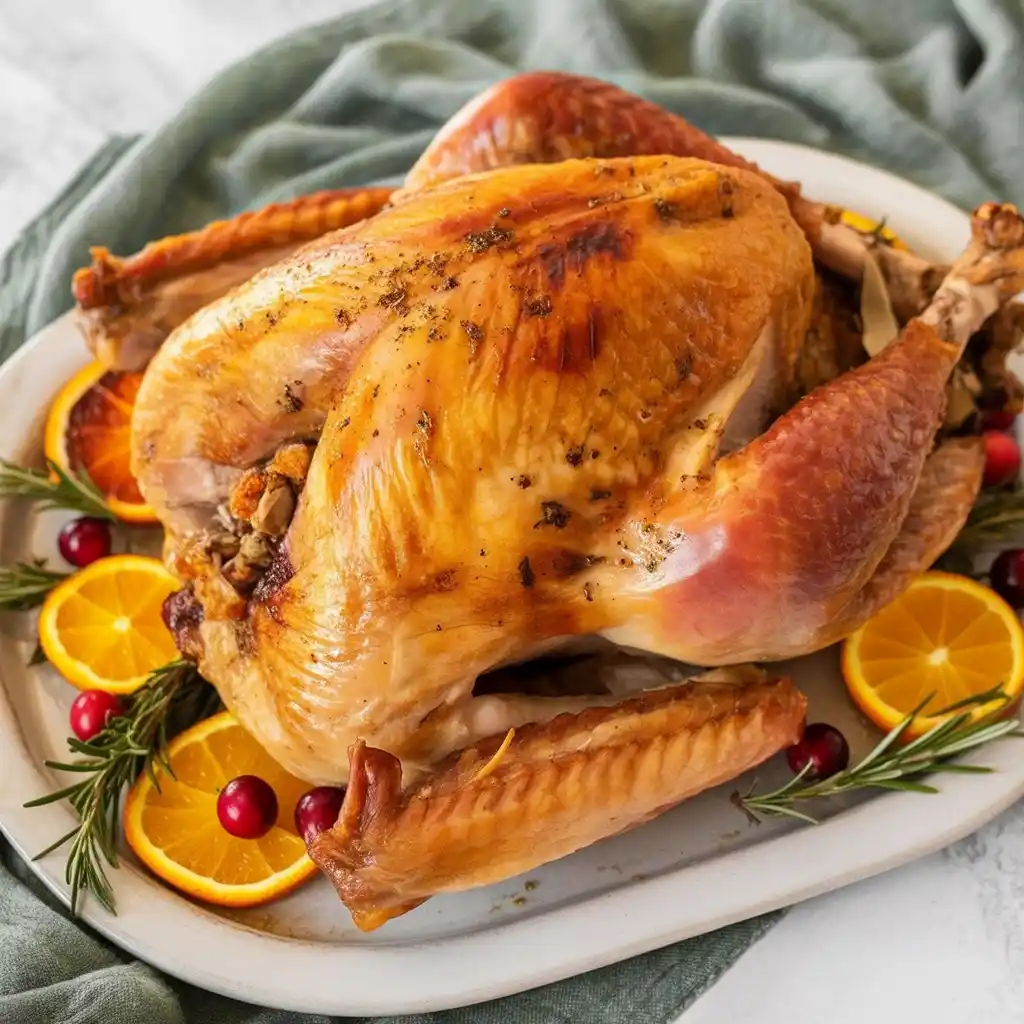
Easy Dry-Brined Turkey – Crispy Skin & Tender Meat
The Ultimate Dry-Brined Turkey: A Feast to Remember
There are some dishes that transcend mere sustenance, becoming central to our most cherished memories and traditions. For many, that dish is a perfectly roasted turkey. But let’s be honest, the quest for a truly succulent, impossibly flavorful bird can often feel like chasing a mythical beast. Until now. Forget everything you thought you knew about bland, dry holiday turkeys. We’re about to unveil the magic of the Dry-Brined Turkey – a method so simple, yet so utterly transformative, it will redefine your expectations for every celebratory meal to come. Prepare for rave reviews, requests for seconds, and a newfound confidence in your kitchen prowess, all thanks to this brilliant, foolproof technique.
Recipe Card will be inserted here.
Quick Glance Summary
⏱️ Prep Time: 30 minutes active + 2-3 days brining, 🍽️ Servings: 8-12, 💥 Vibe: Effortless, Juiciest, Celebratory
Jump Ahead
What You’ll Need
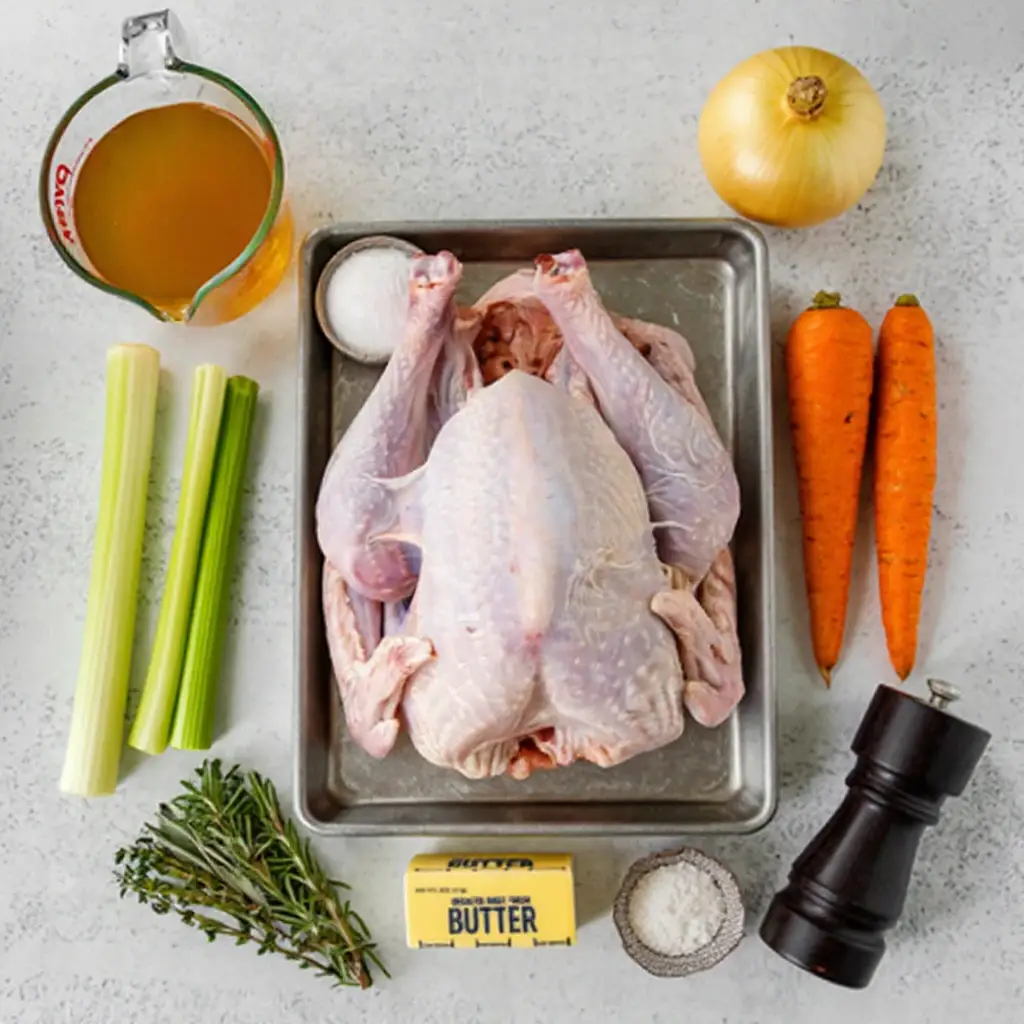
Crafting the perfect Dry-Brined Turkey requires surprisingly few ingredients, allowing the natural flavor of the bird to shine through, enhanced by the simple yet profound power of salt and aromatics. Here’s what you’ll gather:
- 1 (12-16 lb) whole turkey, fresh or thawed
- ½ cup kosher salt (Diamond Crystal recommended; if using Morton’s, reduce to ⅓ cup)
- 2 tbsp black peppercorns, crushed
- 1 tbsp dried rosemary
- 1 tbsp dried thyme
- 1 tsp garlic powder
- ¼ cup unsalted butter, melted (for basting, optional)
- Fresh herbs (rosemary, thyme, sage), onion, and lemon for the cavity (optional, for aroma)
How to Make Dry-Brined Turkey
Embrace the simplicity and unparalleled results of this dry-brining method. The secret to an exquisitely tender, unbelievably juicy, and perfectly seasoned Dry-Brined Turkey lies in patience and precise execution. Follow these steps for a truly unforgettable centerpiece:
- Prepare the Turkey: Remove the turkey from its packaging. Take out the neck and giblets from the cavities. Pat the turkey thoroughly dry with paper towels, inside and out. This step is crucial for crispy skin! Place the turkey on a wire rack set inside a rimmed baking sheet.
- Mix the Dry Brine: In a small bowl, combine the kosher salt, crushed black peppercorns, dried rosemary, dried thyme, and garlic powder. Mix well to ensure an even distribution of flavors.
- Apply the Brine: Generously sprinkle the dry brine mixture all over the exterior of the turkey, ensuring all surfaces are coated. Work it into the skin, particularly around the breast and leg areas. You can also rub a small amount into the main cavity if desired. Do not rinse the turkey after applying the brine.
- Chill and Brine: Place the turkey, still on the wire rack and baking sheet, uncovered, in the refrigerator for 2 to 3 days. This extended time allows the salt to penetrate deeply, tenderizing the meat and drawing out moisture from the skin, leading to incredible crispiness.
- Pre-Roast Preparation: On roasting day, remove the Dry-Brined Turkey from the refrigerator at least 1-2 hours before roasting to allow it to come closer to room temperature. This promotes more even cooking. Pat it dry one last time, if necessary. If using, stuff the cavities loosely with fresh herbs, onion, and lemon.
- Preheat Oven & Roast: Preheat your oven to 425°F (220°C). Place the turkey, breast-side up, on a roasting rack in a large roasting pan. Roast for 30 minutes at 425°F to achieve a beautiful golden-brown skin.
- Reduce Heat & Continue Roasting: Reduce the oven temperature to 325°F (160°C). Continue roasting, basting every hour with melted butter (if using), until a meat thermometer inserted into the thickest part of the thigh (without touching bone) reads 165°F (74°C). For a 12-16 lb turkey, this typically takes 2.5-3.5 hours after the initial high-heat roast.
- Rest the Turkey: Once the turkey reaches 165°F, remove it from the oven, transfer it to a cutting board, and tent it loosely with foil. Let it rest for at least 20-30 minutes before carving. This resting period is crucial for the juices to redistribute, ensuring every slice of your magnificent Dry-Brined Turkey is incredibly moist.
- Carve and Serve: Carve the turkey and arrange it on a warm platter. Serve immediately with your favorite sides and gravy made from the pan drippings.
Fun Twists & Serving Ideas
The beauty of a perfectly executed Dry-Brined Turkey is its versatility. While delicious on its own, here are a few ideas to elevate your feast:
- Citrus & Herb Zest: Incorporate finely grated lemon or orange zest into your dry brine mixture for a brighter, more aromatic profile. Tuck fresh rosemary and thyme sprigs under the skin over the breast before roasting.
- Smoked Paprika & Garlic: For a savory, slightly smoky twist, add a tablespoon of smoked paprika and an extra teaspoon of garlic powder to your brine. This creates a gorgeous hue and deep flavor.
- Compound Butter Finish: Instead of plain melted butter, whisk softened butter with chopped fresh sage, thyme, and a touch of minced garlic. Rub this herbed butter under the skin over the breast and legs before roasting for an extra layer of moisture and flavor.
- Beyond Gravy: While pan gravy is classic, consider serving slices of your juicy Dry-Brined Turkey with a vibrant cranberry-orange relish, a homemade apple chutney, or even a spicy jalapeño jelly for a modern twist.
- Stuffing it Right: If you must stuff, do it lightly with an aromatic mixture of apples, onions, and herbs, ensuring it’s loosely packed to allow for even cooking. Always check the stuffing’s temperature, which should also reach 165°F (74°C).
Reviews
- Danielle P. ⭐⭐⭐⭐⭐ – “I’ve always struggled with dry turkey, but this dry-brined turkey recipe changed everything! The skin was crispy, the meat was incredibly juicy, and the flavor was out of this world. My family devoured it!”
- Sandra M⭐⭐⭐⭐⭐ – “As a seasoned cook, I’ve tried many methods, but the dry brine is truly superior. Minimal effort for maximum impact. This is now my go-to for holiday turkey. Thanks, magicinkitchen.com!”
- Amya R⭐⭐⭐⭐⭐ – “I was nervous trying something new for Thanksgiving, but this dry-brined turkey was a showstopper! Everyone commented on how flavorful and moist it was. The instruction were so clear.”
FAQ
Here are answers to some common questions about preparing a delicious Dry-Brined Turkey:
Q: Why should I dry brine instead of wet brine?
A: Dry brining offers several advantages: it takes up less refrigerator space, there’s no messy liquid to deal with, and it results in significantly crispier skin because the salt draws moisture out of the skin, rather than adding it. The meat also tends to be more flavorful and concentrated.
Q: Can I use a frozen turkey for this recipe?
A: Yes, but ensure your turkey is fully thawed before starting the dry brining process. A partially frozen turkey will not absorb the brine effectively. Thawing typically takes 1-3 days in the refrigerator, depending on size.
Q: Do I need to rinse the turkey after dry brining?
A: Absolutely not! Rinsing the turkey would wash away the flavorful brine and re-introduce moisture to the skin, undoing the benefits of the dry brine. Simply pat it dry before roasting.
Q: How can I tell if my dry-brined turkey is cooked through?
A: The most reliable way is to use a meat thermometer. Insert it into the thickest part of the thigh, without touching the bone. The turkey is safely cooked when it reaches an internal temperature of 165°F (74°C).
Conclusion
And there you have it – the definitive guide to creating the most extraordinary Dry-Brined Turkey you’ve ever tasted. This method isn’t just a recipe; it’s a culinary revelation, promising a bird that is uniformly seasoned, incredibly juicy, and boasts a skin so shatteringly crisp, it might just steal the show. Gone are the days of culinary anxiety over a dry, uninspiring turkey. With this technique, you’re not just cooking; you’re crafting an experience, a centerpiece that will undoubtedly become the star of your holiday table and a cherished tradition. Don’t just make dinner – make magic. Try this incredible Dry-Brined Turkey recipe from magicinkitchen.com, and prepare to be amazed by the delicious transformation!
Recipe Note
For ultimate crispiness, ensure your turkey is completely uncovered during its refrigeration period. This exposure to cold air aids in drying out the skin, which is the secret to that coveted crunch after roasting.

Dry-Brined Turkey
Total Time: 24 to 78 hours (includes brining and resting time)
Course: Main Course, Holiday Recipe
Servings: 8-12
Calories: 550 per serving (approx.)
Ingredients
- 1 (12-15 pound) whole turkey, thawed if frozen
- 3-4 tablespoons kosher salt (or 1.5-2 tablespoons fine sea salt)
- 1 tablespoon black pepper, freshly ground
- 1 teaspoon baking powder (optional, for crispier skin)
- 1 tablespoon chopped fresh herbs (rosemary, thyme, sage), optional
- 2 tablespoons unsalted butter, melted (or olive oil)
Instructions
1.Remove turkey from packaging, remove neck and giblets from the cavity, and pat turkey thoroughly dry with paper towels, inside and out.
2. In a small bowl, combine kosher salt, black pepper, baking powder (if using), and chopped herbs (if using).
3. Sprinkle the salt mixture all over the turkey, including the cavity, gently rubbing it into the skin. Pay extra attention to the breast and thigh areas.
4. Place the turkey, uncovered, on a wire rack set inside a rimmed baking sheet. Refrigerate for 24 to 72 hours. The longer the brining time, the better the flavor and moisture retention.
5. On roasting day, remove the turkey from the refrigerator 1-2 hours before roasting to allow it to come closer to room temperature. This promotes more even cooking. Do not rinse the turkey.
6. Preheat your oven to 425°F (220°C).
7. Pat the turkey dry again with paper towels if there’s any moisture on the skin. Tuck the wing tips under the turkey and tie the legs together with kitchen twine.
8. Brush the melted butter or olive oil all over the turkey skin.
9. Place the turkey, breast-side up, on a roasting rack in a large roasting pan. 10. Roast at 425°F (220°C) for 30 minutes, then reduce the oven temperature to 350°F (175°C). Continue roasting, basting occasionally with pan drippings if desired (though not strictly necessary with dry brine), until a meat thermometer inserted into the thickest part of the thigh (without touching bone) reads 165°F (74°C). This typically takes 2.5-3.5 hours for a 12-15 lb turkey after the initial high-heat roast.
11. Once the turkey reaches 165°F (74°C), remove it from the oven, tent loosely with foil, and let it rest for at least 30 minutes (up to an hour) before carving. This allows the juices to redistribute throughout the meat, ensuring a moist and flavorful turkey.
12. Carve and serve immediately.
Chef’s Notes: Dry brining yields incredibly juicy turkey with crispy skin. Do not rinse the turkey after brining. Ensure it’s thoroughly patted dry before roasting for the best skin. Resting the turkey is crucial for even juice distribution.