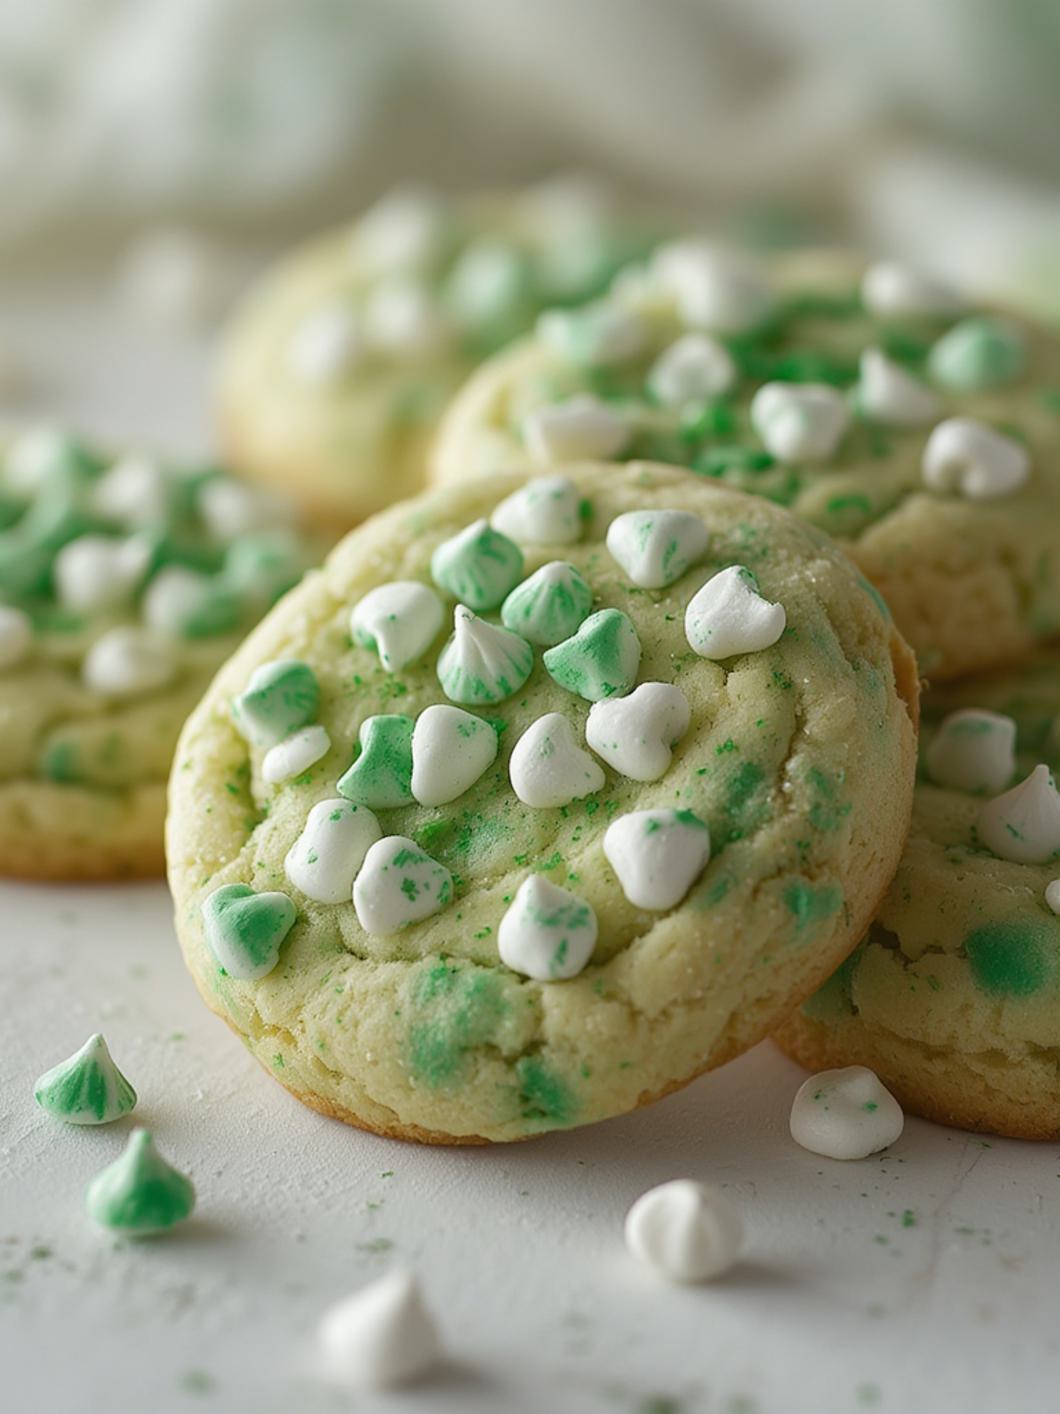
Easy Shamrock Cookies (Soft, Buttery & Festive!)
Easy Shamrock Cookies: Soft, Buttery & Festive Treats for St. Patrick’s Day!
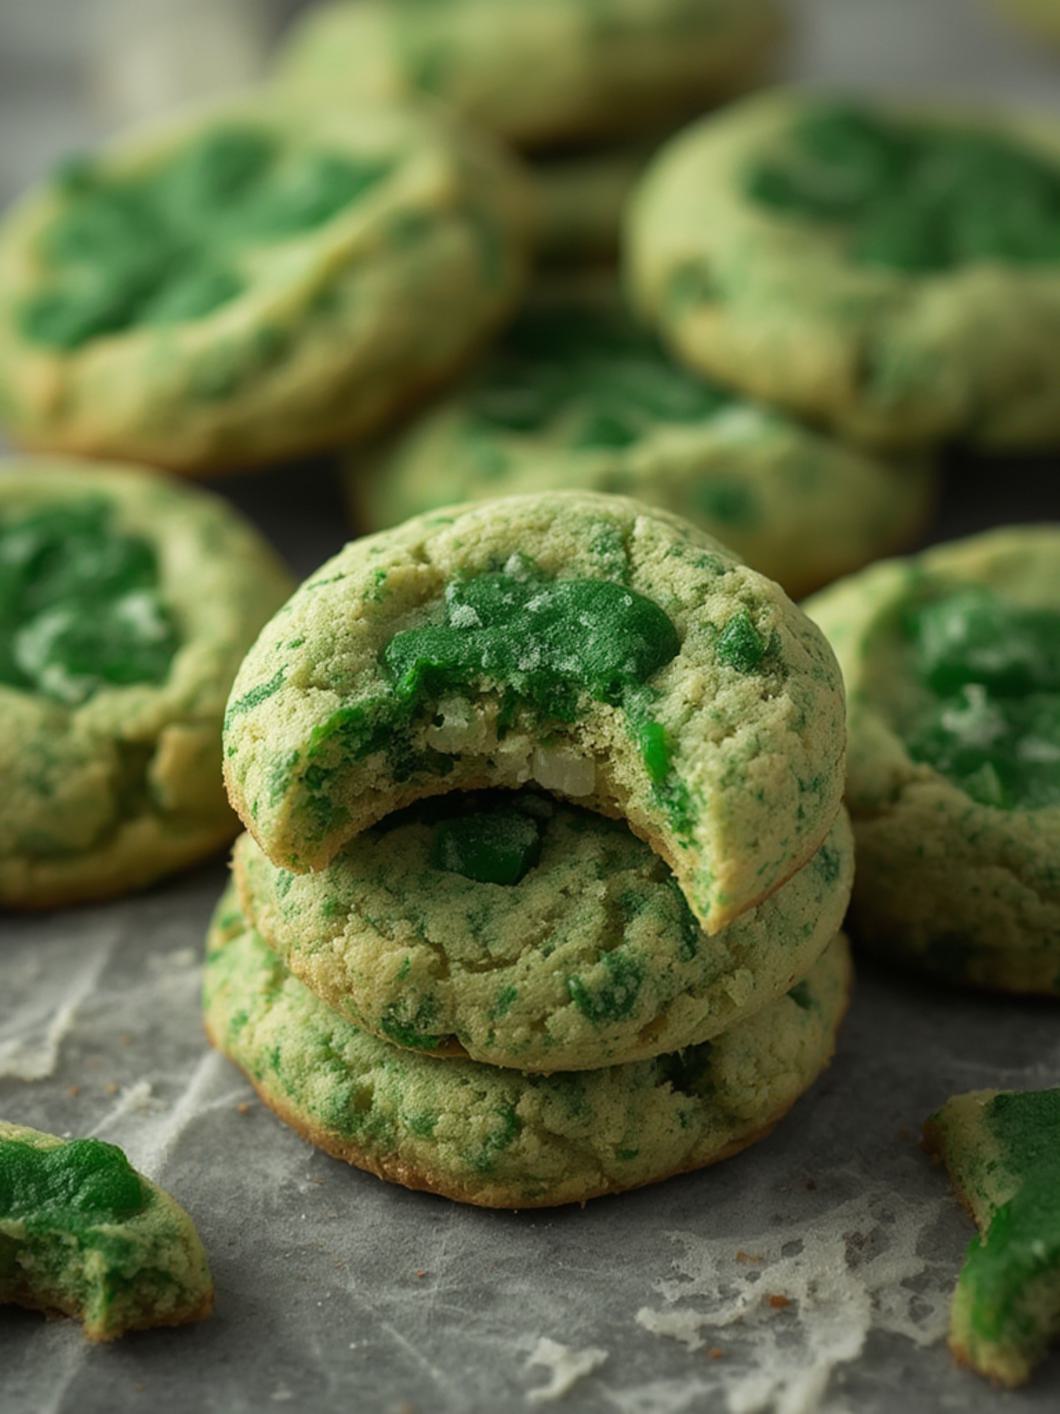
Get ready to infuse your kitchen with the luck of the Irish with these delightful Shamrock Cookies! Perfect for St. Patrick’s Day celebrations, these soft and buttery cut-outs are not only irresistibly delicious but also incredibly fun to make. With their vibrant green hue and charming shamrock shape, these treats are sure to bring a smile to everyone’s face. Forget bland store-bought options; our recipe ensures you’ll create a batch of homemade green st patrick’s day cookies that are both festive and flavorful, making them the star of your holiday dessert table.
Quick Glance Summary
These Easy Shamrock Cookies are a delightful, soft, and buttery treat perfect for St. Patrick’s Day. Featuring a tender cookie base, a hint of vanilla, and a festive green color, they’re simple to decorate and enjoyable for all ages. With a preparation time of around 45 minutes and a yield of 24 cookies, they’re ideal for holiday gatherings or a fun baking project with the family.
What You’ll Need
Gathering your ingredients beforehand makes the baking process smooth and enjoyable. Here’s everything you’ll need to create these festive treats:
- ✦ 1 cup (2 sticks) unsalted butter, softened
- ✦ 1 ½ cups granulated sugar
- ✦ 2 large eggs
- ✦ 1 teaspoon vanilla extract
- ✦ 3 ½ cups all-purpose flour
- ✦ 1 teaspoon baking powder
- ✦ ½ teaspoon salt
- ✦ Green food coloring (gel preferred)
- ✦ ½ cup powdered sugar (for glaze, optional)
- ✦ 1-2 tablespoons milk (for glaze, optional)
- ✦ Sprinkles (optional, for decoration)
Preparation Instructions
Follow these steps carefully to ensure your Shamrock Cookies turn out perfectly soft, buttery, and beautifully green, just like a pot of gold at the end of a rainbow! Making these delightful green st patrick’s day cookies is a fun and rewarding process.
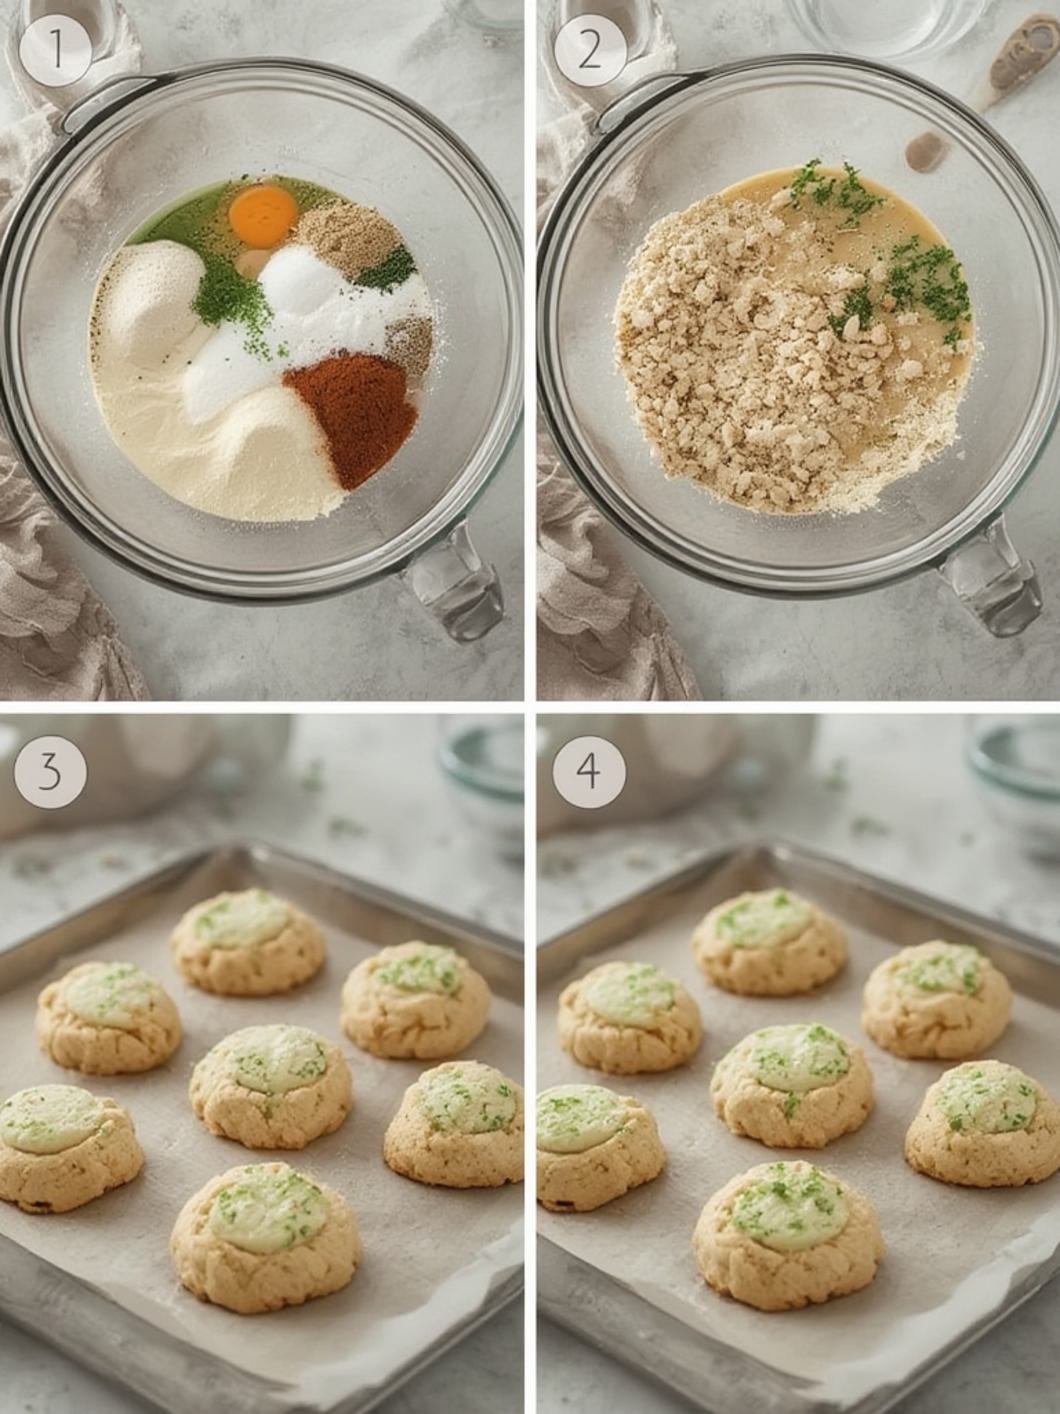
1. Cream Butter and Sugar: In a large bowl, cream together the softened butter and granulated sugar using an electric mixer until light and fluffy, about 3-5 minutes.
2. Add Wet Ingredients: Beat in the eggs one at a time, ensuring each is fully incorporated before adding the next. Stir in the vanilla extract.
3. Combine Dry Ingredients: In a separate medium bowl, whisk together the flour, baking powder, and salt.
4. Form Dough: Gradually add the dry ingredients to the wet ingredients, mixing on low speed until just combined. Be careful not to overmix, as this can make the cookies tough.
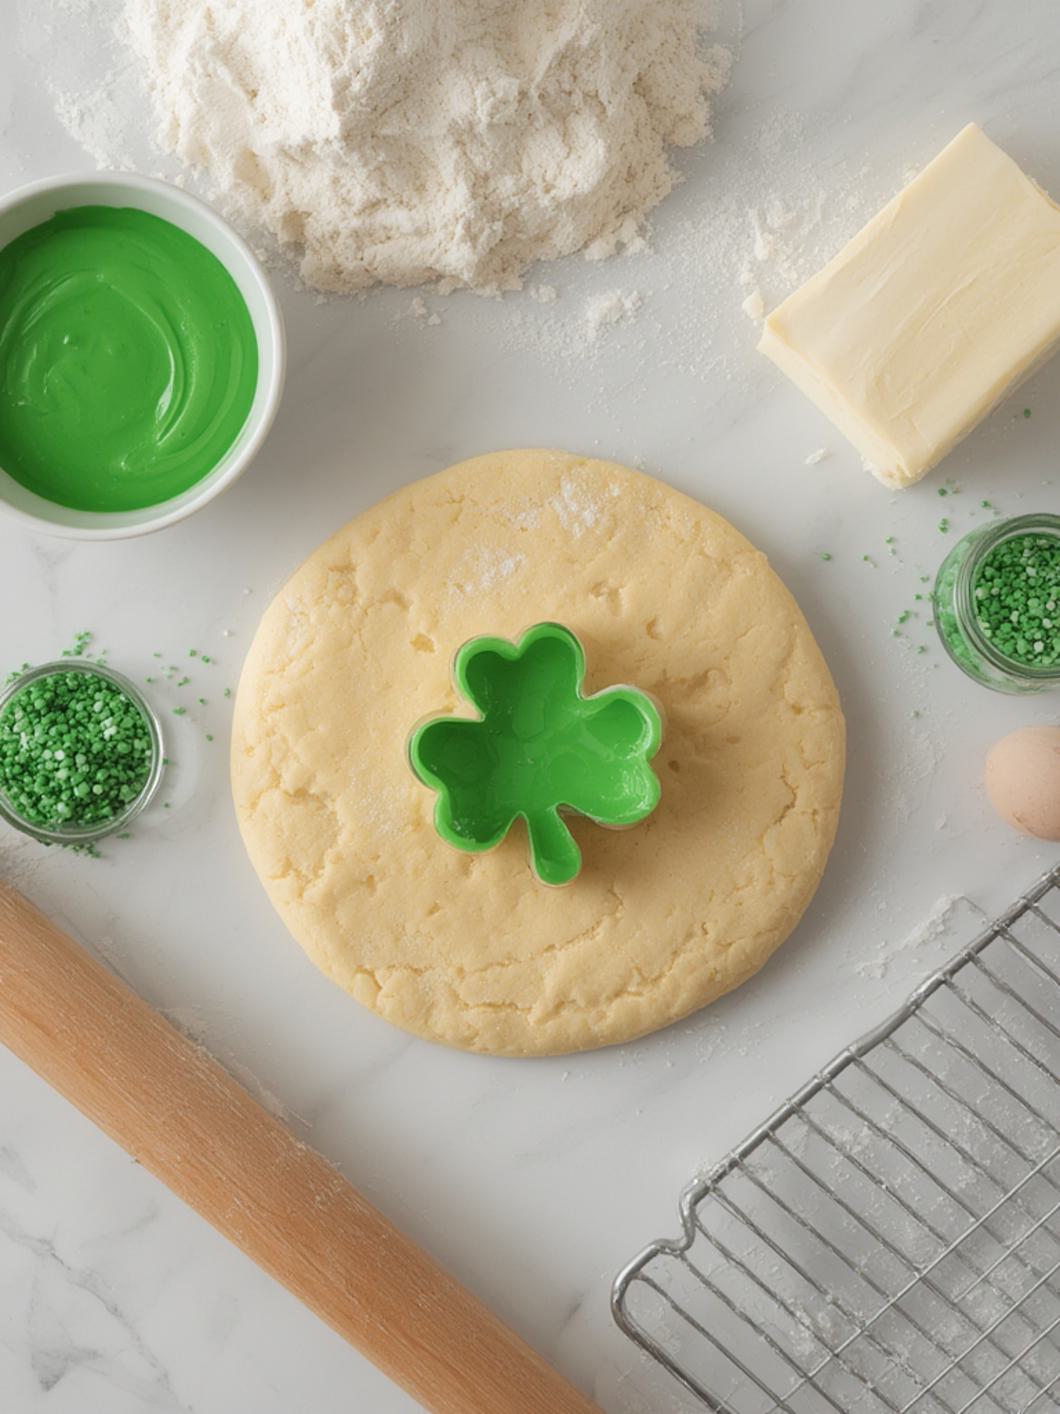
5. Color the Dough: Divide the dough into two equal portions. Add green food coloring to one portion, mixing until the desired shade of green is achieved. Leave the other portion plain for a two-tone effect or simply color both portions green.
6. Chill Dough: Wrap each dough portion tightly in plastic wrap and chill for at least 30 minutes in the refrigerator. This step is crucial for making the dough easier to roll and preventing the cookies from spreading too much during baking. You can chill it for up to 2 hours.
7. Preheat Oven & Prepare Sheets: Preheat your oven to 375°F (190°C). Line baking sheets with parchment paper or silicone mats.
8. Roll and Cut: On a lightly floured surface, roll out each dough portion to about ¼-inch thickness. Use a shamrock-shaped cookie cutter (or a heart-shaped cutter to combine three hearts into a shamrock) to cut out cookies. Reroll any dough scraps as needed until all dough is used.
9. Bake: Carefully transfer the cut-out cookies to the prepared baking sheets, leaving about 1 inch between them. Bake for 8-10 minutes, or until the edges are lightly golden. To keep them soft, avoid letting them brown too much.
10. Cool: Let the cookies cool on the baking sheets for a few minutes before transferring them to a wire rack to cool completely.
11. Optional Glaze & Decorate: Once completely cool, whisk together powdered sugar and milk in a small bowl until smooth. Drizzle over the cooled cookies. Add festive sprinkles immediately if desired, before the glaze sets.
Fun Twists & Serving Ideas
- ✦ Lemon Zest zing: Add 1-2 teaspoons of fresh lemon zest to the cookie dough for a bright, citrusy flavor that complements the butteriness.
- ✦ Minty Fresh: Incorporate ½ teaspoon of peppermint extract along with the vanilla for a refreshing mint-chocolate chip inspired flavor, especially if dipping in melted chocolate.
- ✦ Chocolate Dipped Delights: Dip half of each cooled cookie in melted white chocolate or dark chocolate, then sprinkle with green or rainbow sprinkles before the chocolate sets.
- ✦ Ombre Green: Divide your green-colored dough into three smaller portions and add slightly different amounts of green food coloring to each to create light, medium, and dark green cookies.
- ✦ Cookie Sandwiches: Once cooled, spread a thin layer of cream cheese frosting or mint buttercream between two cookies to create delightful sandwich cookies.
FAQ
Q: Can I make the dough ahead of time?
A: Yes, the dough can be made up to 2-3 days in advance. Wrap it tightly in plastic wrap and store it in the refrigerator. Let it sit at room temperature for 10-15 minutes before rolling if it’s too firm.
Q: What if I don’t have a shamrock cookie cutter?
A: You can use a heart-shaped cutter and combine three hearts at their points to form a shamrock shape before baking, or simply use a round cutter and decorate with green icing.
Q: Why did my cookies spread too much?
A: This usually happens if the butter was too warm, the dough wasn’t chilled enough, or too much flour wasn’t added. Ensure your butter is softened but not melted, and always chill the dough for at least 30 minutes.
Q: Can I use natural food coloring?
A: Yes, natural food colorings can be used, but you might need a larger quantity to achieve a vibrant green, and the color might be slightly less intense.
Q: How do I store these cookies?
A: Store cooled cookies in an airtight container at room temperature for up to 5-7 days. If glazed, ensure the glaze is fully set before stacking.
Conclusion
These Easy Shamrock Cookies are more than just a festive treat; they’re a delightful way to celebrate St. Patrick’s Day with a homemade touch. Their soft, buttery texture and vibrant green color make them an instant favorite, and the simple recipe ensures success for bakers of all skill levels. Whether you’re planning a party or just looking for a fun family activity, these green st patrick’s day cookies are sure to bring joy and a taste of Irish cheer to your home. Happy baking, and may your days be filled with luck and delicious cookies!
Recipe Note
For the softest cookies, avoid overbaking. The edges should be just barely golden, and the centers should still look slightly soft when removed from the oven, as they will continue to set as they cool.