Homemade Danish Pastries – Classic Bakery-Style Recipe
Danish Pastries: A Symphony of Flaky Bliss and Sweet Indulgence

There are some culinary creations that transcend mere food, becoming an experience, a memory, a moment of pure joy. Danish Pastries are undoubtedly one of them. Imagine, if you will, the delicate crackle of golden, impossibly flaky layers giving way to a rich, tender interior, cradling a luscious, sweet filling. The aroma alone is enough to transport you to a bustling European bakery, where time slows, and every bite is a celebration. For too long, many have believed these exquisite treats are beyond the home baker’s grasp. Today, at Magic In Kitchen, we’re here to shatter that myth and guide you through the magical process of creating your own authentic, breathtaking Danish Pastries right in your kitchen. This isn’t just a recipe; it’s an invitation to elevate your baking, to embrace the artistry, and to discover the profound satisfaction of crafting something truly extraordinary. Get ready to embark on a delightful journey where butter, flour, and a little patience transform into pure pastry perfection.
Recipe Card will be inserted here.
⏱️ Prep Time: 3 hours 30 minutes,
🍽️ Servings: 12-16,
💥 Vibe: Luxurious, Delicate, Rewarding
Jump Ahead
What You’ll Need to Create These Divine Danish Pastries
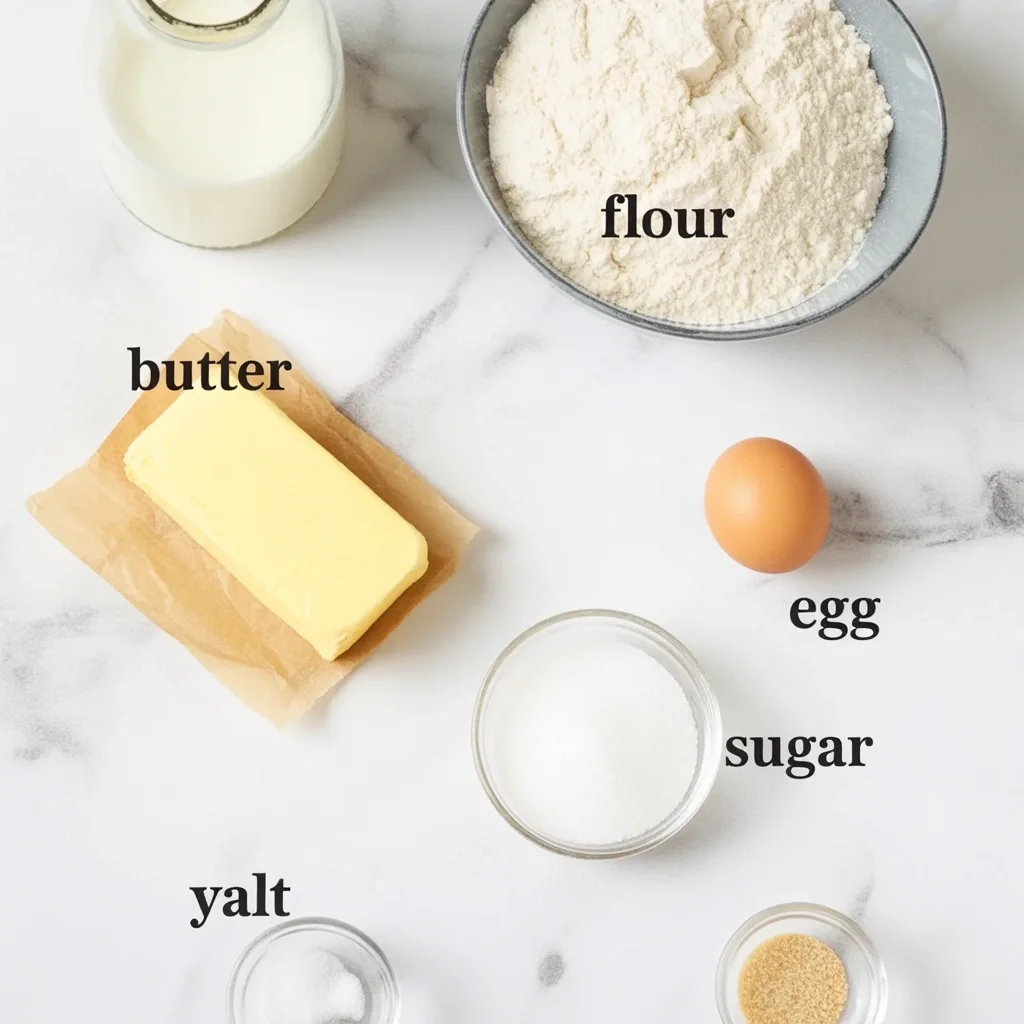
Crafting beautiful Danish Pastries requires a few essential ingredients, mostly pantry staples, alongside the star: high-quality butter for that iconic lamination. Don’t be intimidated by the list; each component plays a crucial role in achieving the perfect texture and flavor of your homemade Danish Pastries.
- 1 cup (240ml) whole milk, warmed to 105-115°F (40-46°C)
- 2 ¼ teaspoons (1 packet) active dry yeast
- ½ cup (100g) granulated sugar, divided
- 1 teaspoon salt
- 2 large eggs, lightly beaten
- 4 cups (480g) all-purpose flour, plus more for dusting
- 1 cup (226g) unsalted butter, very cold and cut into 1/2-inch slices (for lamination)
- For the Cream Cheese Filling:
- 8 oz (226g) cream cheese, softened
- ½ cup (100g) granulated sugar
- 1 large egg yolk
- 1 teaspoon vanilla extract
- For the Glaze:
- 1 ½ cups (180g) powdered sugar
- 2-3 tablespoons milk or water
- ½ teaspoon vanilla extract
- Optional: Fruit preserves (raspberry, apricot), almond paste, chopped nuts for additional fillings or toppings.
How to Make Danish Pastries: A Step-by-Step Guide to Flaky Perfection

Making Danish Pastries is a labor of love, but every moment spent on this recipe is rewarded with an unparalleled taste and texture. Follow these detailed instructions carefully to achieve beautifully laminated, tender Danish Pastries.
- Activate the Yeast: In a large bowl, combine the warm milk, yeast, and 1 tablespoon of the granulated sugar. Stir gently and let it sit for 5-10 minutes until foamy.
- Prepare the Dough: Add the remaining sugar, salt, beaten eggs, and half of the flour to the yeast mixture. Mix until just combined. Gradually add the remaining flour, mixing until a shaggy dough forms.
- Knead and Chill: Turn the dough out onto a lightly floured surface and knead for 5-7 minutes until smooth and elastic. It should be slightly tacky. Form the dough into a rectangle, wrap it tightly in plastic wrap, and refrigerate for at least 2 hours, or preferably overnight. This chill is crucial for handling the Danish Pastries dough.
- Prepare the Butter Block: Arrange the cold butter slices on a piece of parchment paper to form an 8×8 inch square. Top with another piece of parchment and use a rolling pin to pound and roll the butter into a consistent, pliable 8×8 inch square. Refrigerate until ready to use.
- First Turn (Lamination): On a lightly floured surface, roll the chilled dough into a 16×16 inch square. Place the chilled butter block in the center of the dough. Fold the sides of the dough over the butter, sealing the edges completely to encase the butter.
- Roll and Fold: Gently roll the dough into a 10×24 inch rectangle. Perform a “letter fold” by folding one-third of the dough over the middle, then folding the remaining third over that, creating three layers. Wrap tightly and refrigerate for 30 minutes. This is your first “turn.”
- Repeat Turns: Repeat the rolling and folding process two more times (a total of 3 turns), chilling the dough for 30 minutes between each turn. Always ensure the dough is well-floured to prevent sticking, but brush off excess flour before folding.
- Prepare the Filling: While the dough chills for its final time, beat together the softened cream cheese, ½ cup granulated sugar, egg yolk, and vanilla extract until smooth and creamy.
- Shape the Danish Pastries: On a lightly floured surface, roll the chilled dough into a large 1/8-inch thick rectangle (approximately 18×24 inches). Trim the edges to create clean lines. Cut the dough into 3-inch squares.
- Fill and Form: Place about 1 tablespoon of cream cheese filling (or your chosen filling) in the center of each square. Bring two opposite corners of the square towards the center and gently pinch them together. Alternatively, fold all four corners towards the center, overlapping slightly, to form a pinwheel or star shape.
- Proof the Danish Pastries: Arrange the shaped Danish Pastries on parchment-lined baking sheets, leaving space between them. Cover loosely with plastic wrap and let them proof in a warm place for 1 to 1.5 hours, or until visibly puffy and almost doubled in size.
- Bake: Preheat oven to 400°F (200°C). Lightly brush the pastries with an egg wash (1 egg beaten with 1 tbsp water) for a golden sheen. Bake for 15-20 minutes, or until golden brown and cooked through.
- Glaze: While the Danish Pastries cool, whisk together the powdered sugar, milk/water, and vanilla extract until smooth. Drizzle or spread the glaze over the cooled pastries. Serve your delectable Danish Pastries fresh!
Fun Twists & Serving Ideas for Your Danish Pastries
The beauty of homemade Danish Pastries lies in their versatility. While the classic cream cheese filling is divine, don’t hesitate to experiment and make these treats truly your own.
- Fruit Sensations: Before baking, dollop a teaspoon of your favorite fruit preserve (raspberry, apricot, cherry) on top of the cream cheese filling, or use it as a standalone filling.
- Nutty Indulgence: Mix finely ground almonds or pecans with a touch of sugar and butter to create a rich almond paste-like filling, or simply sprinkle chopped nuts over the top before baking.
- Chocolate Dream: Add mini chocolate chips to your cream cheese filling, or melt dark chocolate and drizzle it over the glazed Danish Pastries.
- Savory Surprise: For a less traditional take, fill the pastries with a mixture of caramelized onions and goat cheese, or spinach and feta. Adjust the sweetness of the dough slightly if going fully savory.
- Seasonal Delights: During autumn, a pumpkin spice cream cheese filling can be absolutely heavenly. In summer, fresh berries are a perfect complement.
What Our Readers Are Saying About These Danish Pastries
We love hearing from you! Here’s what some of our wonderful home bakers have said about this Danish Pastries recipe:
- Eleanor R. ⭐⭐⭐⭐⭐ “I never thought I could make Danish Pastries at home, but this recipe made it achievable! The step-by-step instructions were clear, and the result was pure bakery quality. Flaky, tender, and absolutely delicious. My family devoured them!”
- Mark P. ⭐⭐⭐⭐⭐ “A true labor of love, but every bit worth the effort. The lamination process for these Danish Pastries created such incredible layers. I used the cream cheese filling and added a touch of lemon zest – perfection!”
- Sarah T. ⭐⭐⭐⭐ “Fantastic recipe for Danish Pastries! It took some time, but the outcome was professional. I only gave four stars because I found the dough a little tricky to handle on my first try, but by the second turn, I got the hang of it. Definitely making these again.”
Frequently Asked Questions About Danish Pastries
Have questions about mastering your homemade Danish Pastries? We’ve got answers!
- Q: Can I prepare the Danish Pastries dough ahead of time?
- A: Absolutely! You can make the dough, complete all the turns, and then store it tightly wrapped in the refrigerator for up to 2 days before shaping and baking. You can also freeze the unbaked, shaped pastries (before proofing) for up to 1 month. Thaw in the refrigerator overnight and then proof before baking.
- Q: What’s the secret to perfectly flaky Danish Pastries?
- A: The key lies in keeping both the butter and the dough very cold during the lamination process. This prevents the butter from melting into the dough, ensuring distinct layers that create that signature flakiness. Don’t rush the chilling steps!
- Q: Can I use different fillings for my Danish Pastries?
- A: Yes, the possibilities are endless! Beyond cream cheese, popular choices include almond paste, various fruit preserves, poppy seed filling, or even a simple cinnamon sugar blend. Feel free to get creative with your Danish Pastries.
- Q: How should I store leftover Danish Pastries?
- A: Danish Pastries are best enjoyed fresh the day they are baked. However, you can store them in an airtight container at room temperature for up to 2 days. For longer storage, refrigerate for up to 4 days, but the flakiness may diminish slightly. Reheat gently in a warm oven for a few minutes to crisp them up.
Embrace the Art of Danish Pastries
There’s an undeniable magic that happens when you bring a tray of freshly baked Danish Pastries to the table. The golden glow, the sweet aroma, the anticipation of that first crisp, tender bite – it’s a moment of culinary triumph. This recipe, while requiring a touch of patience and precision, opens the door to a world of exquisite flavor and texture that store-bought versions simply can’t match. Imagine the pride you’ll feel as you present these stunning Danish Pastries, knowing every flaky layer was crafted by your own hands. Don’t let the thought of lamination intimidate you; it’s a rewarding skill that will elevate your entire baking repertoire. We encourage you to dive in, trust the process, and experience the sheer delight of creating these exceptional Danish Pastries. Share your creations, your twists, and your moments of joy with us at magicinkitchen.com – because truly, there’s nothing quite like the magic you create in your own kitchen.
Recipe Note: The Power of Cold
For the ultimate flaky Danish Pastries, remember that cold is your best friend. Ensure your butter is ice-cold and pliable, and always respect the chilling times between folds. A cold dough is easier to work with and critical for achieving those distinct, airy layers that define perfect Danish Pastries.

Danish Pastries
Cook Time: N/A
Total Time: 5 hours 15 minutes
Course: Breakfast, Brunch, Dessert
Servings: 12
Calories: 350
Ingredients
- For the Dough:
- 1 cup (240ml) whole milk, lukewarm
- 2 ½ teaspoons active dry yeast (or 1 packet)
- ½ cup (100g) granulated sugar
- 1 large egg
- 1 teaspoon vanilla extract
- 4 cups (500g) all-purpose flour, plus more for dusting
- 1 teaspoon salt
- ½ cup (113g) unsalted butter, melted and cooled (for dough)
- For the Butter Block:
- 1 ½ cups (340g) unsalted butter, cold
- For the Cream Cheese Filling (Optional):
- 8 oz (226g) cream cheese, softened
- ¼ cup (50g) granulated sugar
- 1 large egg yolk
- 1 teaspoon vanilla extract
- For the Egg Wash:
- 1 large egg, beaten with 1 tablespoon water
- For the Glaze:
- 1 cup (120g) powdered sugar
- 2-3 tablespoons milk or water
- ½ teaspoon vanilla extract
Instructions
1.Prepare the Dough: In a large bowl, combine the lukewarm milk, yeast, and 1 tablespoon of the sugar. Let sit for 5-10 minutes until foamy. Add the remaining sugar, egg, vanilla extract, melted butter, flour, and salt. Mix until a shaggy dough forms. Turn out onto a lightly floured surface and knead for 5-7 minutes until smooth and elastic. Form into a ball, place in a lightly oiled bowl, cover, and refrigerate for at least 1 hour, or overnight.
2. Prepare the Butter Block: Place the cold butter between two sheets of parchment paper. Using a rolling pin, flatten the butter into an 8×8 inch (20×20 cm) square. Refrigerate until ready to use.
3. First Fold (Encasing the Butter): On a lightly floured surface, roll the chilled dough into a 16×16 inch (40×40 cm) square. Place the butter block diagonally in the center of the dough. Fold the four corners of the dough over the butter, encasing it completely like an envelope. Pinch the seams closed to seal.
4. First Turn: Gently roll the dough into a 10×20 inch (25×50 cm) rectangle. Fold the dough in thirds, like a business letter (bring one end to the center, then fold the other end over it). This is one ‘turn’. Wrap the dough tightly in plastic wrap and refrigerate for 30 minutes.
5. Second Turn: Repeat the rolling and folding process. Roll the dough into a 10×20 inch rectangle, then fold in thirds. Wrap and refrigerate for another 30 minutes.
6. Third Turn: Repeat the rolling and folding process one last time. Wrap and refrigerate for at least 1 hour, or up to 24 hours.
7. Prepare Filling (if using): In a small bowl, whisk together cream cheese, sugar, egg yolk, and vanilla until smooth.
8. Shape the Pastries: On a lightly floured surface, roll the chilled dough into a 1/8 inch (0.3 cm) thick rectangle, approximately 12×18 inches (30×45 cm). Trim the edges to create a neat rectangle. Cut the dough into 12 squares (about 4×4 inches or 10×10 cm).
9. Fill and Form: For traditional ‘comb’ pastries, make two parallel cuts on opposite sides of each square, leaving a strip in the middle. Place about a tablespoon of filling in the center strip. Fold one cut side over the filling, then the other, overlapping to create a braided effect. For ‘pinwheel’ pastries, cut from each corner almost to the center, leaving about 1 inch (2.5 cm) in the middle. Place a small amount of filling in the center. Fold every other point towards the center, overlapping them to form a pinwheel. Alternatively, roll into spirals or simple squares with filling.
10. Proof: Place the shaped pastries on baking sheets lined with parchment paper, leaving space between them. Cover loosely with plastic wrap and let rise in a warm, draft-free place for 45-60 minutes, or until visibly puffy.
11. Bake: Preheat oven to 400°F (200°C). Brush the tops of the pastries with egg wash. Bake for 15-20 minutes, or until golden brown and puffed. If desired, reduce oven temperature to 375°F (190°C) after 10 minutes to prevent over-browning while ensuring they cook through.
12. Glaze: While the pastries cool slightly, whisk together powdered sugar, milk/water, and vanilla extract until smooth. Drizzle or brush the glaze over the warm pastries. Serve warm or at room temperature.
Chef’s Notes: Laminating requires patience and a cool environment. Ensure your butter is cold but pliable for the best results. Chilling between folds is crucial to prevent the butter from melting and to relax the gluten in the dough. You can vary the fillings with fruit compotes, nuts, or chocolate.