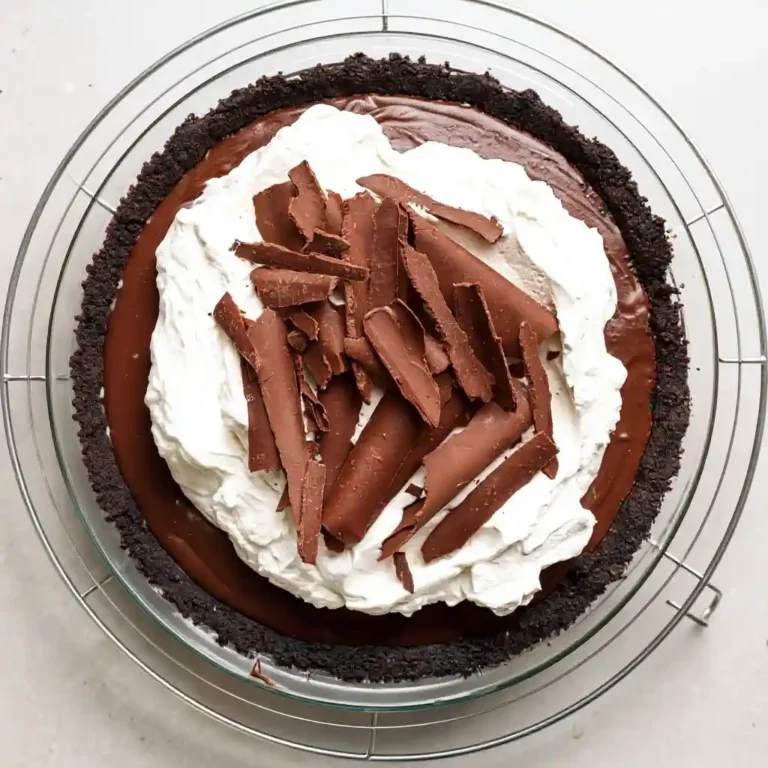
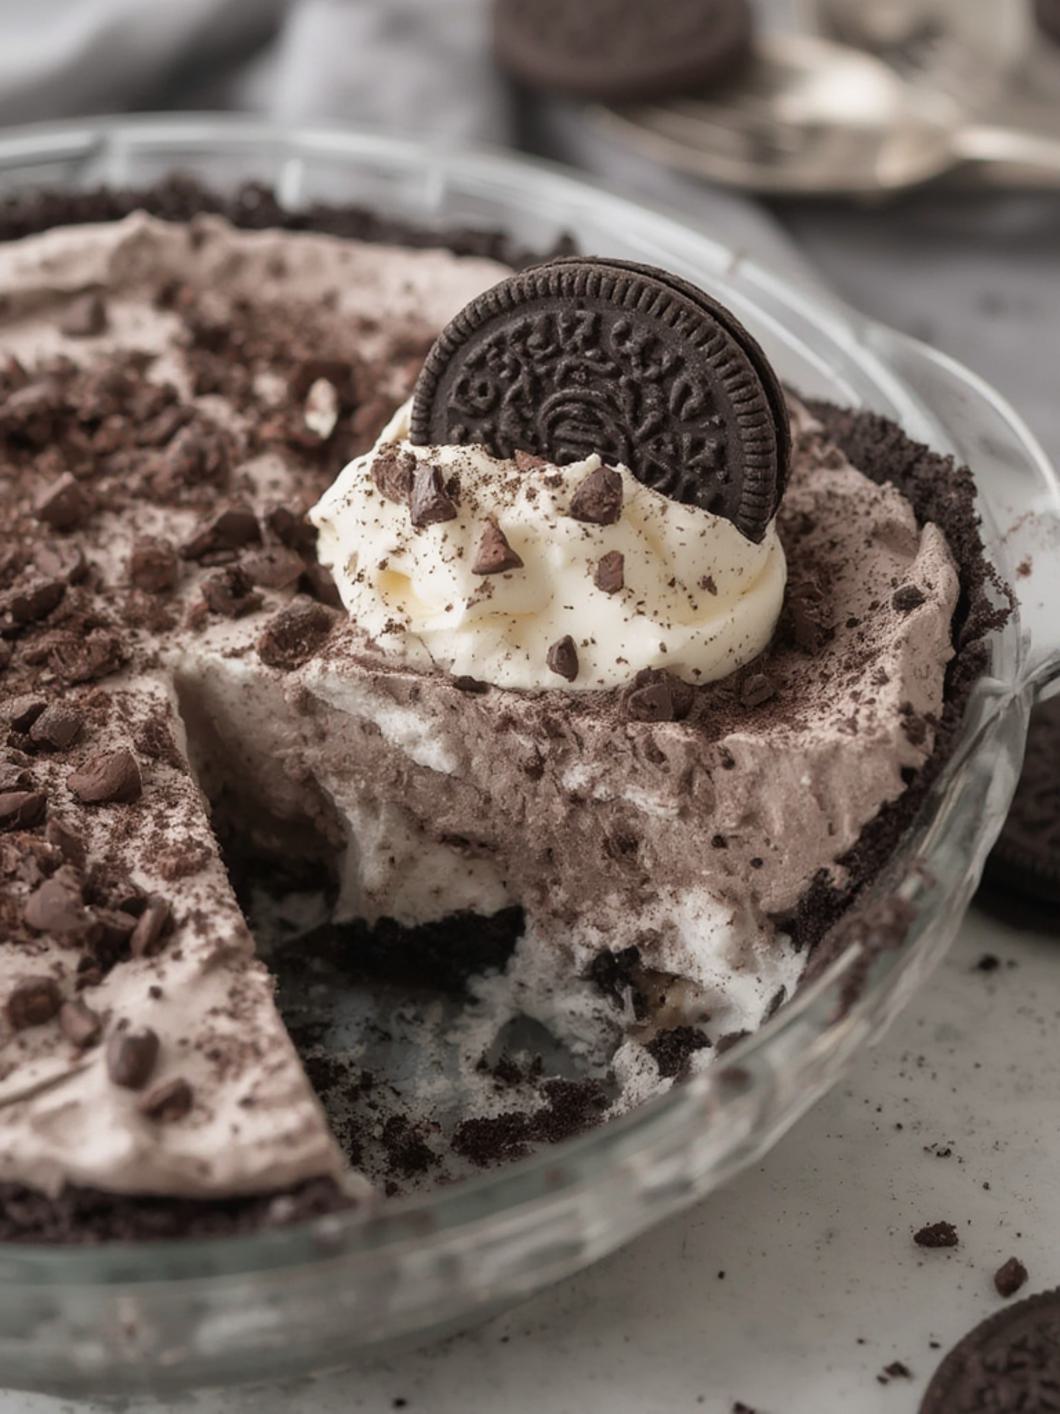
No Bake Oreo Pudding Pie: 3 Easy Steps!
No Bake Oreo Pudding Pie: The Easiest, Creamiest Dessert You’ll Ever Make!
Craving a dessert that’s ridiculously easy to make, yet tastes like a dream? Look no further than this incredible No Bake Oreo Pudding Pie! Perfect for those scorching summer days or when you simply don’t want to turn on the oven, this pie delivers layers of creamy, chocolatey goodness on a classic Oreo crust. Forget complicated baking techniques – with just a few simple ingredients and minimal effort, you’ll create a show-stopping treat that rivals even a decadent No-Bake Oreo Cheesecake. Get ready to impress everyone with this delightful, fuss-free dessert!
Quick Glance Summary
This incredibly easy dessert combines a rich Oreo crust with a luscious, creamy vanilla pudding filling, all topped with a light whipped topping. Requiring no oven, it’s perfect for quick assembly and chilling, making it an ideal treat for any occasion, especially when you need a crowd-pleasing dessert in a hurry. Prep time is just 20 minutes, with a few hours of chill time to achieve perfect sliceability.
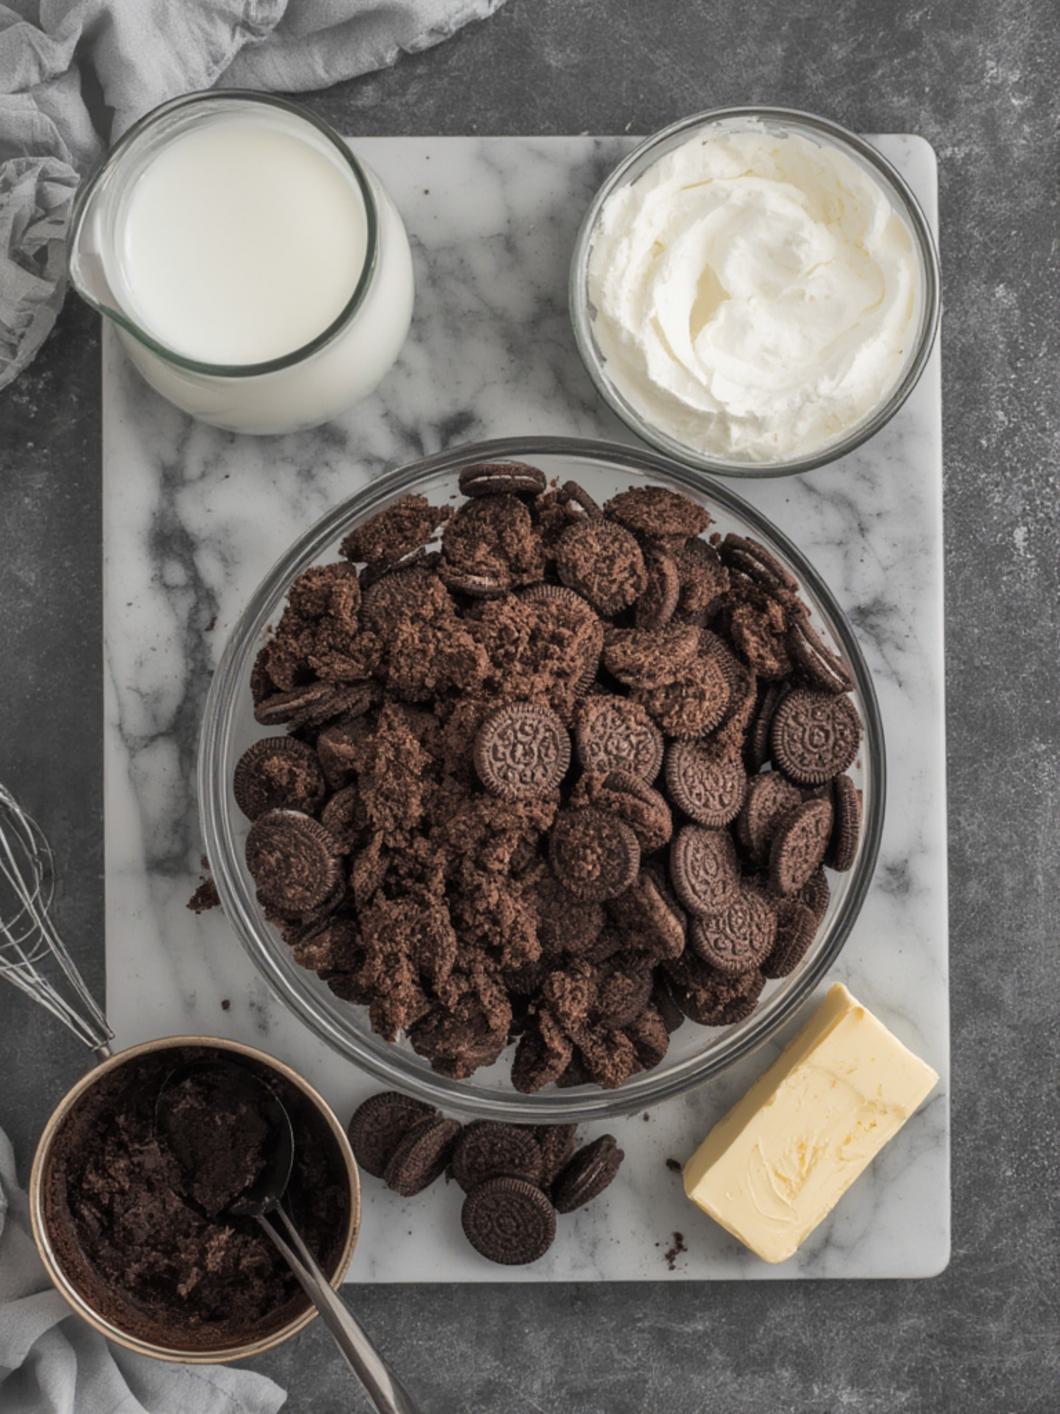
What You’ll Need
Gathering your ingredients is the first step towards dessert bliss. This simple pie uses common pantry staples for maximum flavor with minimal fuss. Here’s what you’ll need:
- 1 (14.3 oz) package Oreo cookies
- 6 tablespoons unsalted butter, melted
- 2 (3.4 oz) packages instant vanilla pudding mix
- 4 cups cold milk
- 1 (8 oz) container whipped topping, thawed (like Cool Whip)
- 1/4 cup chocolate syrup (optional, for garnish)
- Extra Oreo cookies, crushed (optional, for garnish)
 Preparation Instructions
Creating your perfect No Bake Oreo Pudding Pie is incredibly straightforward. Follow these simple steps for a dessert that’s guaranteed to be a hit:
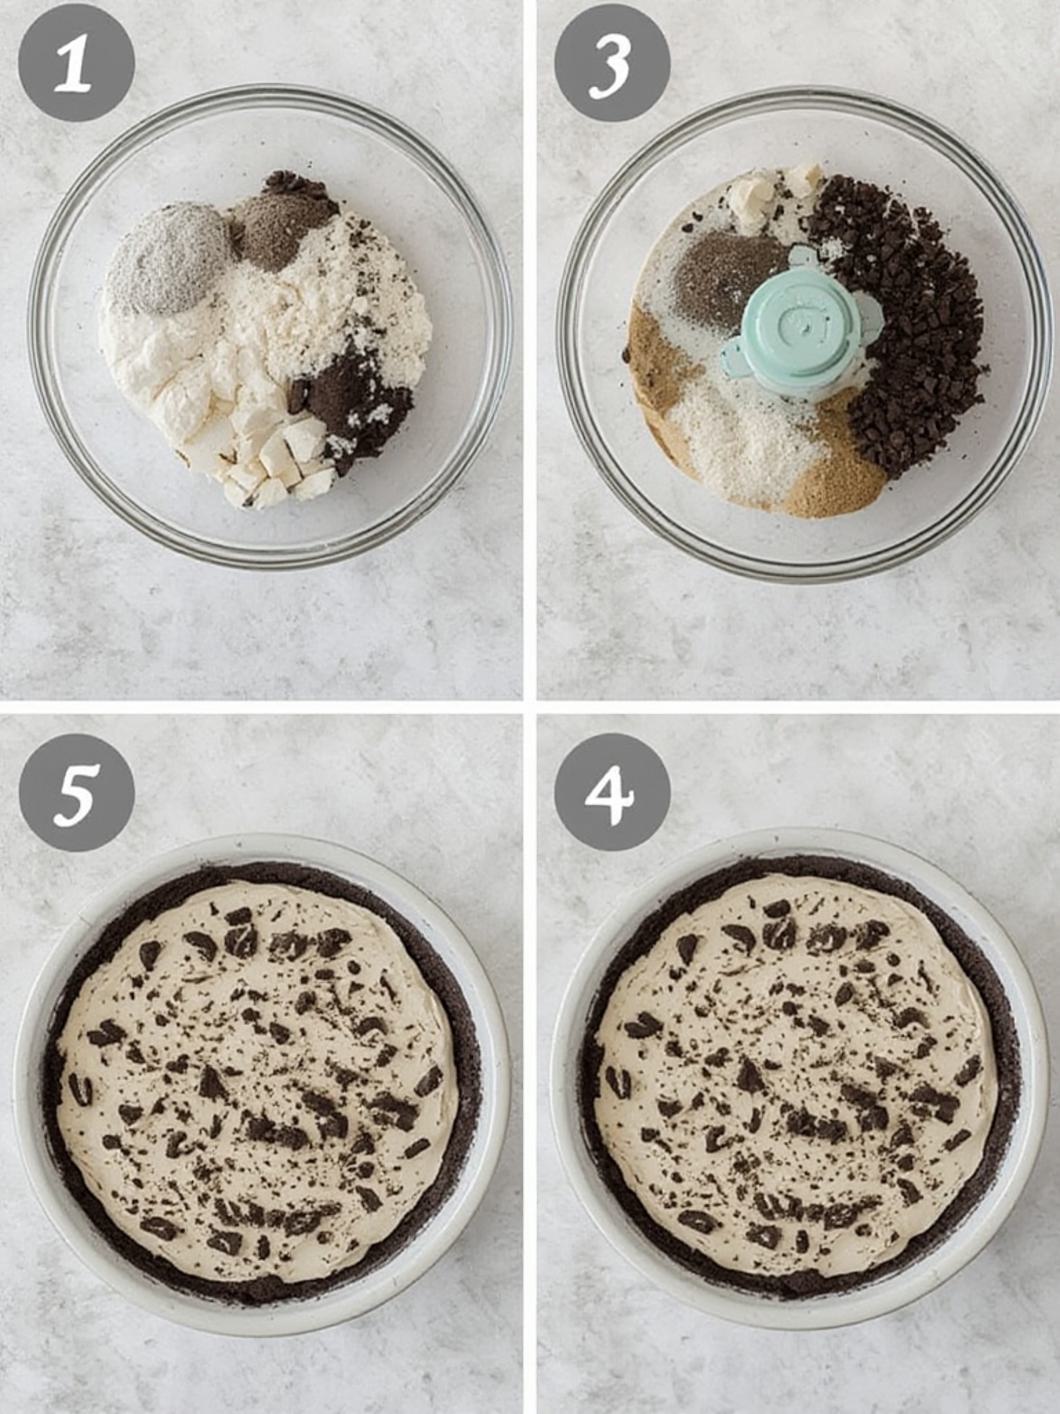
- Crust Creation: Begin by crushing the entire package of Oreo cookies into fine crumbs. You can do this in a food processor or by placing them in a Ziploc bag and crushing them with a rolling pin. In a medium bowl, combine the crushed Oreo crumbs with the melted butter, mixing until thoroughly combined.
- Press and Chill: Press the buttery Oreo mixture firmly and evenly into the bottom and slightly up the sides of a 9-inch pie plate. Place the pie plate in the refrigerator to chill for at least 10 minutes while you prepare the filling.
- Pudding Perfection: In a large mixing bowl, whisk together the two packages of instant vanilla pudding mix with 4 cups of cold milk. Whisk continuously for about 2 minutes until the mixture thickens. Ensure there are no lumps for a smooth consistency, much like you would prepare the base for a delicious No-Bake Oreo Cheesecake.
- Fold in Whipped Topping: Gently fold half of the thawed whipped topping into the prepared pudding mixture until just combined. Be careful not to overmix, as this will keep the pudding light and airy.
- Assemble the Pie: Evenly spread the pudding mixture over the chilled Oreo crust.
- Final Topping: Dollop or spread the remaining half of the whipped topping over the pudding layer.
- Chill to Set: Place the assembled pie back into the refrigerator for at least 4 hours, or preferably overnight, to allow it to set completely. This is crucial for clean slices.
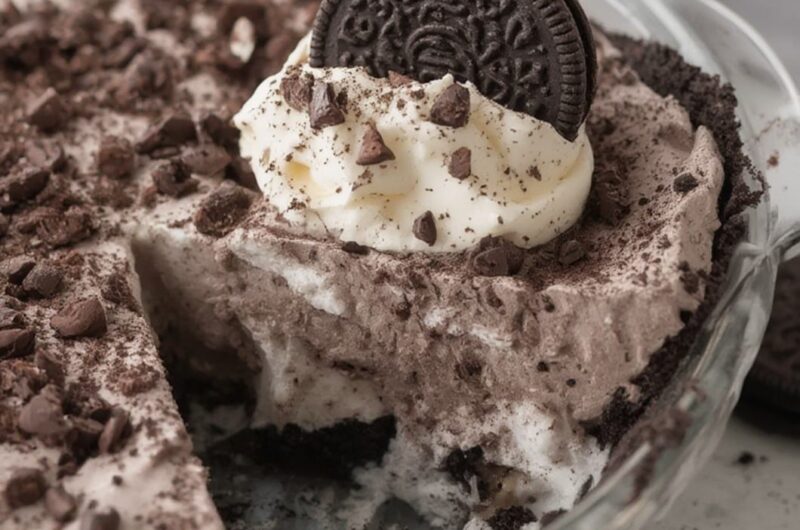
- Garnish and Serve: Just before serving, drizzle with chocolate syrup and sprinkle with extra crushed Oreo cookies, if desired. Slice and enjoy your delightful, no-fuss dessert!
Fun Twists & Serving Ideas
While the classic No Bake Oreo Pudding Pie is perfect as is, here are some creative ways to elevate your dessert or switch things up:
- Flavor Variations: Experiment with different instant pudding flavors! Chocolate, banana cream, or even cheesecake pudding can create exciting new profiles.
- Coffee Kick: For a grown-up twist, add a teaspoon of instant espresso powder to the pudding mixture.
- Berry Blast: Layer fresh berries (strawberries, raspberries) over the pudding before adding the final whipped topping for a fruity contrast.
- Candy Crush: Mix in crushed candy bars (like Snickers or Butterfinger) with the Oreo crumbs for the crust, or sprinkle them over the top for garnish.
- Chocolate Drizzle & Chips: Instead of just chocolate syrup, melt some chocolate chips and drizzle artistic patterns over the top. Add mini chocolate chips for extra texture.
Reviews
- Sarah P. (5/5 Stars): “This pie is an absolute lifesaver! So easy to make for parties and always disappears first. The perfect blend of creamy and crunchy!”
- Mark T. (5/5 Stars): “I’m usually terrible at baking, but this was foolproof. My kids devoured it. Will definitely be making this again and again!”
- Jessica L. (4/5 Stars): “Delicious! I used chocolate pudding mix for an extra chocolatey kick. A bit sweet for me, but everyone else loved it. Great simple recipe.”
FAQ
- Can I use homemade whipped cream instead of store-bought?
- Absolutely! Freshly whipped cream will add an even richer texture. Just be sure it’s stiffly peaked before folding it into the pudding and topping the pie.
How long does No Bake Oreo Pudding Pie last in the refrigerator?This pie can be stored covered in the refrigerator for up to 3-4 days. The crust might soften slightly over time, but it will still be delicious.
Can I freeze this pie?While you can freeze it, the texture of the whipped topping and pudding can change slightly upon thawing, becoming a bit watery. It’s best enjoyed fresh and chilled from the refrigerator.
What if my pudding doesn’t thicken?Ensure you are using instant pudding mix, not cook-and-serve. Also, make sure your milk is very cold and you whisk for the full 2 minutes as instructed on the pudding package.
Can I use gluten-free Oreos?Yes, many brands now offer gluten-free chocolate sandwich cookies that would work perfectly for the crust.
Conclusion
There you have it – the ultimate, stress-free dessert that’s sure to bring smiles to every face. This No Bake Oreo Pudding Pie is more than just a recipe; it’s a testament to how incredible simple ingredients can be when brought together with a little love. Whether you’re a seasoned baker or a kitchen novice, you’ll find joy in preparing and serving this delightful treat. It offers all the satisfaction of a rich dessert, without the fuss of baking, standing proudly alongside other no-bake marvels like the No-Bake Oreo Cheesecake. So go ahead, whip up this pie and savor every creamy, crunchy bite!
Recipe Note
For the cleanest slices, make sure your pie is thoroughly chilled, ideally for at least 4 hours or overnight. A warm knife dipped in hot water and wiped dry between slices can also help achieve perfect presentation.
🍴 No Bake Oreo Pudding Pie 🍴
🌍 American Cuisine | 🥣 Dessert
20 minutes
20 minutes
8
450
🛒 Ingredients
- 🥄 1 (14.3 oz) package Oreo cookies
- 🥄 1/2 cup (1 stick) unsalted butter, melted
- 🥄 2 (3.4 oz) packages instant vanilla pudding mix (or flavor of your choice)
- 🥄 3 cups cold milk
- 🥄 1 (8 oz) container frozen whipped topping, thawed (like Cool Whip)
- 🥄 1/2 cup mini chocolate chips (optional, for garnish)
- 🥄 Extra crushed Oreos (optional, for garnish)
📝 Instructions
1
Prepare the crust: In a food processor, finely crush the entire package of Oreo cookies (including the cream filling) until they resemble fine crumbs. Alternatively, place cookies in a large zip-top bag and crush with a rolling pin. In a medium bowl, combine the Oreo crumbs and melted butter. Press the mixture firmly into the bottom and up the sides of a 9-inch pie plate. Place the crust in the refrigerator to chill for at least 15 minutes while you prepare the filling.
2
Prepare the pudding: In a large bowl, whisk together the instant pudding mixes and cold milk for 2-3 minutes, until the mixture starts to thicken. Let stand for 5 minutes to allow it to set further.
3
Assemble the pie: Gently fold in half of the thawed whipped topping into the prepared pudding mixture until well combined.
4
Pour the pudding mixture into the chilled Oreo crust, spreading evenly.
5
Top the pie with the remaining half of the whipped topping, spreading it to cover the pudding layer completely.
6
Garnish: If desired, sprinkle with mini chocolate chips and/or extra crushed Oreos.
7
Chill: Cover the pie loosely with plastic wrap and refrigerate for at least 4 hours, or until thoroughly set. For best results, chill overnight.
8
Serve: Slice and serve cold. Store any leftover pie in the refrigerator.