Best Coconut Joy Candies – Perfect No-Bake Treat
Whip Up Heavenly Homemade **Coconut Joy Candies** Today!
Do you ever find yourself craving a sweet escape, a little taste of tropical bliss that instantly transports you to sun-drenched beaches and warm breezes? Imagine a treat so incredibly simple to make, yet so satisfyingly delicious it rivals any store-bought confection. Today, we’re diving into the enchanting world of homemade **Coconut Joy Candies** – a delightful indulgence that promises pure happiness in every bite. Forget complicated baking projects; this recipe is about pure, unadulterated joy, made with just a handful of ingredients you likely already have on hand. MagicInKitchen.com is thrilled to bring you this fantastic recipe, proving that the most extraordinary flavors often come from the simplest preparations. Get ready to create a batch of these irresistible **Coconut Joy Candies** that will impress everyone and become a fast favorite in your home. The beauty of these candies lies not just in their incredible taste, but also in the sheer ease of their creation. They are perfect for a quick snack, an elegant dessert, or a thoughtful homemade gift. Prepare to fill your kitchen with the sweet aroma of coconut and your heart with the joy of creating something truly special.
Essential Ingredients for Your **Coconut Joy Candies**
Crafting these delectable **Coconut Joy Candies** requires a short and sweet list of ingredients. Quality makes a difference, so choose your components wisely to ensure the best possible flavor and texture for your homemade treats. This selection of ingredients forms the core of our simple yet profound recipe, bringing together tropical sweetness and creamy richness in perfect harmony. Here’s what you will need to embark on this delightful culinary adventure:
- 4 cups (about 14 ounces) sweetened shredded coconut
- 1 (14-ounce) can sweetened condensed milk
- 1 teaspoon pure vanilla extract
- Pinch of salt (optional, but enhances flavor)
- Optional: 6 ounces melting chocolate (dark, milk, or white) for dipping
- Optional: 1 tablespoon coconut oil (if using chocolate for dipping)
Step-by-Step Guide to Perfect **Coconut Joy Candies**
Making your own **Coconut Joy Candies** is an incredibly rewarding experience, and this step-by-step guide ensures your success. Follow these instructions carefully, and you will soon be enjoying the fruits of your labor. The simplicity of the process belies the incredible flavor you will achieve. These instructions focus on creating that perfect chewiness and rich coconut flavor that defines truly exceptional **Coconut Joy Candies**.
- Combine the Core Ingredients: In a large mixing bowl, thoroughly combine the sweetened shredded coconut, the entire can of sweetened condensed milk, the vanilla extract, and the pinch of salt (if using). Stir well with a sturdy spoon or a rubber spatula until all the coconut is evenly coated and moistened. The mixture should be sticky and hold together when pressed.
- Chill for Firmness: Cover the bowl with plastic wrap and refrigerate the coconut mixture for at least 30 minutes. This chilling step is crucial; it allows the coconut to absorb the condensed milk, making the mixture firmer and much easier to handle when shaping. Do not skip this step, as it prevents your **Coconut Joy Candies** from being too loose.
- Prepare for Shaping: Line a baking sheet with parchment paper or wax paper. This will prevent your shaped candies from sticking and makes for easy cleanup.
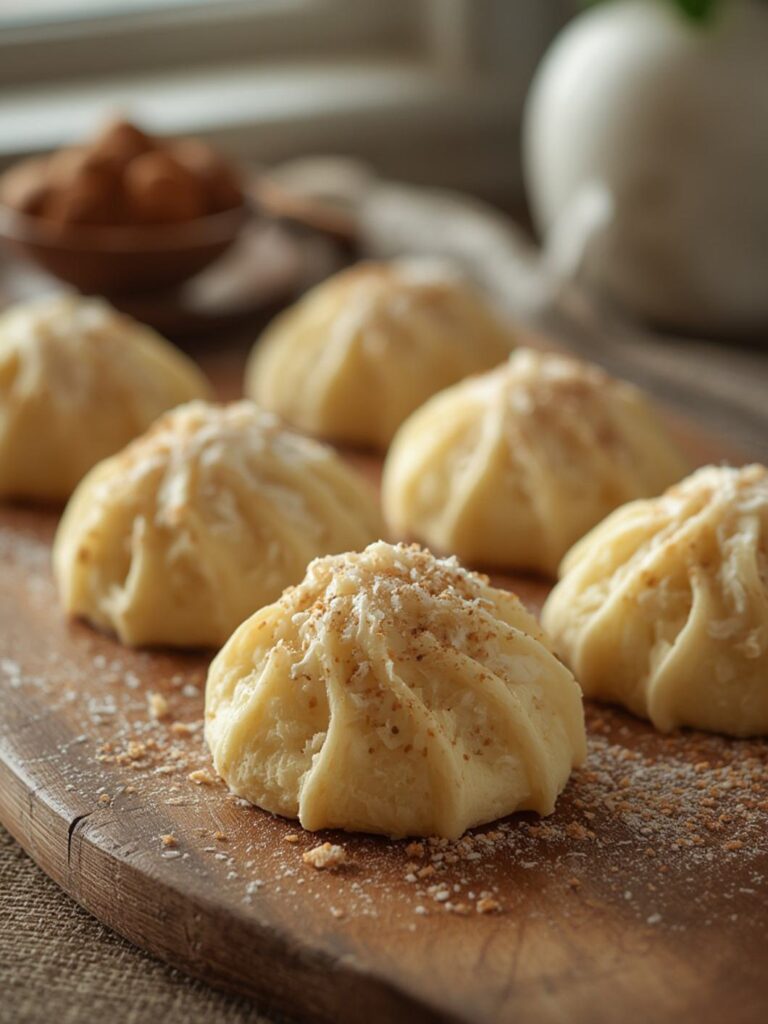
- Shape Your Candies: Remove the chilled coconut mixture from the refrigerator. Using a small cookie scoop or a tablespoon, scoop out portions of the mixture. Roll each portion between your palms to form small balls, or press them into desired shapes like logs or small mounds. The size is entirely up to you, but aim for consistency so they chill and set evenly. Place the shaped **Coconut Joy Candies** on the prepared baking sheet.
- Final Chill and Set: Once all your **Coconut Joy Candies** are shaped, return the baking sheet to the refrigerator for at least 1 hour, or until they are firm. This firming process is key to their delightful chewiness and structural integrity.
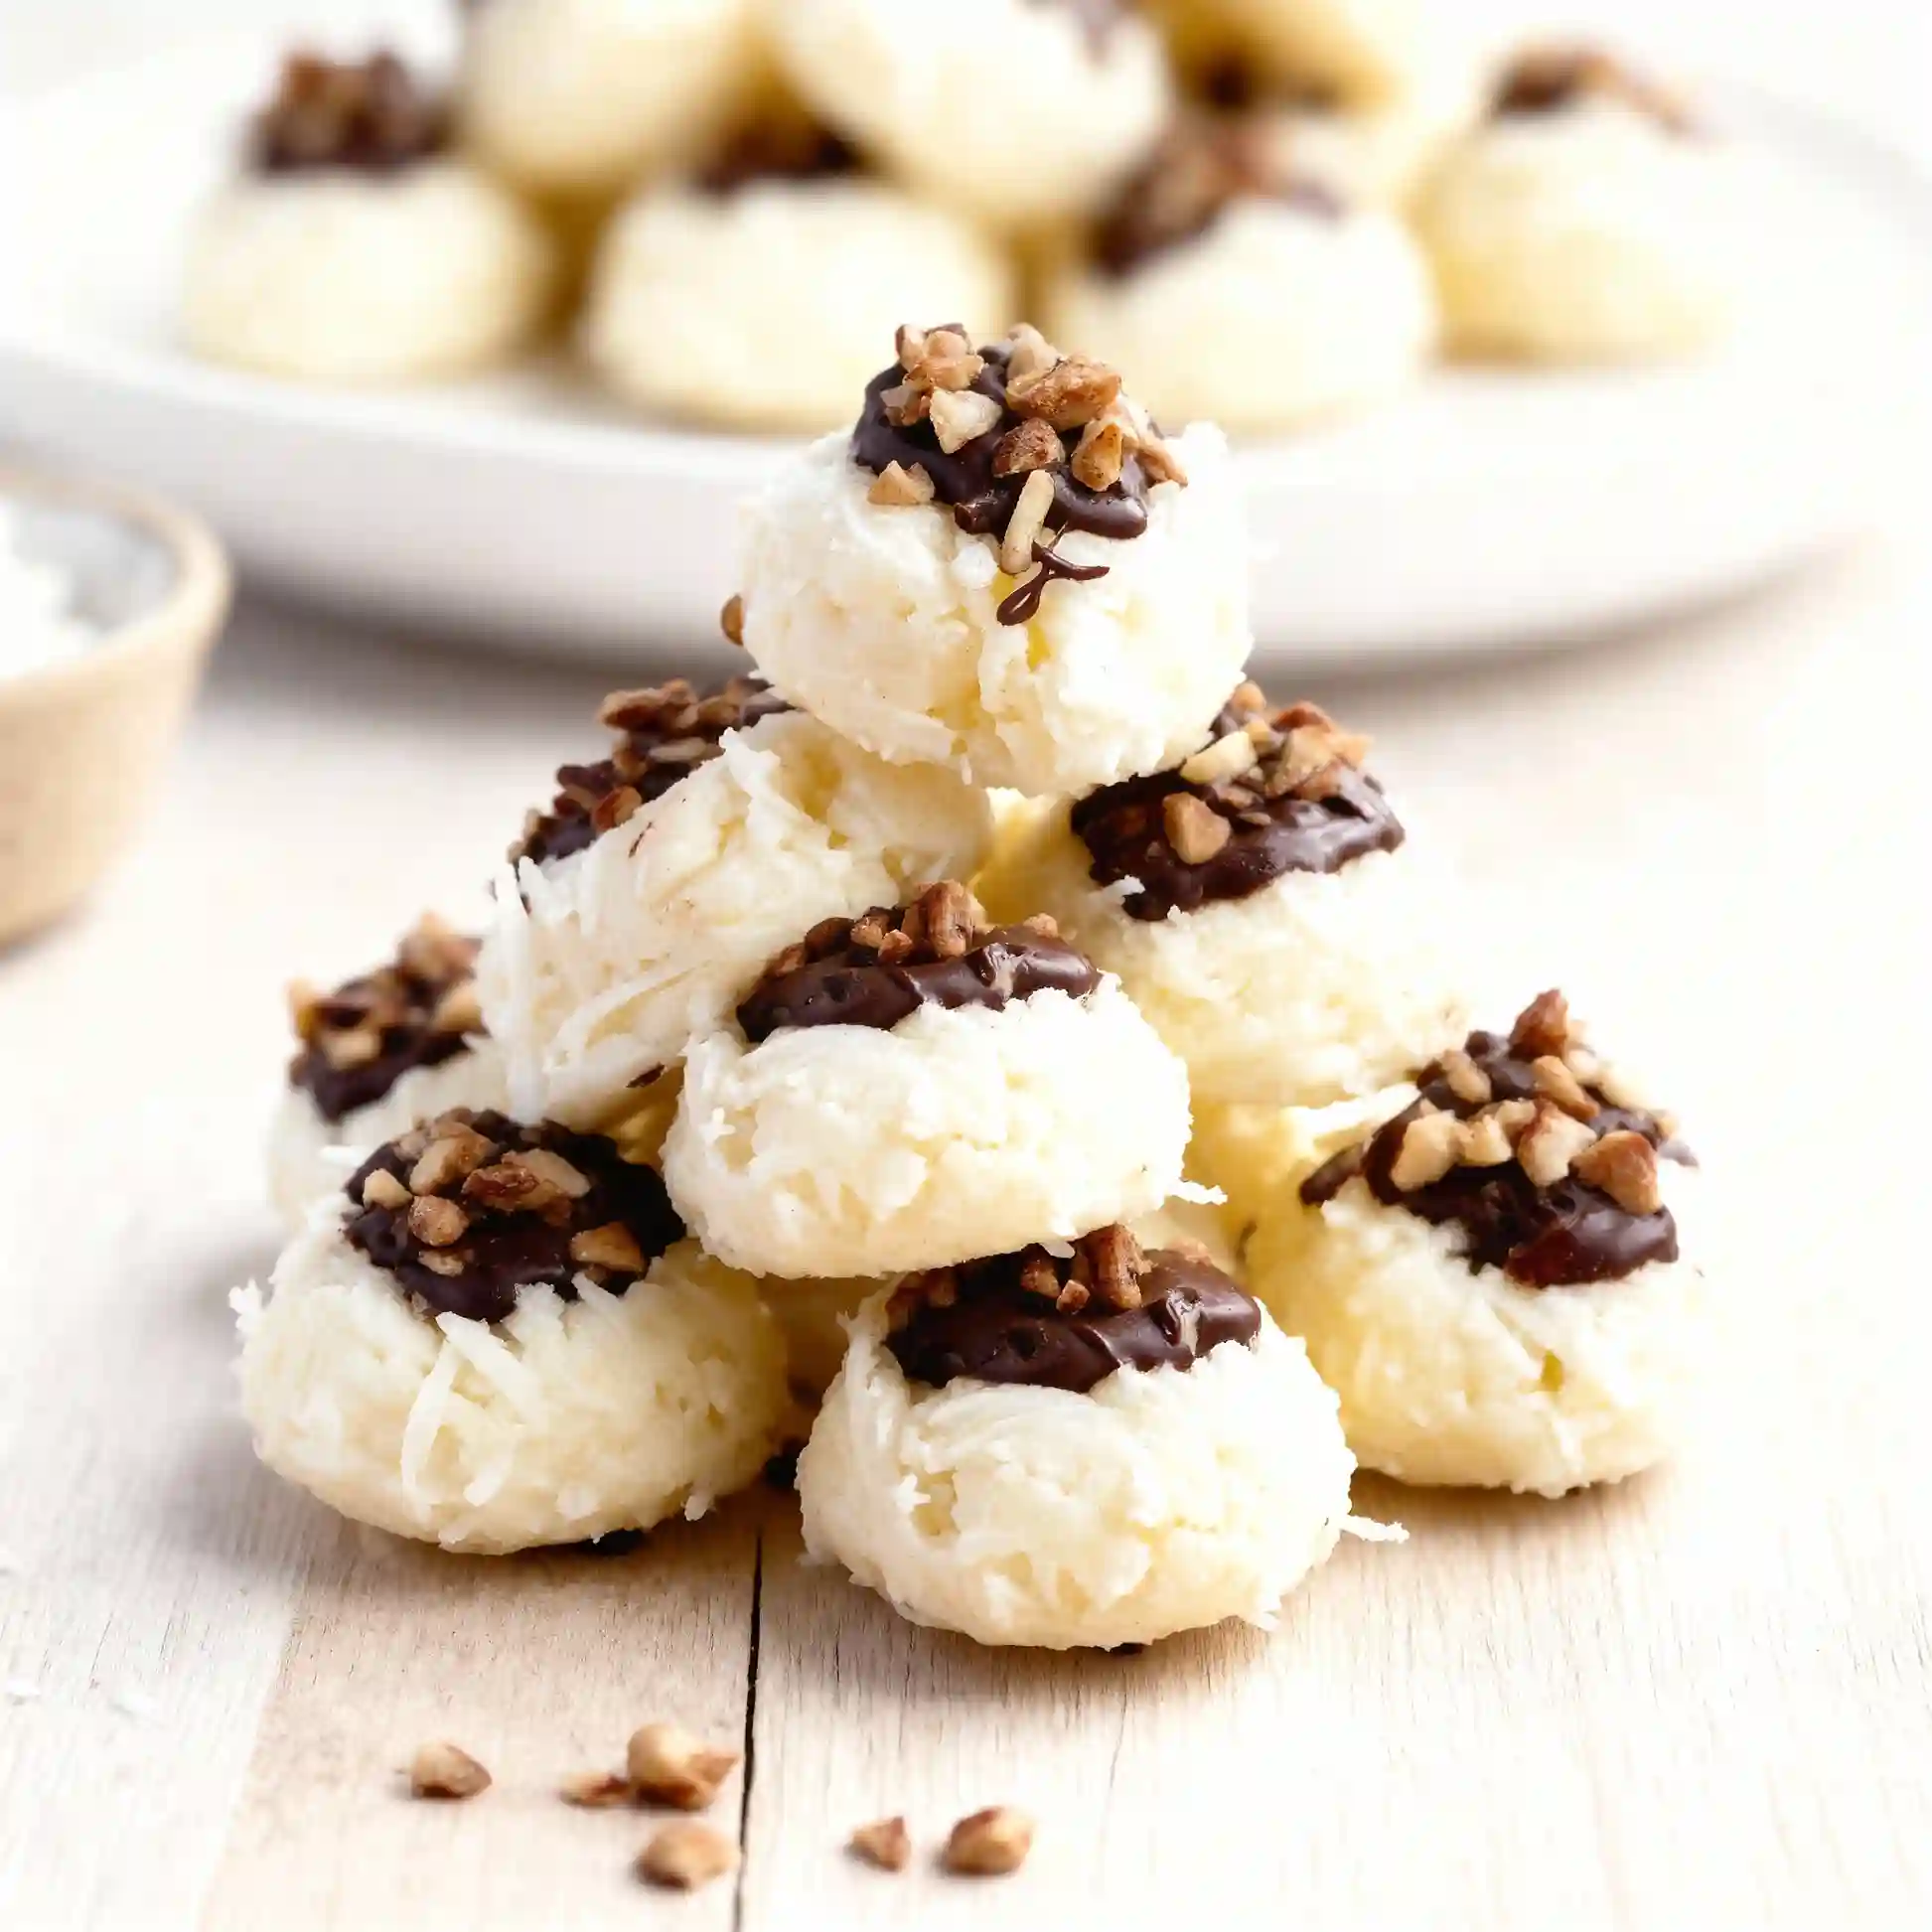
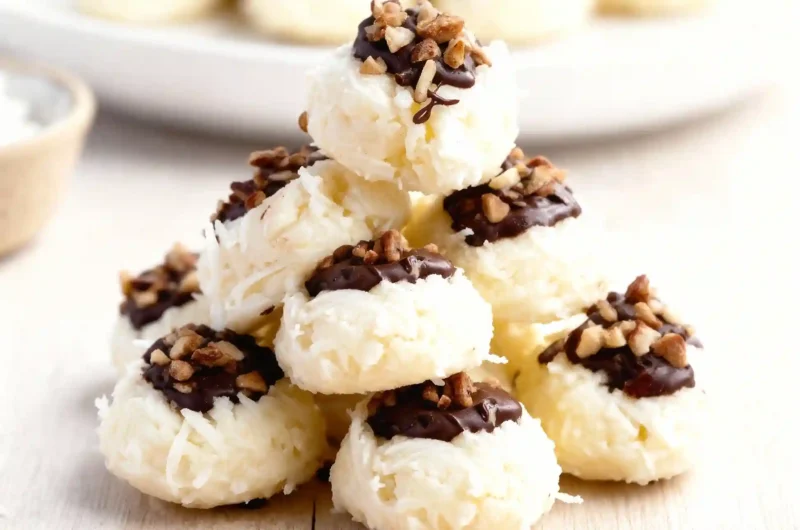
- Optional Chocolate Coating (for an extra treat): If you desire chocolate-dipped **Coconut Joy Candies**, melt your chosen chocolate in a microwave-safe bowl in 30-second intervals, stirring after each, until smooth. Alternatively, use a double boiler. If the chocolate is too thick, stir in 1 tablespoon of coconut oil until smooth. Dip each chilled coconut candy halfway or entirely into the melted chocolate. Use a fork or a dipping tool to gently lift them out, allowing excess chocolate to drip off.
- Set the Chocolate: Place the chocolate-dipped **Coconut Joy Candies** back on the parchment-lined baking sheet. Return them to the refrigerator for another 15-20 minutes, or until the chocolate has fully set and hardened.
- Enjoy! Your homemade **Coconut Joy Candies** are now ready to be savored. Store them in an airtight container in the refrigerator to maintain their freshness and texture.
Creative Ways to Serve Your **Coconut Joy Candies**
Once your irresistible **Coconut Joy Candies** are complete, the fun does not stop there! Presentation can elevate any dish, turning a simple treat into a delightful experience. These versatile little candies are perfect for a multitude of occasions, making them a fantastic addition to any dessert spread or as a standalone delightful bite. Here are some creative ways to serve and enjoy your homemade **Coconut Joy Candies**:
- Elegant Dessert Platter: Arrange your **Coconut Joy Candies** artfully on a dessert platter alongside fresh berries, a few dark chocolate squares, and perhaps some candied nuts. This creates a visually appealing and varied sweet dish for guests.
- Coffee or Tea Companion: Pair a couple of these delightful candies with your morning coffee or afternoon tea. The sweet, tropical notes of the coconut perfectly complement the rich flavors of hot beverages.
- Homemade Gift: Package your **Coconut Joy Candies** in a pretty box or a decorative bag. They make a thoughtful and much-appreciated homemade gift for friends, family, or colleagues during holidays or special occasions.
- Party Favors: For a special event, individually wrap each candy in clear cellophane and tie with a ribbon. These make charming and delicious party favors that guests will love to take home.
- Cupcake Toppers: For an extra special touch, you can place a smaller version of these **Coconut Joy Candies** on top of frosted cupcakes, adding texture and an exotic flavor twist.
- Ice Cream Sundae Topping: Roughly chop a few **Coconut Joy Candies** and sprinkle them over vanilla or chocolate ice cream for an amazing textural and flavor boost to your sundae.
- Picnic Basket Treat: Pack these chilled **Coconut Joy Candies** in a portable container for a delightful sweet treat to enjoy during a picnic or an outdoor gathering. They hold up well and are easy to transport.
Your **Coconut Joy Candies** Questions Answered
We know that even the simplest recipes can spark a few questions. Here are some frequently asked questions about making **Coconut Joy Candies**, along with our expert answers, to ensure your culinary journey is as smooth and joyful as possible. We want you to feel confident and inspired as you create these delightful treats.
Q: Can I use unsweetened shredded coconut instead?
A: Yes, you certainly can! If you use unsweetened shredded coconut, you might find the candies slightly less sweet. You can compensate for this by adding 1-2 tablespoons of powdered sugar to the mixture, tasting as you go, to achieve your desired sweetness level for your **Coconut Joy Candies**.
Q: How long do **Coconut Joy Candies** last?
A: When stored in an airtight container in the refrigerator, these candies will stay fresh and delicious for up to 1-2 weeks. They are best enjoyed within the first few days for optimal texture and flavor.
Q: Can I freeze these candies?
A: Absolutely! **Coconut Joy Candies** freeze beautifully. Place them in a single layer on a baking sheet until frozen solid, then transfer them to a freezer-safe bag or container. They can be frozen for up to 2-3 months. Thaw them in the refrigerator before serving.
Q: Are there any variations I can try with this recipe?
A: The possibilities are endless! You can mix in a tablespoon of cocoa powder for a chocolate-coconut flavor, add a few drops of almond extract for an amaretto twist, or even finely chopped nuts for added crunch. Another popular variation is to incorporate lemon or lime zest for a bright, citrusy note, giving your **Coconut Joy Candies** a refreshing zing.
Indulge in the Magic of Homemade **Coconut Joy Candies**
There you have it – a straightforward, incredibly delicious recipe for homemade **Coconut Joy Candies** that promises to bring a burst of tropical happiness into your life. These delightful treats are a testament to the fact that you do not need complicated techniques or exotic ingredients to create something truly magical in your kitchen. Whether you are whipping up a batch for a special occasion, preparing a thoughtful gift, or simply treating yourself to a well-deserved sweet moment, these **Coconut Joy Candies** are sure to hit the spot. The joy of creating something so simple yet so profoundly satisfying is what MagicInKitchen.com is all about.
We encourage you to roll up your sleeves, gather your ingredients, and experience the simple pleasure of making these incredible **Coconut Joy Candies** for yourself. Once you taste the homemade difference, you will never look back! We love hearing from our community, so please share your creations, tips, and any delicious variations you discover in the comments below. Your culinary adventures inspire us all. For more easy-to-follow, mouth-watering recipes that turn everyday cooking into something extraordinary, keep exploring MagicInKitchen.com – your go-to source for kitchen inspiration and pure culinary magic!
 Coconut Joy Candies
Cook Time: N/A
Total Time: 2 hours 45 minutes (includes chilling time)
Course: Dessert
Servings: 24 candies
Calories: Approximately 150-200 per candy (varies by size and ingredients)
Ingredients
- 3 cups sweetened shredded coconut
- 1 (14-ounce) can sweetened condensed milk
- 1/2 cup powdered sugar (confectioners’ sugar)
- 1 teaspoon vanilla extract
- Pinch of salt
- 12 ounces semi-sweet or dark chocolate chips
- 1 tablespoon coconut oil or shortening (for melting chocolate)
Instructions
- In a large bowl, combine the shredded coconut, sweetened condensed milk, powdered sugar, vanilla extract, and salt. Mix thoroughly with a spoon or your hands until all ingredients are well combined and a sticky, firm mixture forms.
2. Cover the bowl with plastic wrap and refrigerate for at least 30 minutes to firm up the mixture, making it easier to shape.
3. Line a baking sheet with parchment paper.
4. Remove the coconut mixture from the refrigerator. Scoop out about 1 tablespoon of the mixture at a time and shape it into small oval logs or round mounds. Place the shaped candies onto the prepared baking sheet.
5. Once all candies are shaped, place the baking sheet back into the refrigerator for at least 1 hour, or until the candies are very firm.
6. In a microwave-safe bowl, combine the chocolate chips and coconut oil (or shortening). Microwave in 30-second intervals, stirring well after each, until the chocolate is completely melted and smooth. Alternatively, melt the chocolate in a double boiler.
7. Remove the chilled coconut candies from the refrigerator. Using a fork or a dipping tool, carefully dip each coconut candy into the melted chocolate, allowing any excess chocolate to drip off.
8. Return the chocolate-dipped candies to the parchment-lined baking sheet.
9. Once all candies are dipped, place the baking sheet back into the refrigerator for another 30-60 minutes, or until the chocolate coating is completely set and firm.
10. Store Coconut Joy Candies in an airtight container in the refrigerator for up to 1 week.
Chef’s Notes: For best results, ensure the coconut mixture is thoroughly chilled before shaping, and the shaped candies are well chilled before dipping in chocolate. This prevents them from falling apart and helps the chocolate set quickly and smoothly.