Homemade Crescent Rolls – Fluffy, Buttery & Perfect
Flaky Perfection on Your Plate: The Ultimate Homemade Crescent Rolls

There are few aromas as utterly comforting and deeply nostalgic as that of freshly baked bread. And when it comes to truly magical moments in the kitchen, nothing quite compares to pulling a tray of golden-brown, impossibly flaky Crescent Rolls from the oven. Imagine that delicate pull-apart texture, the tender crumb, and the whisper of butter melting on your tongue. This isn’t just a recipe; it’s an invitation to create warmth, joy, and unforgettable memories around your table. At magicinkitchen.com, we believe that the best food comes from the heart, and these homemade crescent rolls are a testament to that philosophy. Forget the store-bought versions; once you experience the sublime satisfaction of baking your own, there’s simply no turning back. Let’s embark on this delightful baking journey together!
Recipe Card will be inserted here.
Quick Glance Summary
⏱️ Prep Time: 2 hours 15 minutes (active: 30 minutes), 🍽️ Servings: 16, 💥 Vibe: Buttery, Flaky, Comforting
Jump Ahead to What You Need
- What You’ll Need
- How to Make Perfect Crescent Rolls
- Fun Twists & Serving Ideas
- Reviews
- Frequently Asked Questions
- A Final Flaky Word
- Recipe Note
What You’ll Need
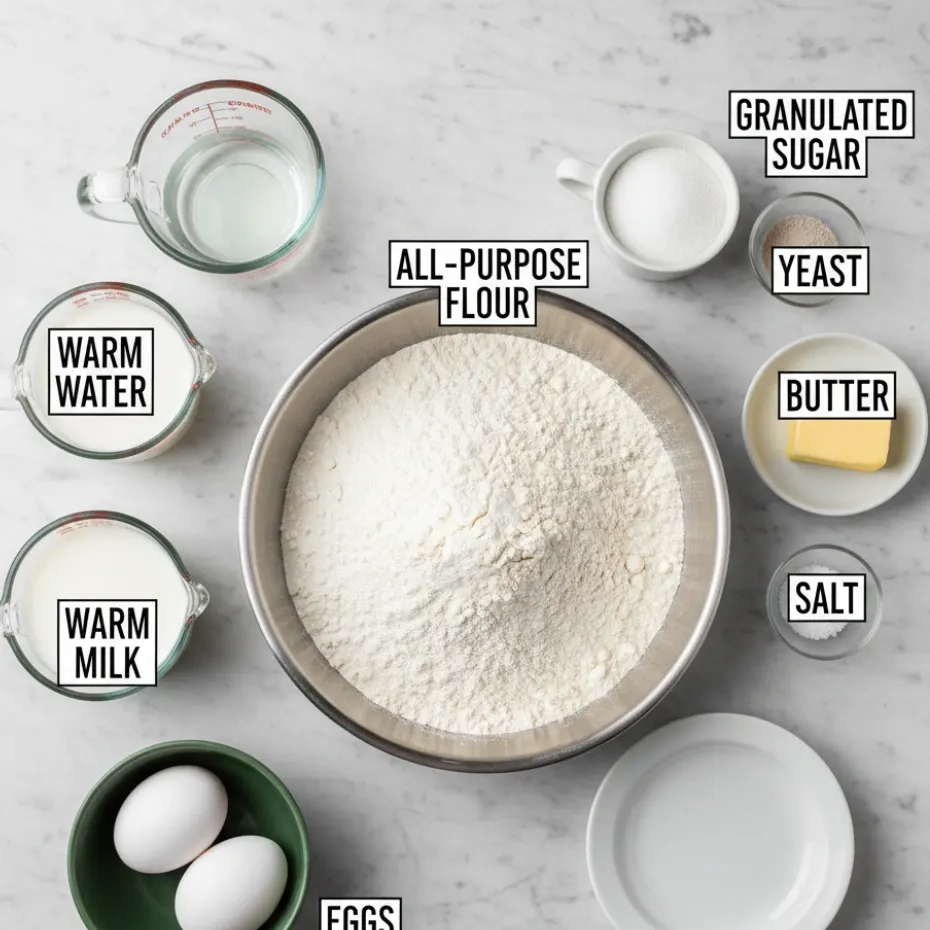
Creating these delightful homemade crescent rolls requires a handful of pantry staples, proving that extraordinary flavor often lies in simplicity. Gather these foundational ingredients, and you’re well on your way to baking perfection.
- 4 ½ cups (about 540g) All-Purpose Flour, plus more for dusting
- 2 ¼ teaspoons (1 packet) Active Dry Yeast
- ¼ cup Granulated Sugar
- 1 ½ teaspoons Salt
- 1 ¼ cups Whole Milk, warmed to 105-115°F (40-46°C)
- ½ cup (1 stick) Unsalted Butter, melted and cooled, plus 4 tablespoons softened for laminating
- 1 large Egg, at room temperature
- 1 Egg Yolk, for egg wash (optional, for golden sheen)
How to Make Perfect Crescent Rolls
Embark on the journey of crafting these irresistible homemade crescent rolls. Each step is designed to guide you towards a batch of golden, flaky perfection that will become a staple at your table. The key to truly spectacular crescent rolls lies in patience and precise execution, ensuring every bite is a dream.
- Activate the Yeast: In the bowl of a stand mixer (or a large mixing bowl), combine the warm milk and sugar. Sprinkle the active dry yeast over the top. Let it sit for 5-10 minutes until foamy, indicating the yeast is active.
- Combine Wet and Dry: Add the melted butter and egg to the yeast mixture, whisking gently. In a separate bowl, whisk together the flour and salt. Gradually add the dry ingredients to the wet ingredients, mixing on low speed with the dough hook attachment until a shaggy dough forms.
- Knead the Dough: Increase the mixer speed to medium-low and knead for 7-10 minutes until the dough is smooth, elastic, and pulls away from the sides of the bowl. It should be slightly tacky but not sticky. If kneading by hand, flour your surface lightly and knead for 10-15 minutes.
- First Rise: Lightly grease a large bowl. Place the dough in the bowl, turning once to coat. Cover with plastic wrap or a clean kitchen towel and let it rise in a warm place for 1 to 1 ½ hours, or until doubled in size.
- Shape and Laminate: Punch down the risen dough gently. Turn it out onto a lightly floured surface. Roll the dough into a large rectangle, approximately 18×12 inches. Spread the 4 tablespoons of softened butter evenly over two-thirds of the dough, leaving one-third uncovered. Fold the unbuttered third over the middle third, then fold the remaining buttered third over that (like a letter). Gently roll it out again to the same size. Repeat this folding and rolling process once more, without adding more butter. This creates layers for flaky crescent rolls.
- Second Rise & Cut: Roll the dough into a large circle, about 18-20 inches in diameter and ¼ inch thick. Using a pizza cutter or sharp knife, cut the circle into 16 wedges, similar to slicing a pizza.
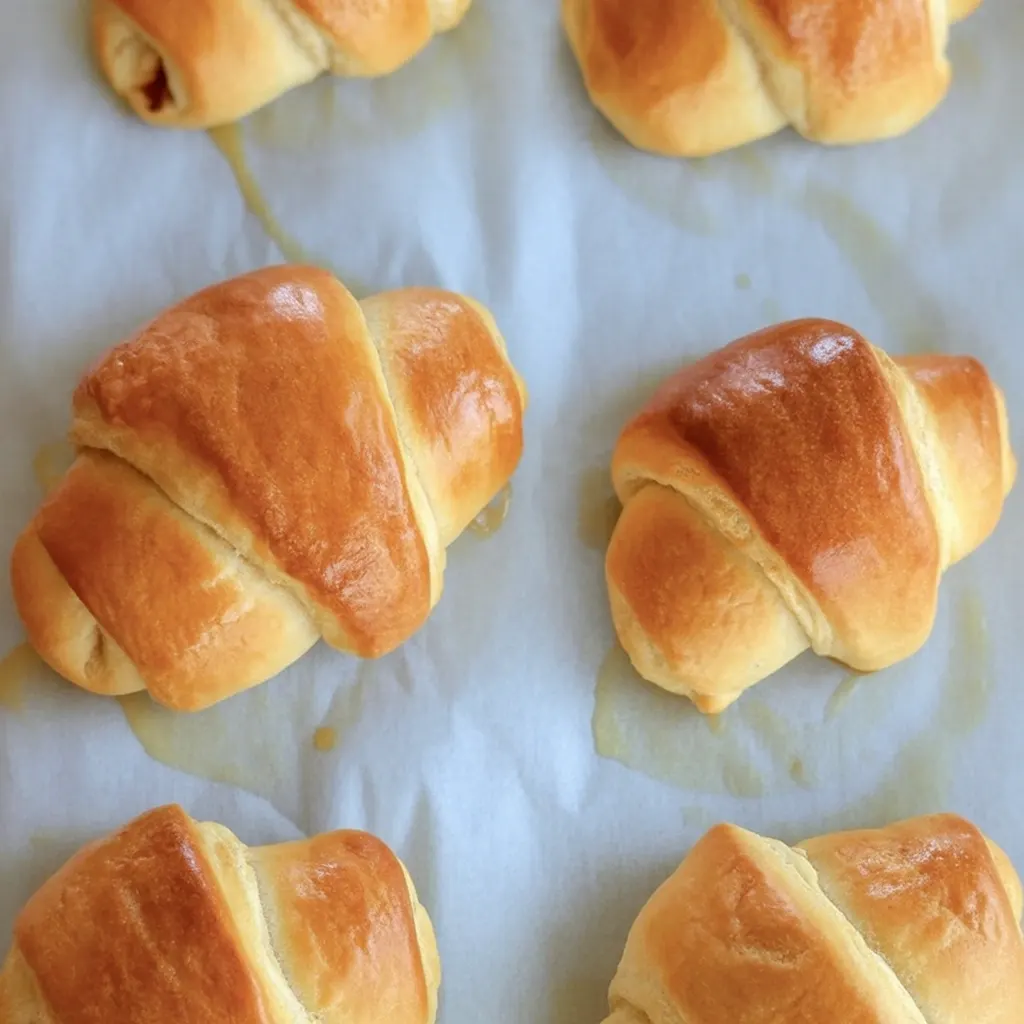
- Form the Crescent Rolls: Starting from the wide end of each wedge, gently roll it up towards the pointed tip, forming the classic crescent shape. Place the crescent rolls on a baking sheet lined with parchment paper, leaving about 2 inches between them.
- Final Proof: Cover the formed crescent rolls loosely with plastic wrap or a clean towel and let them rise in a warm spot for another 30-45 minutes, or until noticeably puffy. Preheat your oven to 375°F (190°C) during the last 15 minutes of proofing.
- Bake to Golden Perfection: If using, whisk the egg yolk with a tablespoon of water for an egg wash and lightly brush over the tops of the rolls. Bake for 12-18 minutes, or until golden brown and cooked through.
- Serve Warm: Remove the crescent rolls from the oven and transfer them to a wire rack. Serve immediately with extra butter, jam, or alongside your favorite meal.
Fun Twists & Serving Ideas
While classic homemade crescent rolls are divine on their own, their versatility allows for endless culinary creativity. Elevate your baking game with these delightful variations and serving suggestions:
- Garlic Herb Crescents: Before rolling, sprinkle minced garlic, fresh parsley, and a pinch of dried oregano over the buttered dough. Perfect with Italian meals.
- Sweet Cinnamon Sugar Swirls: Instead of savory, spread softened butter, then sprinkle generously with cinnamon sugar before rolling. A delightful breakfast treat or dessert.
- Cheesy Pull-Aparts: Before rolling each wedge, place a small cube of cheddar, Gruyère, or Monterey Jack cheese at the wide end. The melted cheese surprise is irresistible!
- Mini Sandwich Makers: Use smaller crescent rolls to make adorable sliders. Fill with ham and cheese, or a scoop of chicken salad for a party appetizer.
- Soup & Stew Sidekick: These soft, buttery crescent rolls are ideal for soaking up the rich broths of your favorite soups, stews, and gravies.
Reviews
We absolutely adore hearing about your experiences in the kitchen. Here’s what some of our amazing readers have to say about these homemade crescent rolls:
🌟🌟🌟🌟🌟 “Absolutely divine!” – Sarah L.
“I was intimidated by making crescent rolls from scratch, but this recipe made it so easy to follow. They turned out incredibly flaky and buttery, just like the bakery. My family devoured them!”
🌟🌟🌟🌟🌟 “A holiday staple now!” – Mark T.
“These crescent rolls are a game-changer. I used to buy store-bought, but never again. The texture and flavor are incomparable. They were the star of our Thanksgiving dinner.”
🌟🌟🌟🌟🌟 “Better than Grandma’s!” – Emily R.
“Don’t tell my grandma, but these crescent rolls are the best I’ve ever had. So tender, so rich. The instructions for laminating really make a difference for that perfect flakiness. Thank you, magicinkitchen.com!”
Frequently Asked Questions
Q: Can I make crescent rolls ahead of time?
A: Absolutely! You can prepare the dough up to the end of the first rise, then punch it down, shape the crescent rolls, and refrigerate them overnight. The next day, let them come to room temperature and proof for about 1-1.5 hours before baking. Alternatively, you can freeze shaped, unbaked rolls for up to a month. Thaw overnight in the fridge and then proof.
Q: What’s the secret to flaky crescent rolls?
A: The secret lies in the lamination process – folding softened butter into the dough. This creates distinct layers that puff up in the oven, giving you that signature flaky texture. Don’t rush this step, and ensure your butter is softened, not melted, for the best results.
Q: Can I use instant yeast instead of active dry yeast?
A: Yes, you can! If using instant yeast, you can mix it directly with the dry ingredients (flour, sugar, salt) without activating it first in the milk. Just ensure your milk is still warm to help the yeast get going. The rise times might also be slightly shorter with instant yeast.
Q: How do I store leftover crescent rolls?
A: Store leftover crescent rolls in an airtight container at room temperature for up to 2-3 days. For longer storage, freeze them in a freezer-safe bag for up to 3 months. Reheat gently in the oven at 300°F (150°C) for 5-10 minutes, or in the microwave for a few seconds until warm.
A Final Flaky Word
The journey to crafting perfect homemade Crescent Rolls is truly a rewarding one, culminating in a culinary masterpiece that speaks volumes of comfort and care. From the gentle knead of the dough to the glorious aroma that fills your home, every step is a testament to the magic that happens when simple ingredients transform into something extraordinary. These flaky, buttery rolls are more than just a side dish; they are an experience, a memory waiting to be made around your family table. We at magicinkitchen.com encourage you to embrace the joy of baking and discover the unparalleled satisfaction of serving these incredible crescent rolls. Trust us, your loved ones will thank you!
Recipe Note
For an extra boost of flavor and a deeper golden hue, consider brushing your crescent rolls with a little melted butter immediately after they come out of the oven. This adds an irresistible sheen and enhances their already incredible taste and texture.

Crescent Rolls
Cook Time: 10 minutes
Total Time: 35 minutes
Course: Bread
Servings: 8 rolls
Calories: 120 per roll (approximate)
Ingredients
- 1 can (8 oz) refrigerated crescent dinner rolls
- Optional: 2 tablespoons unsalted butter, melted (for brushing)
Instructions
1.Preheat oven to 375°F (190°C). Unroll dough on an ungreased baking sheet or a baking sheet lined with parchment paper.
2. Separate dough into 8 triangles along perforations.
3. Starting at the wide end of each triangle, roll up loosely to the opposite point.
4. Place rolls point-side down on the baking sheet, shaping them into a crescent if desired.
5. Bake for 12-15 minutes or until golden brown. If desired, brush with melted butter immediately after removing from the oven. Serve warm.
Chef’s Notes: These classic crescent rolls are incredibly easy to make using refrigerated dough, perfect for a quick breakfast, dinner side, or snack. They come out golden brown, flaky, and tender. A staple for holiday meals or any day you need a warm, comforting bread.