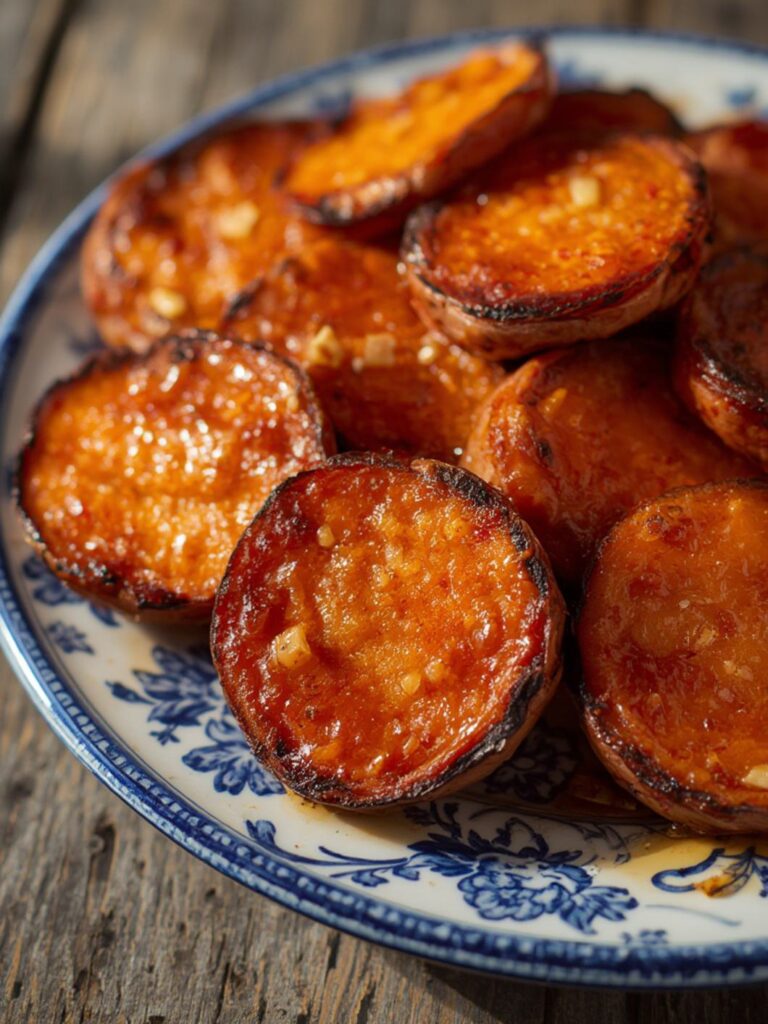
Homemade Hard Candy – Colorful Treat Kids Love
Learn how to make homemade Hard Candy with this quick and easy recipe from MagicInKitchen.com. Perfect for gifts or a sweet treat!
Mastering the Art of Homemade Hard Candy

Remember those delightful little jewels of sweetness, the ones that sparkled in candy dishes or offered a burst of flavor that lasted and lasted? There’s something truly magical about a perfectly crafted Hard Candy , a simple pleasure that transports you back to childhood. But what if I told you that creating these crystalline confections in your own kitchen is not only possible but incredibly rewarding? Forget store-bought; it’s time to unlock the secret to homemade Hard Candy, a treat that’s surprisingly straightforward to make and offers endless possibilities for flavor and fun.
At MagicInKitchen.com, we believe that the best memories are often made right in your kitchen, and this Hard Candy recipe is a perfect example. Whether you’re looking for a delightful edible gift, a fun project to do with family, or simply craving that nostalgic crunch and vibrant taste, this guide will walk you through every step. You’ll be amazed at how quickly you can transform a few basic ingredients into a beautiful batch of customized Hard Candy. Get ready to impress your friends and family with these vibrant, flavorful, and utterly delicious homemade treasures. Let’s dive into the sweet science of making perfect Hard Candy!
Ingredients for Your Perfect Hard Candy
Crafting delicious hard candy starts with a handful of simple, readily available ingredients. These core components will form the basis of your sweet creation. For best results, measure everything accurately before you begin your candy-making adventure.
- 2 cups granulated sugar
- ⅔ cup light corn syrup
- ¾ cup water
- 1 teaspoon flavored extract (e.g., peppermint, cherry, lemon, cinnamon)
- Food coloring (gel or liquid, optional)
- Powdered sugar or cornstarch (for dusting)
- Non-stick cooking spray or a lightly oiled baking sheet/silicone mat
Preparation Instructions for Your Homemade Hard Candy
Making hard candy is a process that requires attention and precision, especially when it comes to temperature. Follow these detailed steps carefully for the best results and a batch of crystal-clear, flavorful hard candy.
- Gather Your Tools: Before you even think about mixing ingredients, ensure you have all your tools ready. You’ll need a heavy-bottomed saucepan (at least 3-quart), a candy thermometer (this is crucial for perfect hard candy), a long-handled spoon, a baking sheet lined with a silicone mat or lightly greased parchment paper, and your flavorings and food coloring close by.
- Combine Sugar, Corn Syrup, and Water: In your heavy-bottomed saucepan, combine the granulated sugar, light corn syrup, and water. Stir these ingredients together over medium heat until the sugar is completely dissolved. It’s important not to rush this step; clear dissolution prevents crystallization in your finished hard candy.
- Bring to a Boil and Monitor Temperature: Once the sugar is dissolved, stop stirring. Insert your candy thermometer, making sure the bulb doesn’t touch the bottom of the pan. Increase the heat to medium-high and bring the mixture to a rolling boil. Continue to cook, without stirring, until the thermometer reaches exactly 300°F (149°C), also known as the “hard crack” stage. This is the critical temperature for achieving that signature hard candy texture.
- Remove from Heat and Add Flavor/Color: As soon as the mixture hits 300°F, immediately remove the pan from the heat. Carefully (the mixture will be extremely hot) and quickly stir in your chosen flavored extract and a few drops of food coloring, if using. Work fast, as the hard candy mixture will start to cool and thicken quickly.
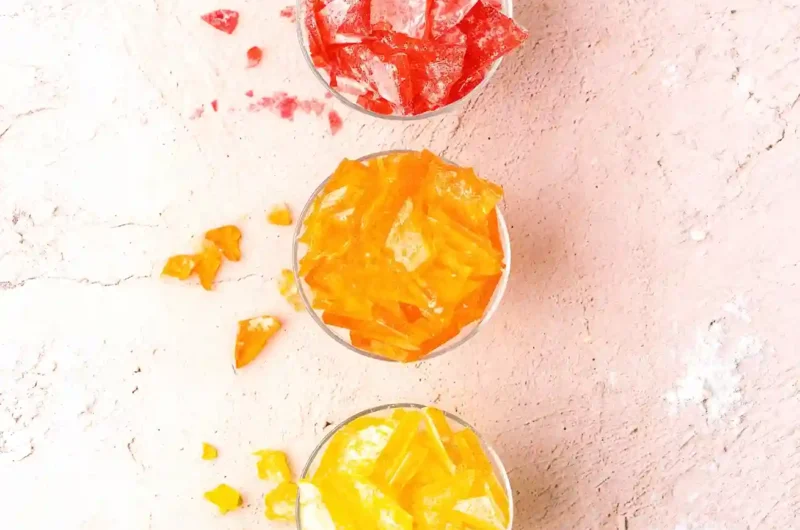
- Pour and Cool: Immediately and carefully pour the hot hard candy mixture onto your prepared baking sheet. You can pour it into thin sheets to break later or into molds if you’re using them. Be extremely cautious as the molten sugar is very hot and can cause severe burns. Allow the hard candy to cool completely and harden, which usually takes about 30-60 minutes, depending on the thickness.
- Break and Dust: Once the hard candy is completely cool and brittle, you can break it into smaller, irregular pieces using a small hammer or by dropping the sheet gently onto a hard surface. If using molds, simply pop the hardened hard candies out. To prevent the pieces from sticking together, dust them lightly with powdered sugar or cornstarch. Place the powdered sugar in a plastic bag, add the broken hard candy pieces, and shake gently to coat.
- Store Properly: Store your homemade hard candy in an airtight container at room temperature. For best quality and to prevent stickiness, you might want to add a small desiccant packet (like the ones found in vitamin bottles) to absorb any moisture. Enjoy your delightful homemade hard candy!
Serving Suggestions for Your Sweet Creations

Homemade hard candy isn’t just a treat; it’s a versatile confection that can add a touch of sweetness and charm to various occasions. Once your beautiful batch of hard candy is ready, consider these creative serving suggestions:
- Elegant Gift Bags: Package your colorful hard candy pieces in small cellophane bags tied with a pretty ribbon. They make delightful party favors, holiday gifts, or a thoughtful thank-you gesture.
- Candy Dish Centerpiece: Arrange an assortment of different flavored and colored hard candy in a beautiful glass candy dish. It adds a vibrant pop of color and a tempting treat to any coffee table or dining spread.
- Topping for Desserts: Crush some of the hard candy into smaller shards and use them as a decorative and flavorful topping for ice cream sundaes, cupcakes, or even a fancy chocolate mousse. Peppermint hard candy works exceptionally well this way during the holidays.
- Hot Beverage Stirrers: For a unique twist, use longer, thinner pieces of hard candy as stirrers for hot chocolate or coffee. A cinnamon or peppermint hard candy can infuse your drink with extra flavor as it dissolves.
- Edible Decorations: If you’ve used molds to create specific shapes, these hard candies can be used as edible decorations for cakes or gingerbread houses. Imagine tiny star or heart-shaped hard candy adorning your holiday treats!
- Just for Snacking: Of course, the simplest way to enjoy your homemade hard candy is to simply pop a piece in your mouth and savor the lingering flavor.
Frequently Asked Questions About Making Hard Candy
New to making hard candy? Don’t worry! Here are some common questions and helpful answers to ensure your candy-making journey is a sweet success.
Q: Why did my hard candy turn sticky or grainy?
A: Stickiness often occurs if the candy didn’t reach the “hard crack” stage (300°F/149°C) or if it absorbed too much moisture from the air after cooling. Graininess can happen if sugar crystals formed on the sides of the pan during cooking and then fell back into the mixture. To prevent this, avoid stirring once the mixture boils and you can brush down the sides of the pan with a wet pastry brush during the initial heating phase to dissolve any crystals.
Q: Can I use different flavors and colors for my hard candy?
A: Absolutely! This is where the fun begins. You can use almost any oil-based or highly concentrated extract (like LorAnn Oils for candy making) to flavor your hard candy. For colors, gel food coloring works best as it’s concentrated and won’t add extra liquid to your mixture. Experiment with combinations like lemon-lime, cherry-almond, or even root beer!
Q: How long does homemade hard candy last?
A: When stored correctly in an airtight container at room temperature, away from humidity, homemade hard candy can last for several weeks, even up to a month or two. Humidity is its biggest enemy, causing it to become sticky. Adding a desiccant packet to your storage container can help extend its shelf life.
Q: Do I need a candy thermometer?
A: Yes, a candy thermometer is essential for making hard candy. Achieving the precise temperature of 300°F (149°C) is critical for the candy to reach the “hard crack” stage, ensuring it hardens properly and maintains its texture. Eyeballing the temperature will likely lead to soft or sticky results.
Q: Can I re-melt hard candy if it didn’t turn out right?
A: It’s generally not recommended to re-melt and re-cook hard candy. The process of re-heating can cause the sugar to caramelize too much, altering the flavor and potentially making it too brittle or difficult to work with. It’s usually best to start a fresh batch if your first attempt doesn’t meet expectations.
Conclusion: Your Sweet Journey with Homemade Hard Candy
There’s a unique satisfaction that comes from creating something so delightful from scratch, and this homemade Hard Candy recipe is truly one of the most rewarding. From the mesmerizing shimmer of the molten sugar to the satisfying crack as it hardens, every step is a testament to the magic that happens when simple ingredients are transformed with a little care and precision. You’ve now unlocked the secrets to crafting your very own jewel-like confections, customized to your exact taste preferences.
We encourage you to experiment with different flavors, colors, and even molds to make each batch of hard candy uniquely yours. Imagine peppermint swirls for the holidays, zesty citrus drops for summer, or rich butterscotch for a cozy evening treat. The possibilities are truly endless, and the joy of sharing these homemade treasures with friends and family is immeasurable.
So, go ahead, gather your ingredients, fire up your stove, and dive into the wonderful world of candy making. We’re confident you’ll love the results. Once you’ve perfected your batch of hard candy, we’d love to hear about your experience! Share your favorite flavor combinations or any tips you discovered in the comments section below. And for more incredible recipes that bring magic to your kitchen, be sure to explore MagicInKitchen.com. Happy candy making!
 Hard Candy
Cook Time: N/A
Total Time: 1 hour 35 minutes
Course: Confectionery
Servings: Approx. 50 small pieces
Calories: Approx. 50-70 calories per piece (varies)
Ingredients
- 2 cups granulated sugar
- 2/3 cup light corn syrup
- 3/4 cup water
- 1 teaspoon concentrated candy flavoring oil (e.g., peppermint, cherry, cinnamon)
- 1/4 teaspoon food coloring (optional)
- Powdered sugar (for dusting, optional)
- Cooking spray or light oil (for molds/baking sheet)
Instructions
- Prepare your workspace: Lightly spray silicone molds or a large parchment-lined baking sheet with cooking spray or oil. Have everything ready as the candy sets very quickly.
2. In a heavy-bottomed saucepan, combine the granulated sugar, light corn syrup, and water. Stir over medium heat until the sugar is completely dissolved.
3. Insert a candy thermometer, ensuring it doesn’t touch the bottom of the pan. Increase heat to medium-high and bring the mixture to a boil without stirring.
4. Continue to cook, without stirring, until the mixture reaches the ‘hard crack’ stage, which is between 300°F and 310°F (149°C-154°C). This will take approximately 15-20 minutes.
5. Once the desired temperature is reached, immediately remove the saucepan from the heat. Carefully and quickly stir in the concentrated flavoring oil and food coloring (if using). The mixture will bubble vigorously.
6. Immediately and carefully pour the hot candy mixture into your prepared silicone molds or onto the greased parchment-lined baking sheet. If using a baking sheet, you can spread it thinly for shards or try to form drops.
7. Allow the candy to cool completely at room temperature for at least 1 hour, or until fully hardened. Do not refrigerate, as this can cause stickiness.
8. Once hard, if using molds, pop out the candies. If poured onto a baking sheet, break the hardened candy into smaller, irregular pieces using a metal spatula or by gently cracking the sheet.
9. If desired, lightly dust the candy pieces with powdered sugar to prevent sticking.
10. Store the hard candy in an airtight container at room temperature. Humidity is the enemy of hard candy, so keep it sealed.
Chef’s Notes: Always use a reliable candy thermometer for accurate results. Be extremely cautious when working with hot sugar; it can cause severe burns. Work quickly once the flavoring and coloring are added, as the candy sets very fast. Silicone molds work best for shaping, but you can also pour the mixture onto a parchment-lined baking sheet and break it into shards once cool. For best flavor, use concentrated candy flavoring oils, not extracts.