Free Amigurumi Bear Lev Pattern – Easy Holiday Outfit Tutorial
Create your own adorable Amigurumi Bear Lev Pattern ! This easy-to-follow crochet pattern is perfect for holiday gifts or as a charming addition to your handmade collection.
Free Amigurumi Bear Lev Pattern – Easy Holiday Outfit Tutorial
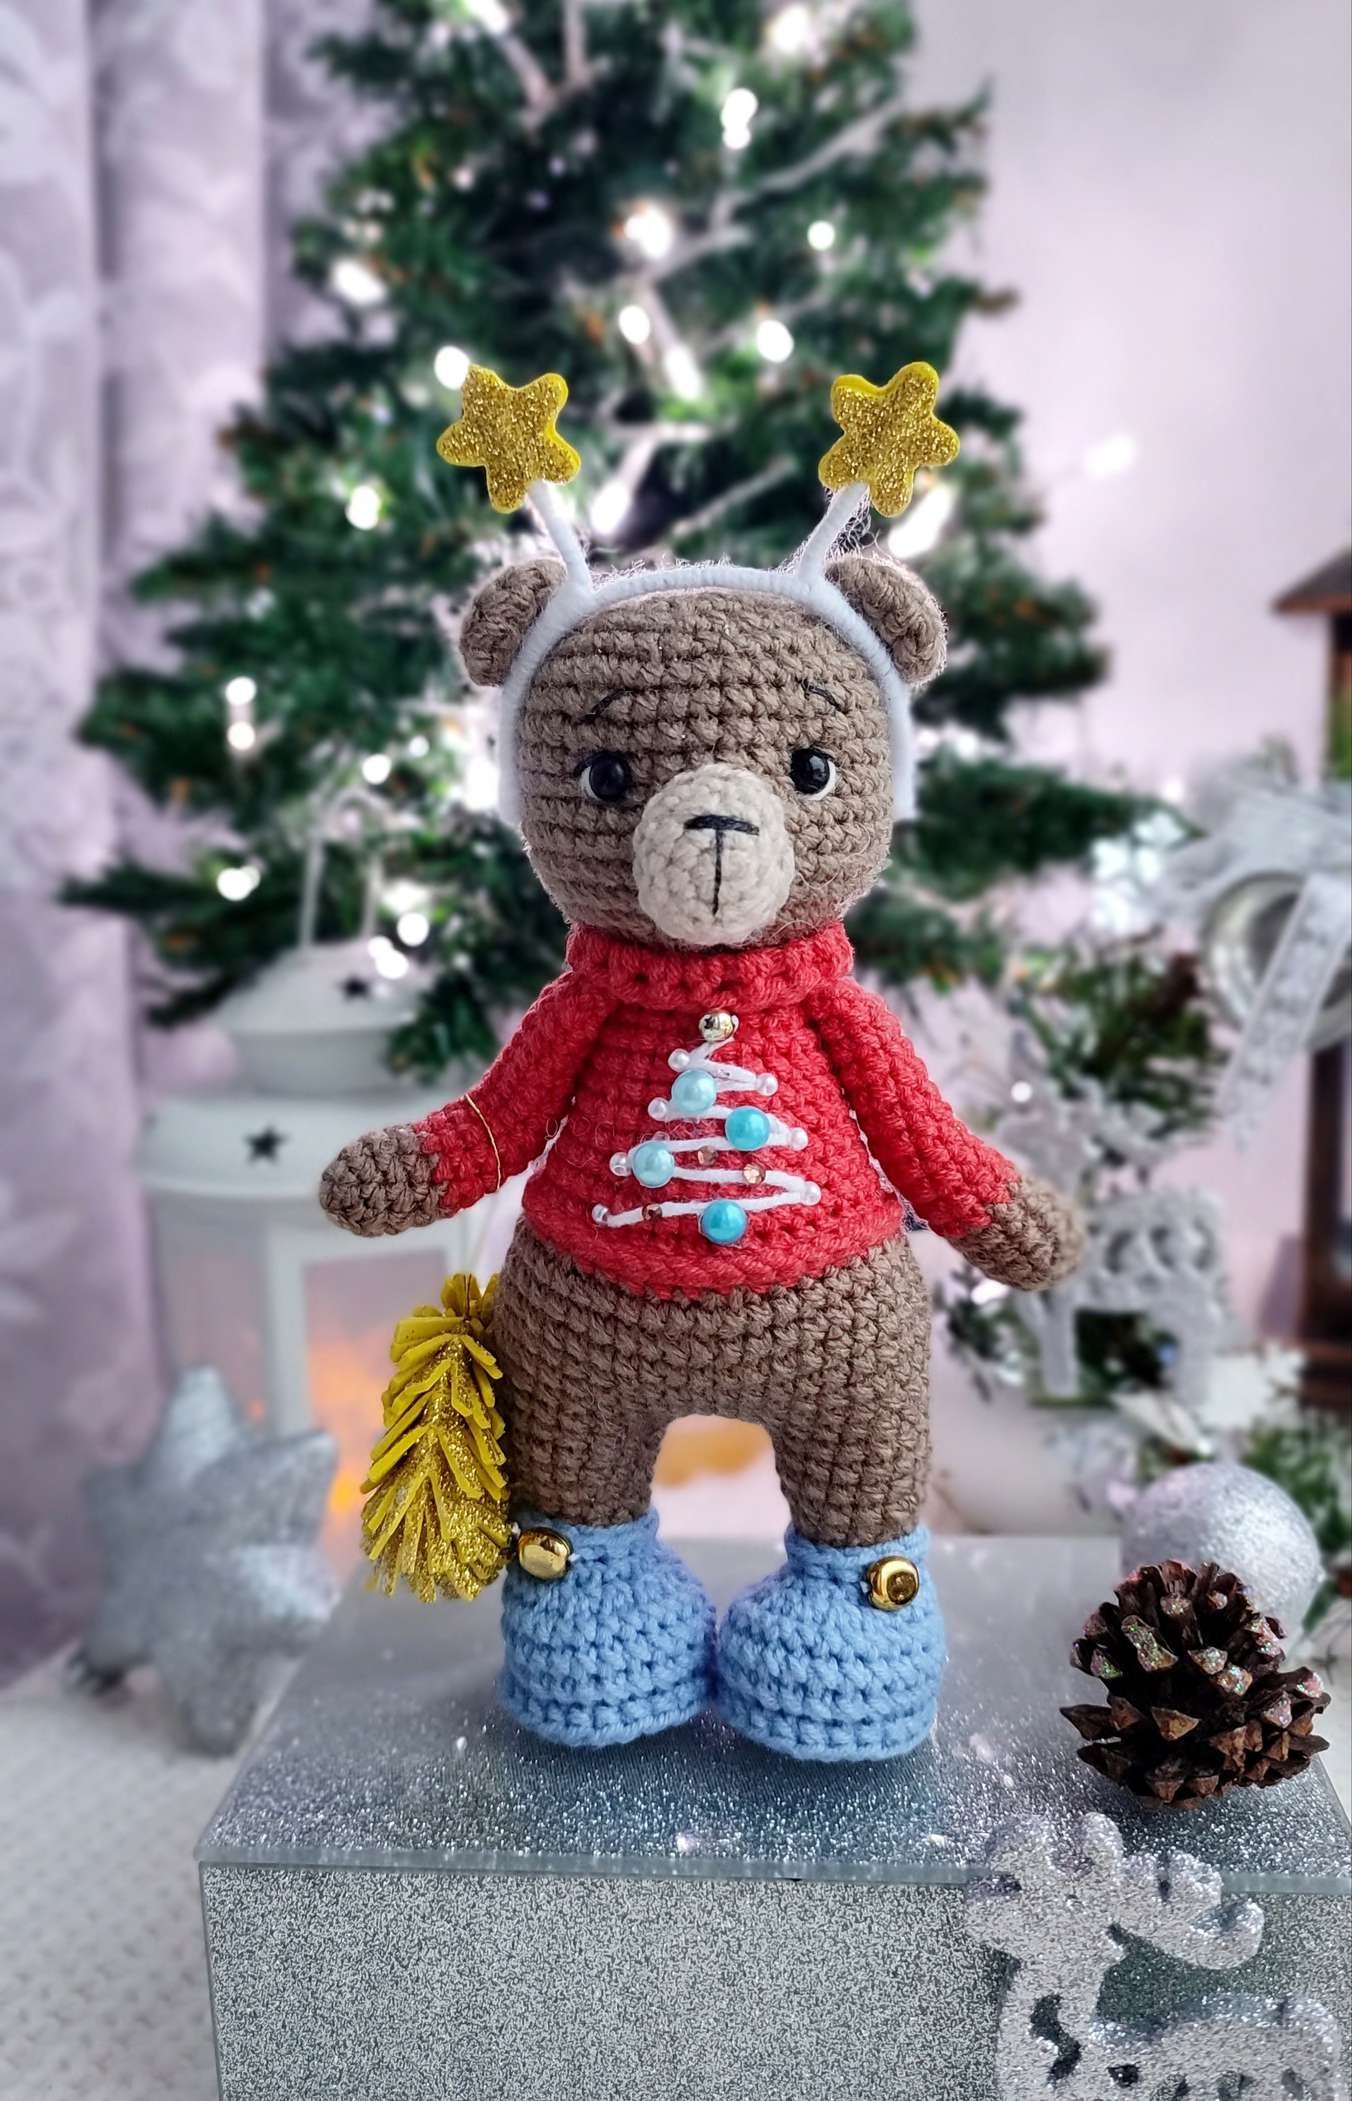
Table of Contents
Materials You Will Need
- YarnArt Jeans (or similar sport weight yarn)
- 2.0mm or 2.5mm crochet hook
- Stitch markers
- Fiberfill for stuffing
- Tapestry needle
- Safety eyes (optional)
Step-by-Step Instructions
Step 1
Step 1: Prepare materials: gather black half-beads (6mm, 2 pcs) for eyes, yarn, hook (2.0-2.5mm), stitch markers, fiberfill stuffing, tapestry needle, and optional safety eyes.

Step 2
Step 2: Review abbreviations: КА = magic ring; сбн = single crochet; вп = chain stitch; пр = increase; уб = decrease; зпп/ппп = half double crochet; ССН = double crochet; (…)*n = repeat n times.
Step 3
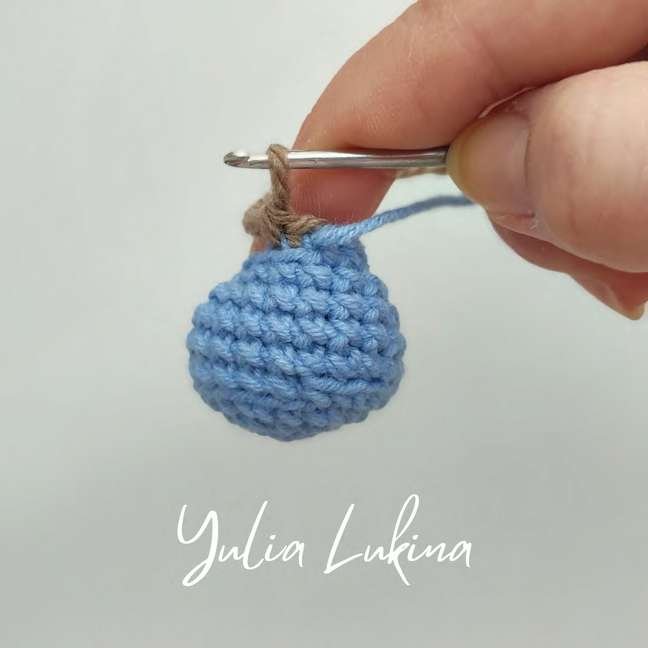
Step 3: Arm base (brown): Round 1: 5 sc in magic ring; Round 2: inc each st (10 sc); Rounds 3-5: sc even (10 sc for 3 rounds); Rounds 6-16: sc even (10 sc for 11 rounds).
Step 4
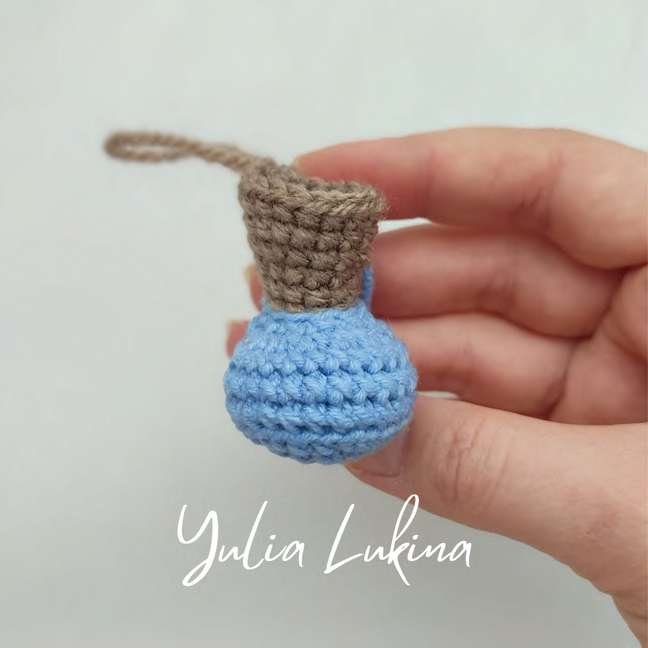
Step 4: Arm sleeve & closing (red): Optionally insert wire for posability or lightly stuff arm halfway; fold tip flat and work 5 sc across to close; Round 1: 6 sc in magic ring; Round 2: inc each st (12 sc); Round 3: (1 sc, inc) × 6 (18 sc).

Step 5
Step 5: Leg/foot base (blue): Round 4: 1 sc, inc, (2 sc, inc)×5, 1 sc (24 sc); Round 5: sc even in back loops only (24 sc); Rounds 6-7: sc even (24 sc for 2 rounds); Round 8: 6 sc, (dec)×6, 6 sc (18 sc); Round 9: 3 sc, (dec)×6, 3 sc (12 sc).

Step 6
Step 6: Leg continuation (brown): Continue with blue yarn for foot, do not cut; Round 10: sc even in back loops only (12 sc); Rounds 11-12: sc even (12 sc for 2 rounds); Round 13: (3 sc, inc)×3 (15 sc); Rounds 14-15: sc even (15 sc for 2 rounds) + add extra sc for alignment as needed.
Step 7
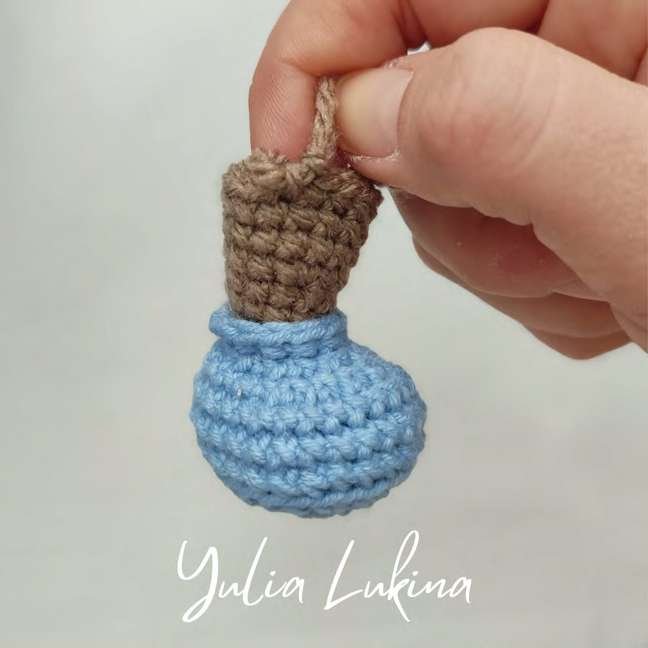
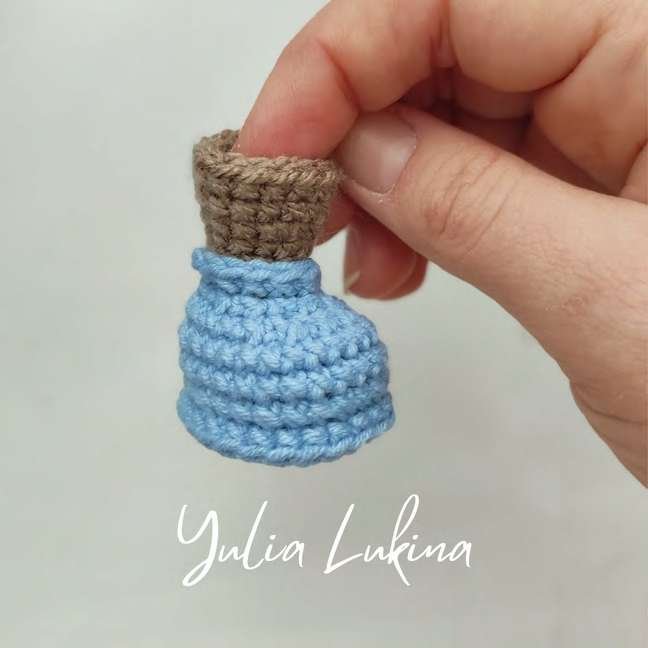
Step 7: Second leg & shoe detail: Work additional sc for alignment on first leg; return to shoe sole: work sc in each front loop of hdc around; second leg: work identically to first leg.
Step 8
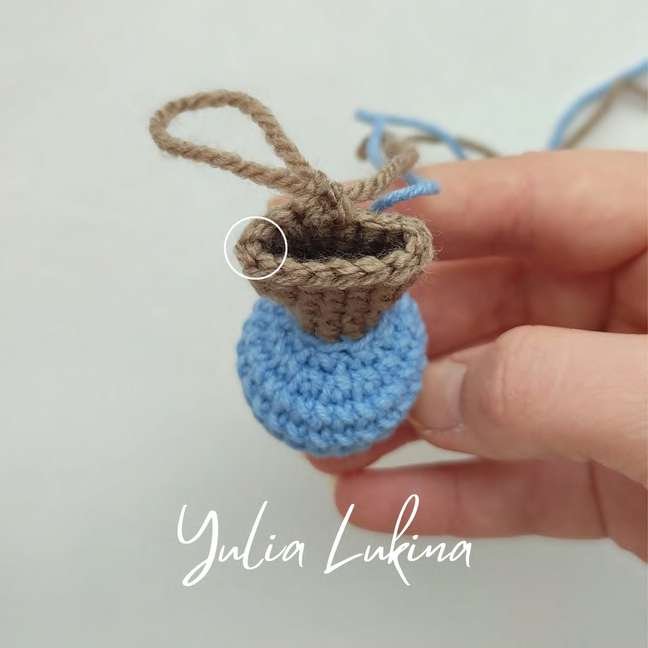
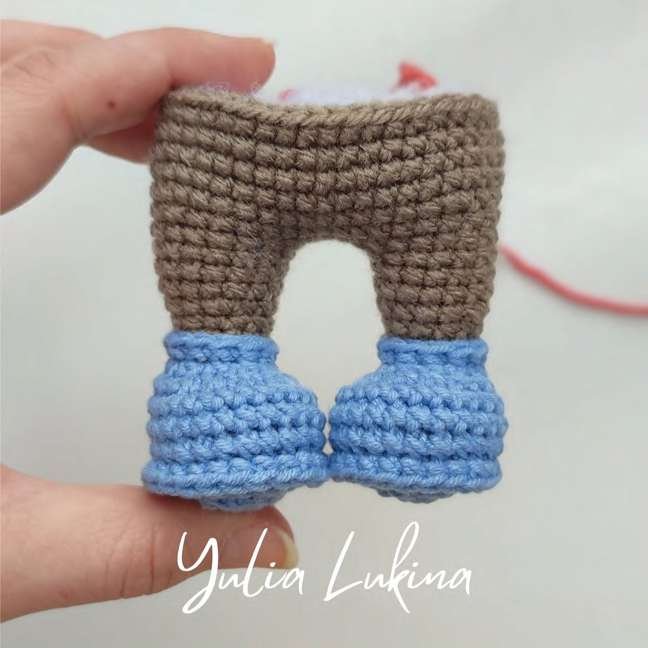
Step 8: Body & leg joining: Add 11 extra sc to leg for alignment; join legs: ch 3, join to first leg; Round 16: 15 sc on first leg, 3 sc on ch, 15 sc on second leg, 3 sc on ch (36 sc); Round 17: sc even (36 sc); Round 18: (5 sc, inc)×6 (42 sc); Rounds 19-22: sc even (42 sc for 4 rounds) + work half round to center back.
Step 9
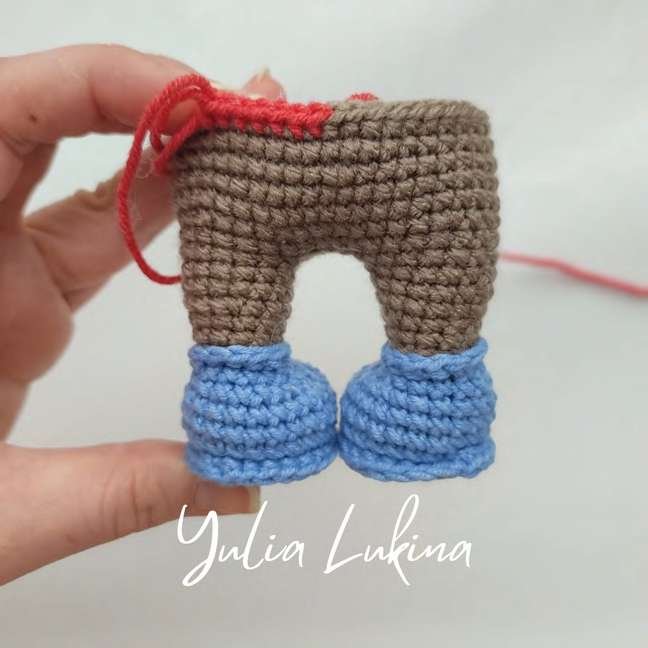
Step 9: Body shaping (red): Change to red; Round 23: (5 sc, dec)×6 (36 sc); Round 24: sc even in back loops only (36 sc); Round 25: sc even (36 sc); Round 26: 2 sc, dec, (4 sc, dec)×5, 2 sc (30 sc); Rounds 27-28: sc even (30 sc for 2 rounds); Round 29: (3 sc, dec)×6 (24 sc); Rounds 30-31: sc even (24 sc for 2 rounds).
Step 10
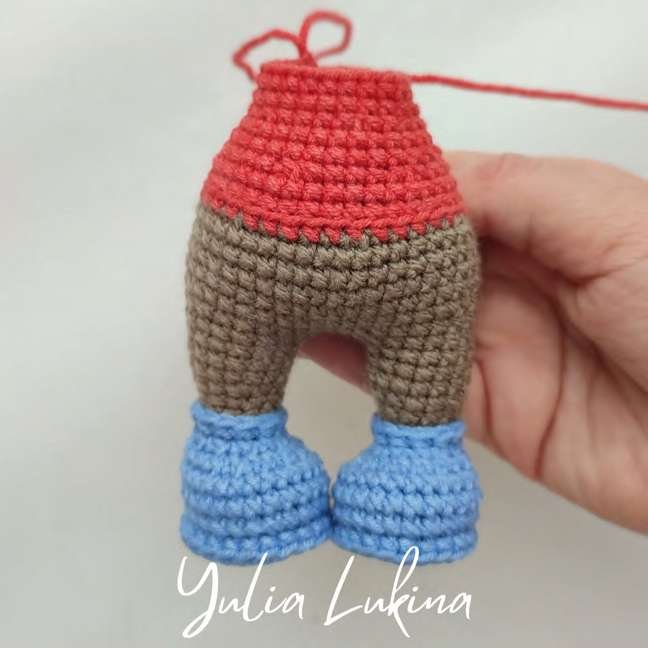
Step 10: Neck & head start: Round 32: 1 sc, dec, (2 sc, dec)×5, 1 sc (18 sc); Round 33: (1 sc, dec)×6 (12 sc); Round 34: (dec)×6 (6 sc); pull tight, fasten off.
Step 11
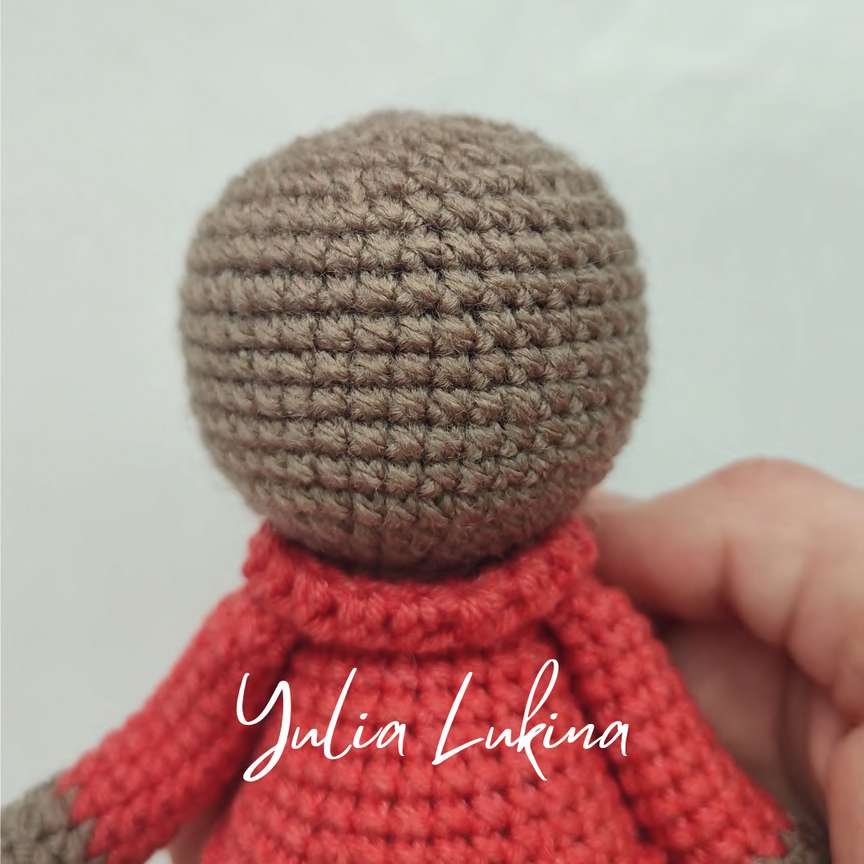
Step 11: Sweater collar: With red yarn, work 2 rounds of 1 double crochet in each stitch around the neck; fasten off.
Step 12
Step 12: Sweater bottom: With red yarn, work 1 double crochet in each front loop of half double crochet around the bottom; fasten off.

Step 13
Step 13: Christmas tree embellishment: With white yarn, embroider a Christmas tree on the front of the sweater; add beads and rhinestones as desired.
Step 14
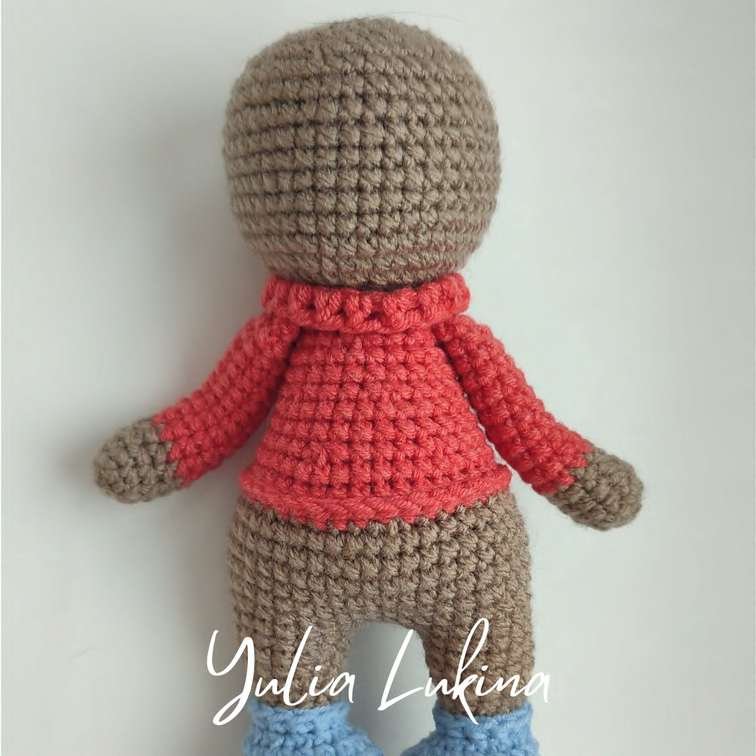
Step 14: Head: Immediately continue from body: Round 35: attach arms symmetrically: 3 sc, 5 sc (with arm), 4 sc, 5 sc (with arm), 1 sc (18 sc); Round 36: sc even in back loops only (18 sc); Round 37: sc even (18 sc).
Step 15
Step 15: Head shaping: Round 38: inc each st (36 sc); Round 39: (5 sc, inc)×6 (42 sc); Rounds 40-48: sc even (42 sc for 9 rounds); Round 49: (5 sc, dec)×6 (36 sc); Round 50: 2 sc, dec, (4 sc, dec)×5, 2 sc (30 sc); Round 51: (3 sc, dec)×6 (24 sc); Round 52: 1 sc, dec, (2 sc, dec)×5, 1 sc (18 sc); Round 53: (3 sc, dec)×6 (12 sc); Round 54: (dec)×6 (6 sc); pull tight, fasten off.
Step 16
Step 16: Ears (beige): Make 2 ears: Round 1: 5 sc in magic ring; Round 2: inc each st (10 sc); Round 3: sc even (10 sc); fasten off, leaving long tail for sewing.
Step 17
Step 17: Muzzle (beige): Round 1: 6 sc in magic ring; Round 2: (inc)×2, 1 sc, (inc)×2, 1 sc (10 sc); Round 3: 1 sc, (inc)×2, 3 sc, (inc)×2, 2 sc (14 sc); Round 4: sc even (14 sc); fasten off, leaving long tail for sewing.

Step 18
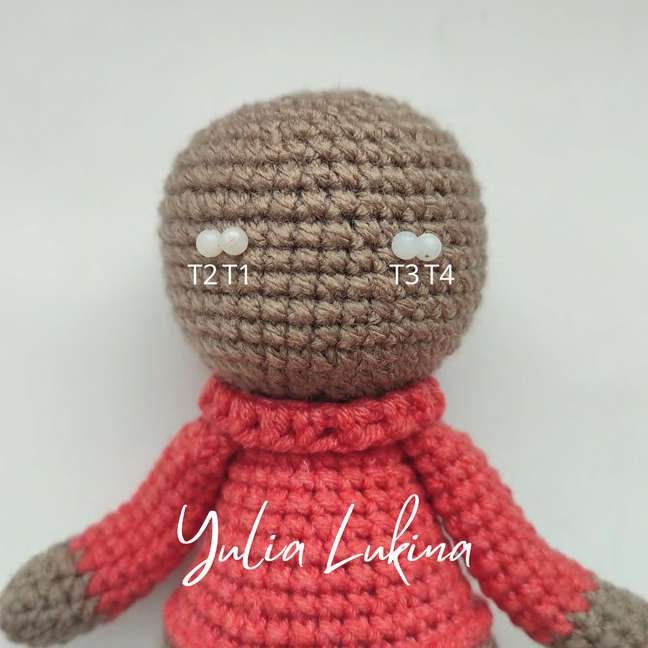
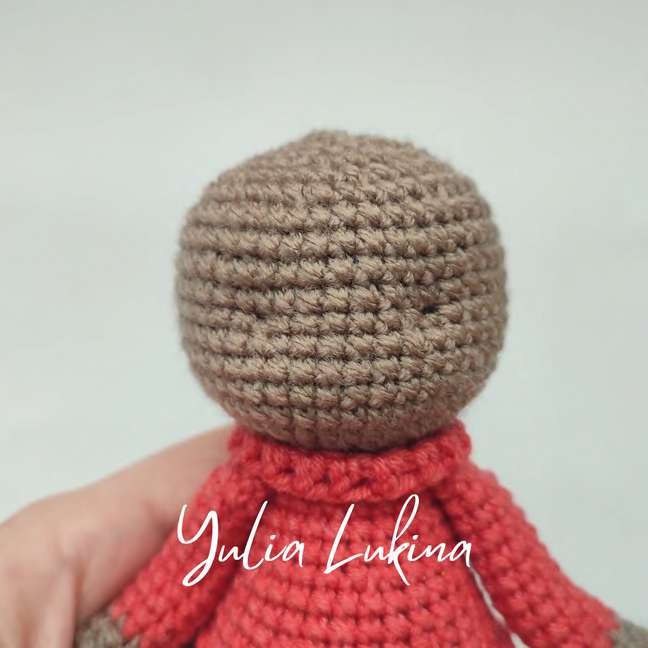
Step 18: Face assembly: Between rounds 42-43 of head, mark 2 points 6 st apart (T1,T3); from T1/T3 left/right, mark 2 more points 1 st apart (T2,T4). Insert needle with yarn from back of head, bring out at T1, insert in T2, bring yarn out back; tighten to create eye indentation (repeat if desired). Repeat other side: out at T3, in at T4. Sew on muzzle, stuff lightly; embroider nose with black cotton floss; glue on safety eyes (or embroider eyes for child safety); embroider eye whites, eyelashes, eyebrows; sew ears in desired position.
Step 19
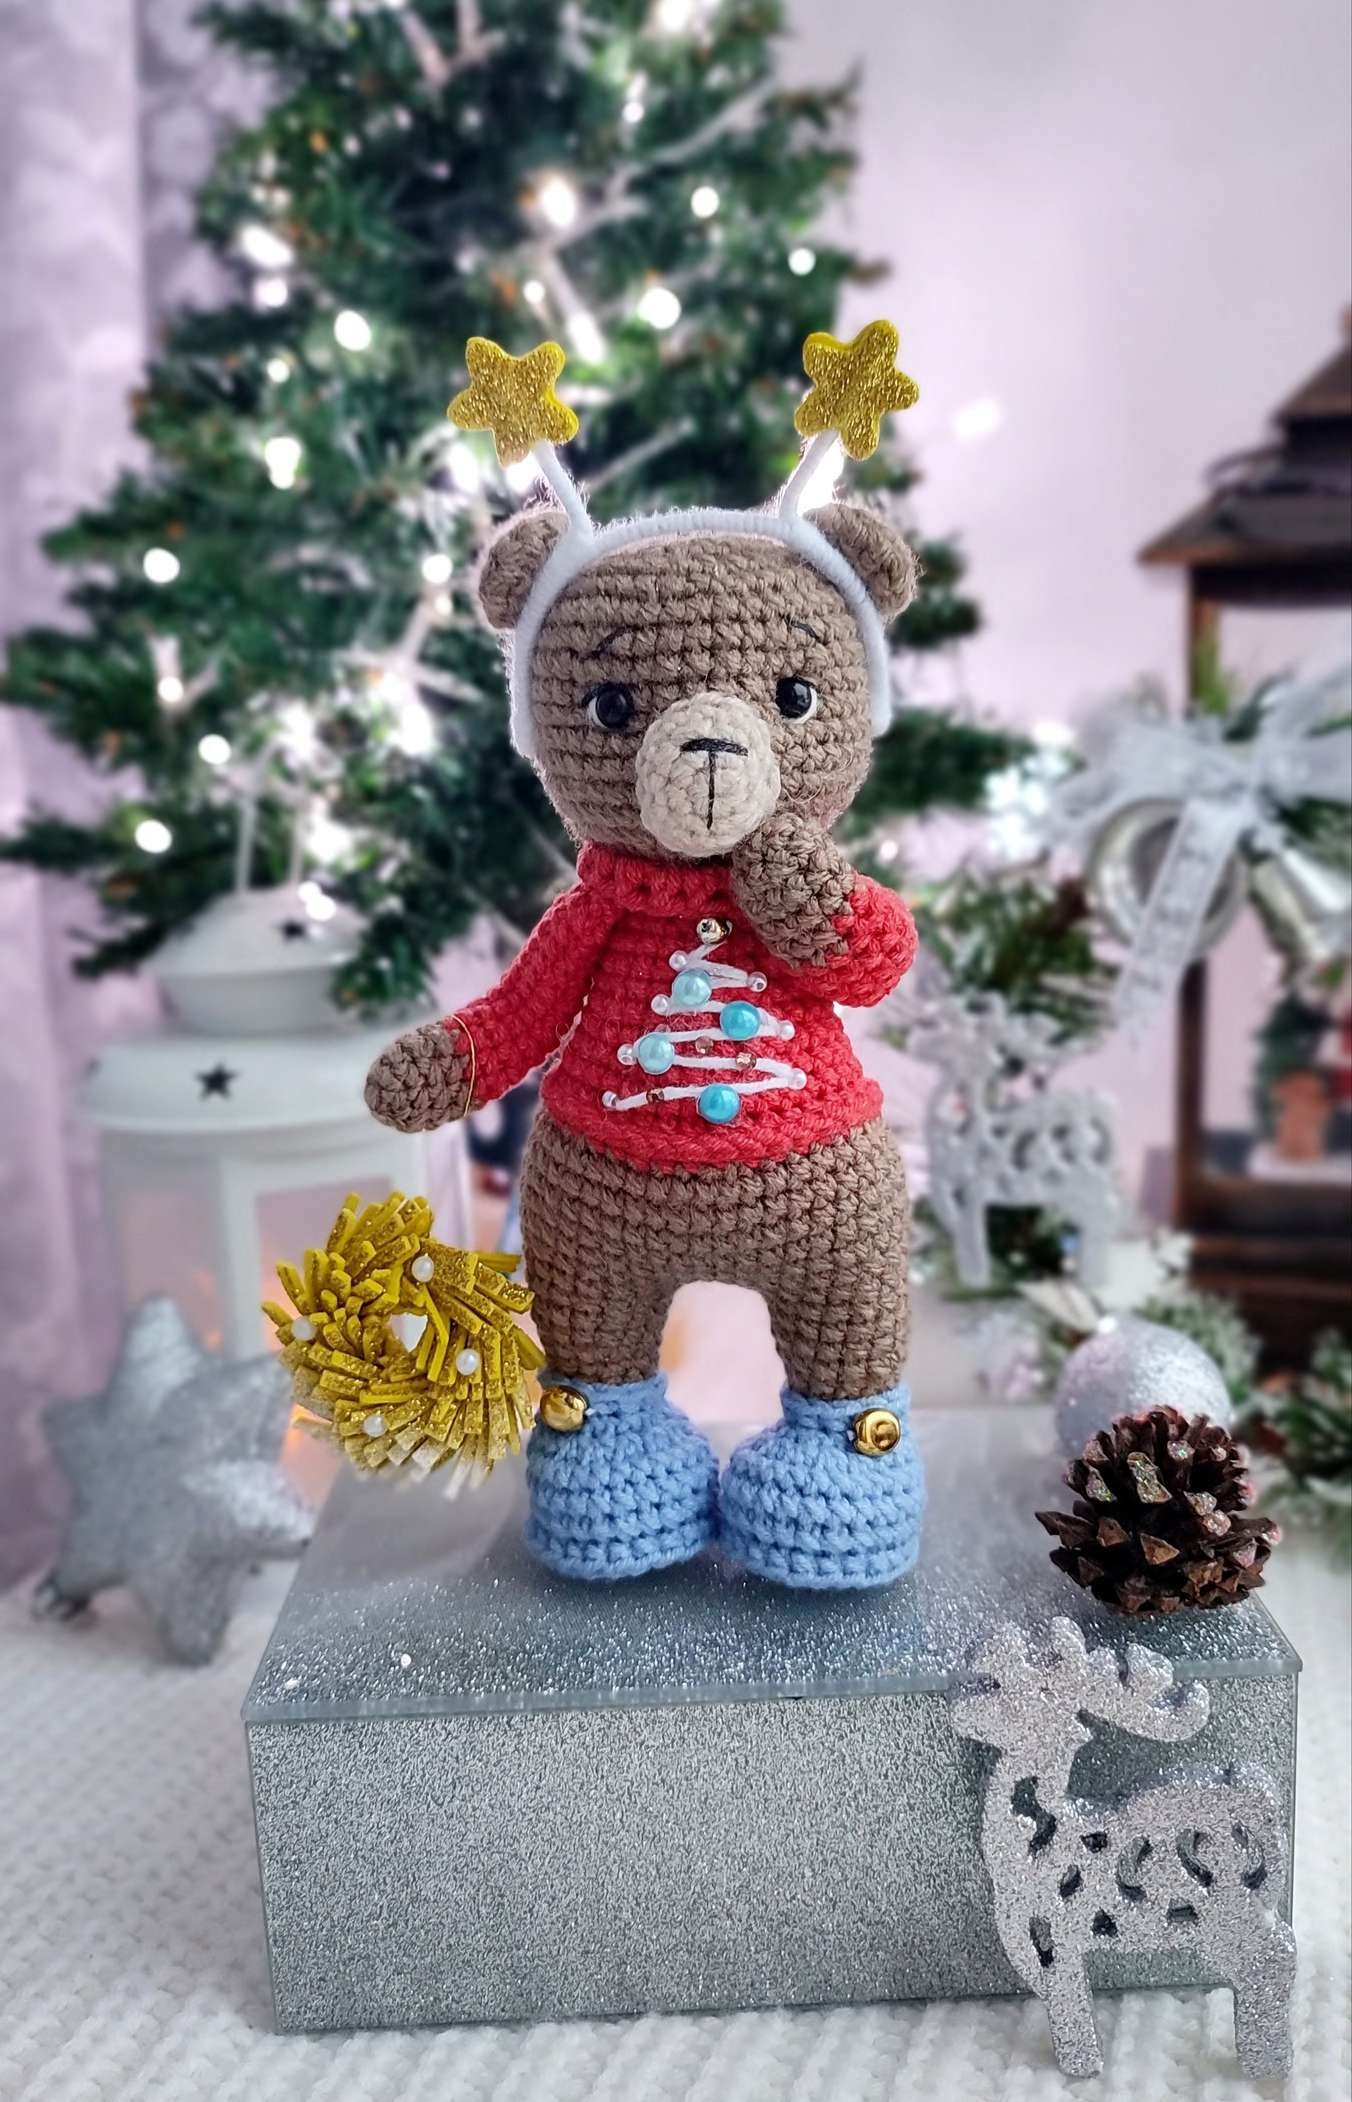
Step 19: Final assembly & details: Sew arms to body at shoulder points; sew legs to body at hip points; stuff body and head firmly as you go; attach head to body; optional: insert wire in neck for posability (or stuff firmly); final check: ensure all parts are secure and symmetrical. Key notes: Use invisible decrease (front loop only) for neat shaping; stuff firmly as you crochet; when changing colors, carry unused yarn along inside; for child safety: embroider eyes instead of using plastic safety eyes; finished size approx 15-18 cm (6-7 in) tall with sport weight yarn and 2.5 mm hook; difficulty: beginner-friendly.
Frequently Asked Questions (FAQ)
1. What yarn and hook size are best for Amigurumi Bear Lev?
Sport or DK weight cotton/acrylic yarn (such as YarnArt Jeans) paired with a 2.5 mm or 3.0 mm crochet hook works best. Using a slightly smaller hook than recommended for your yarn weight ensures your stitches stay tight, preventing the polyester fiberfill stuffing from showing through.
2. How tall is the finished crochet bear?
When made with sport-weight yarn and a 2.5 mm hook, Lev sits approximately 15 to 18 cm (6 to 7 inches) tall, making it a perfect pocket-sized or shelf-sitting plushie.
3. Is this amigurumi pattern beginner-friendly?
Yes! The bear is worked using basic amigurumi stitches (single crochet, increases, and invisible decreases) in continuous rounds. The limbs and head are crocheted separately and then securely sewn onto the main body.
4. How do I prevent gaps when making invisible decreases?
Always use the invisible decrease method (inserting your hook only into the front loops of the next two stitches, yarn over, pull through two loops, and yarn over and pull through the remaining two loops). This creates a seamless finish without unsightly holes.
5. Are safety eyes safe for young children?
If you plan to gift this toy to an infant or toddler, it is recommended to embroider the eyes using black embroidery floss instead of using plastic safety eyes to eliminate any choking hazards.
Tips for Success
- Use Invisible Decreases: When working amigurumi, always use the front-loop-only (FLO) invisible decrease method to prevent unsightly gaps and holes in your stuffing.
- Stuff as You Go: Pack fiberfill firmly into the head and body parts to give your bear a sturdy, professional shape that holds up over time.
- Secure Safety Eyes: If gifting this toy to a young child, ensure safety eyes are locked securely from the inside, or embroider the eyes by hand instead.
Conclusion
Creating Amigurumi Bear Lev pattern is a wonderfully rewarding project that brings a classic handmade toy to life with every stitch. Whether you’re gifting this cuddly companion to a loved one or adding it to your own collection, customizing the colors and facial expressions makes each bear truly unique. Grab your yarn and hook, and enjoy bringing Lev to life!