
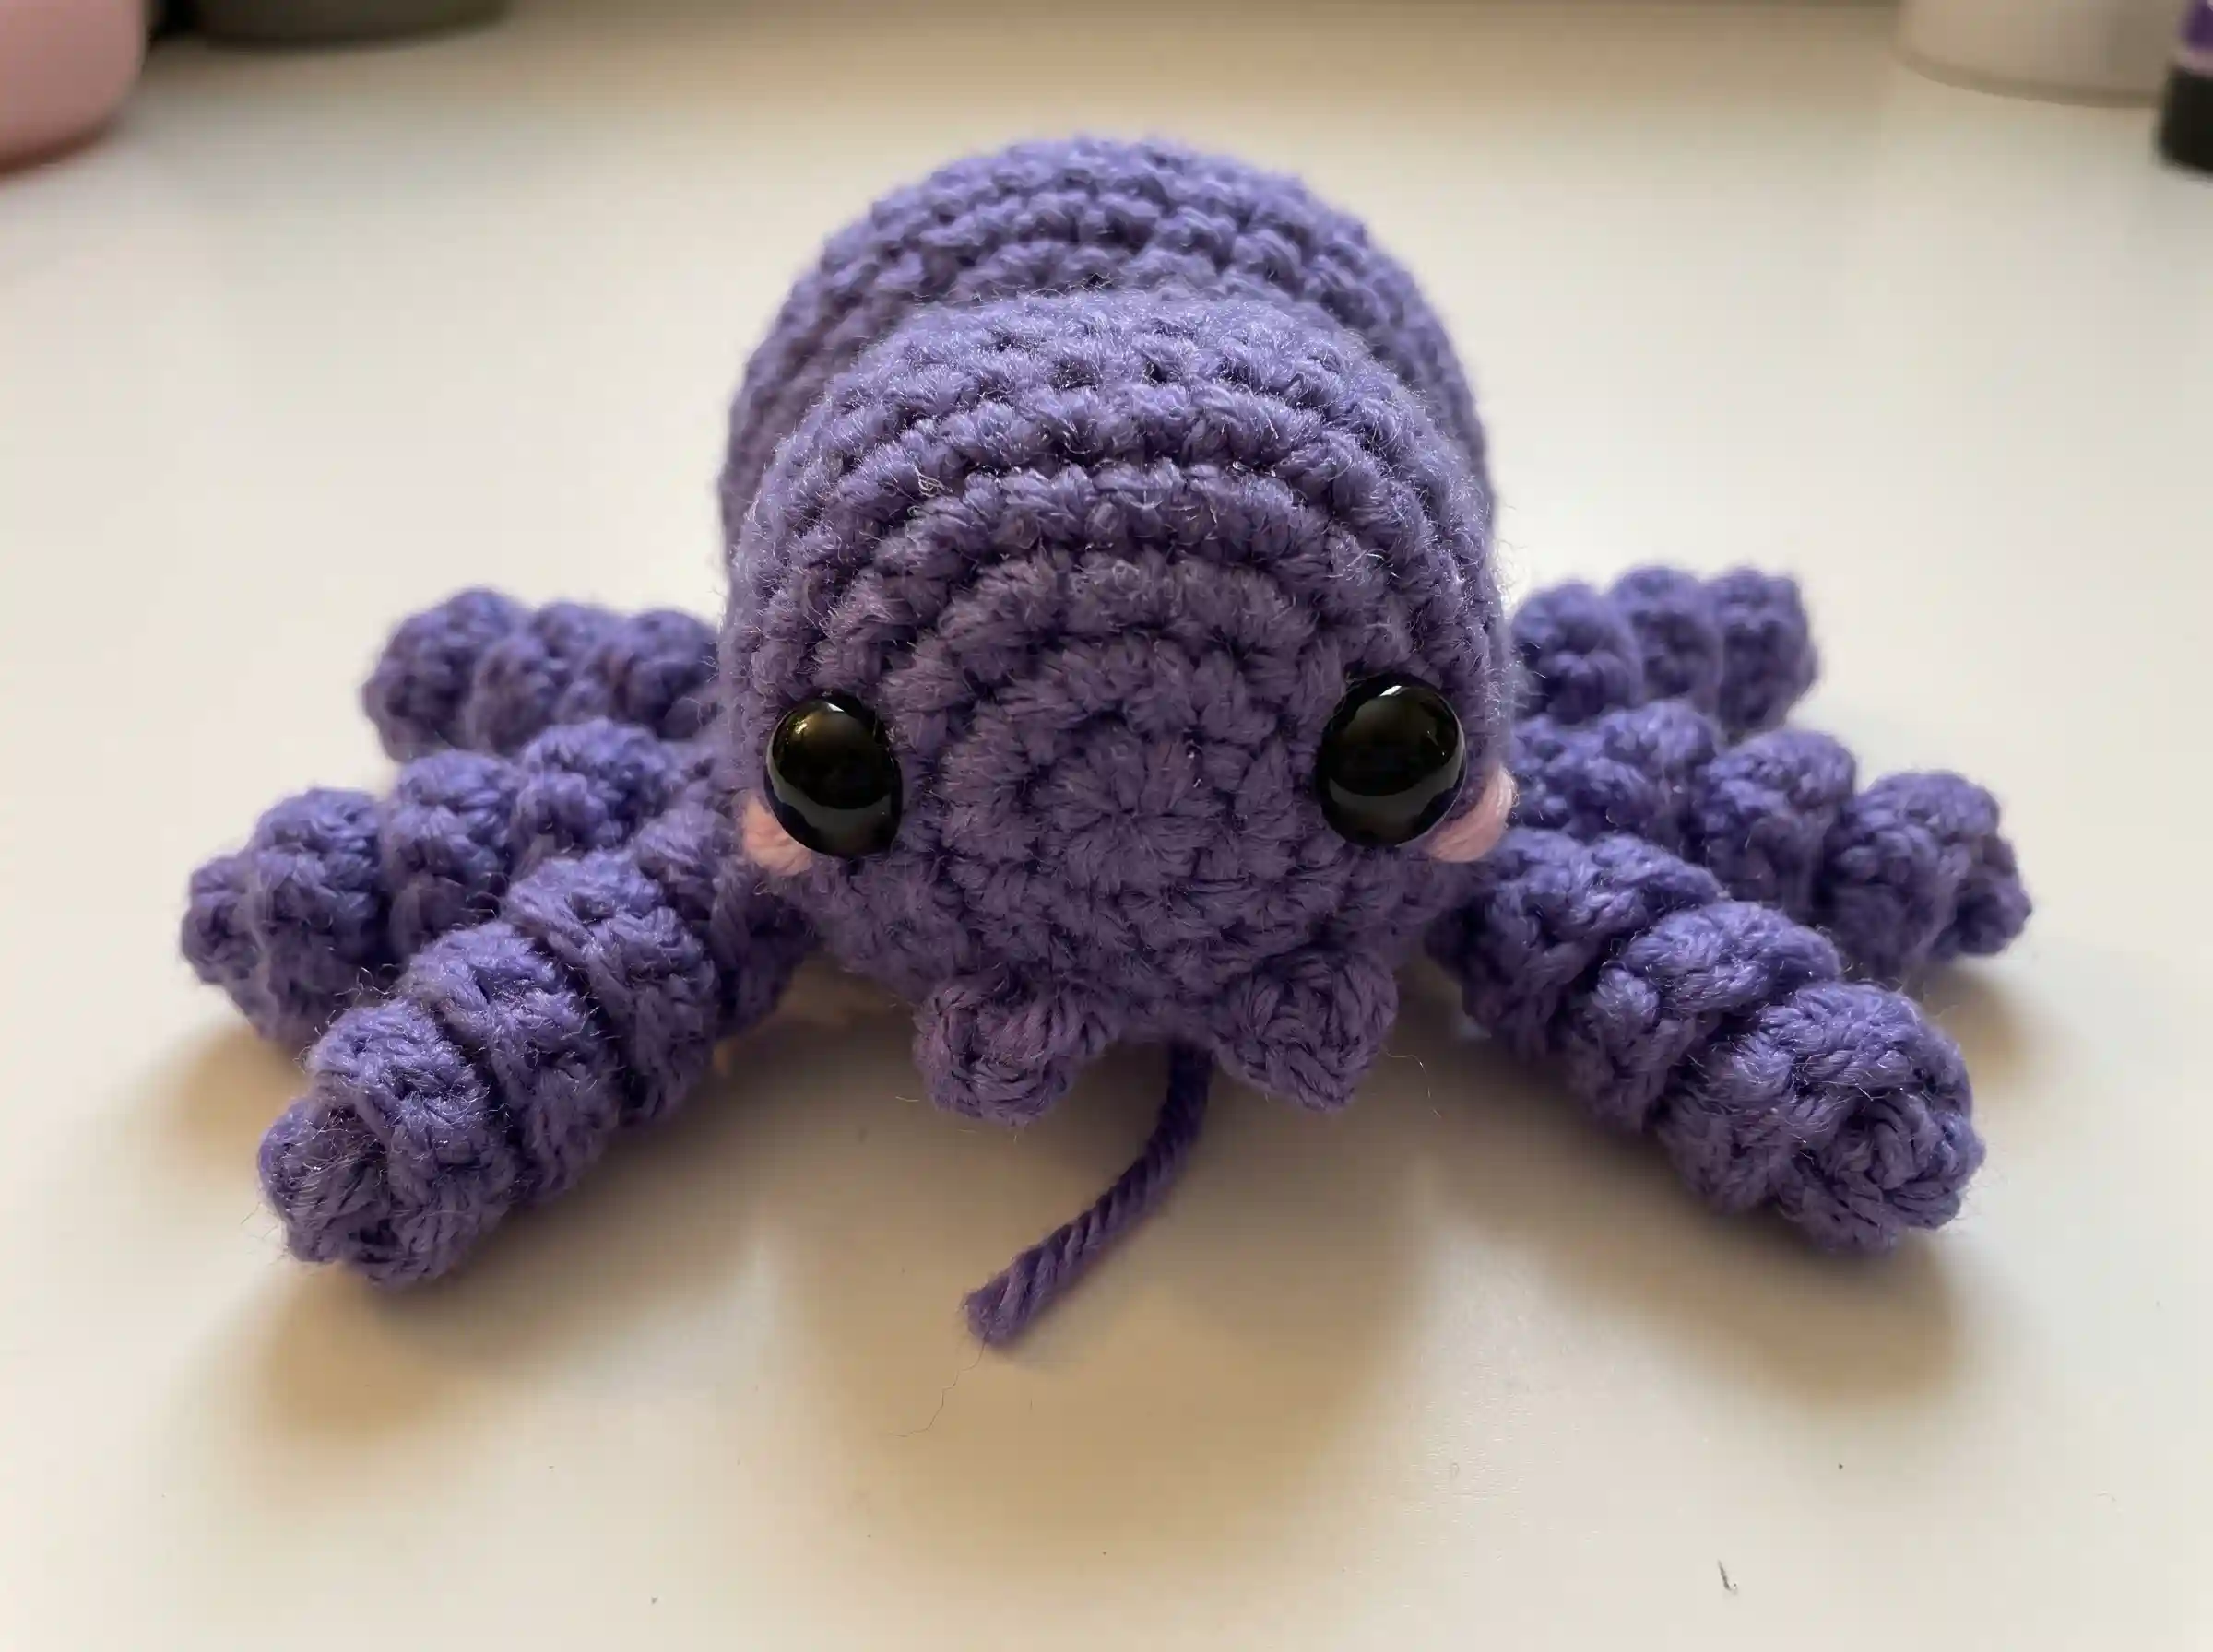
How to Crochet a No-Sew Amigurumi Spider: Free Pattern & Step-by-Step Tutorial
Learn how to crochet an adorable, completely no-sew amigurumi spider with this free step-by-step pattern, detailed instructions, and photo guide. Perfect for beginners!
How to Crochet a No-Sew Amigurumi Spider: Free Pattern & Step-by-Step Tutorial
If you are looking for a quick, adorable, and completely sewing-free plushie project, this No-Sew Amigurumi Spider is the perfect pattern for you!
Created by designer Cassie Babb (Chickinsoodlenoop), this cute spider project requires zero sewing to assemble the legs or body segments. Whether you are preparing for Halloween crafts, making cute desk buddies, or creating soft plushies for gifts, this beginner-friendly tutorial guides you step-by-step through the entire process.
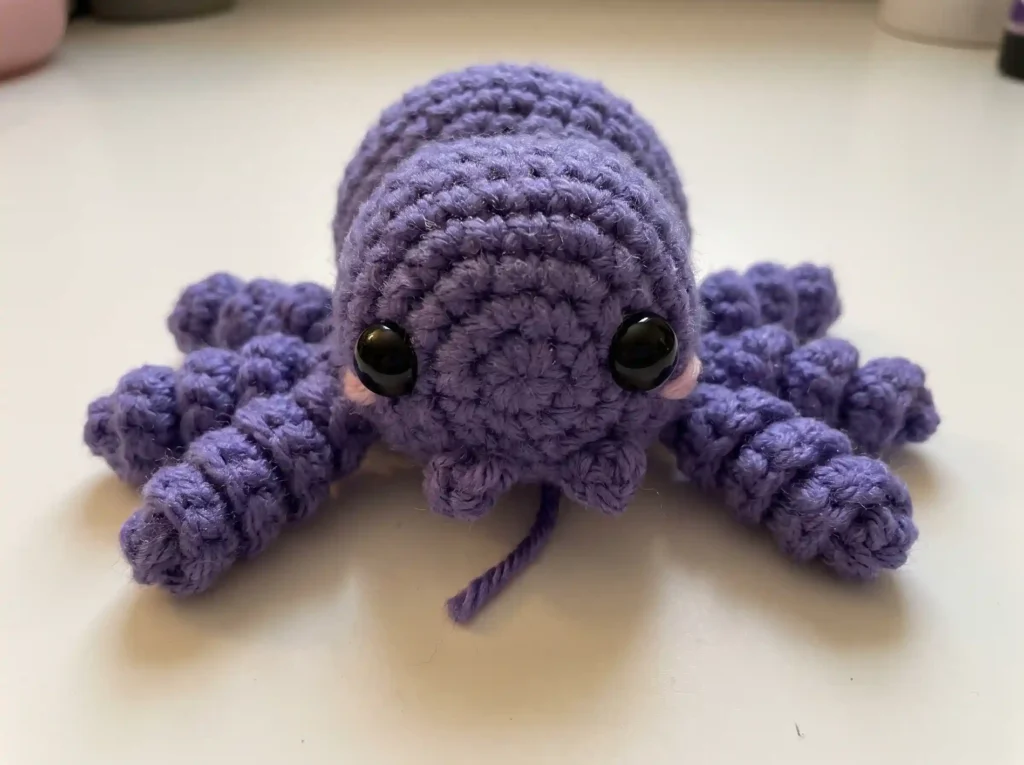
Table of Contents
Materials & Tools Required
Before grabbing your hook, select your preferred yarn weight and matching hook size. You can make a small handheld spider or upscale to blanket yarn for a large plushie!
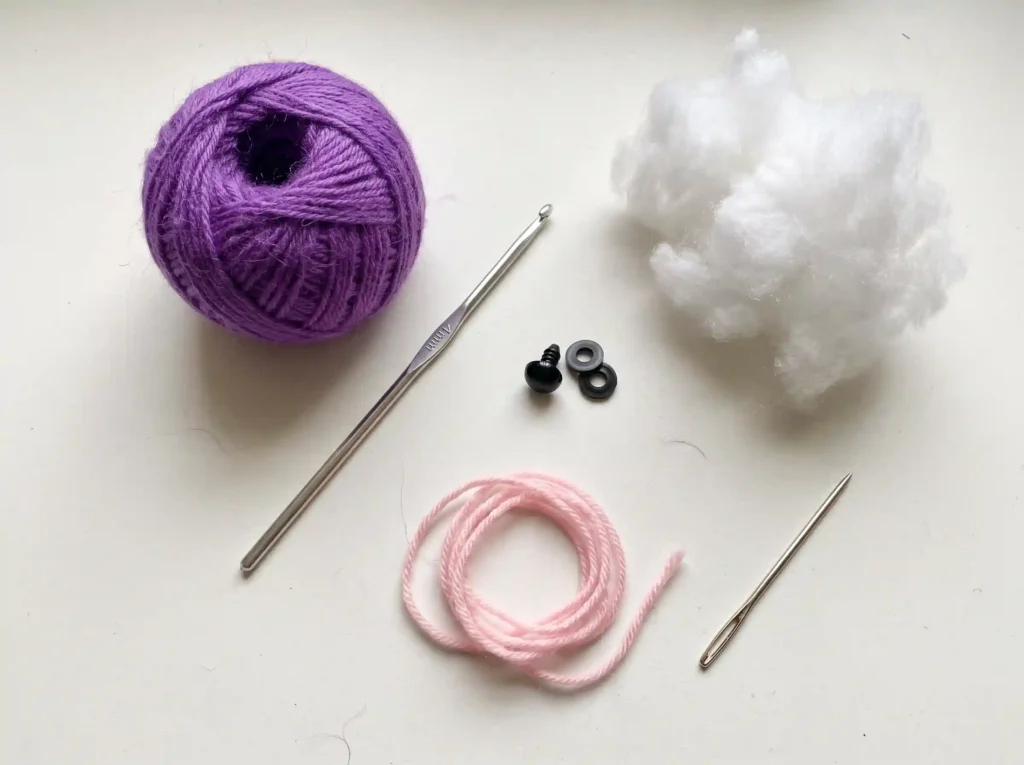
- Standard Size (approx. 4″ L x 5.5″ W x 2.5″ H): Medium Weight (Category 4) Yarn (e.g., Red Heart Super Saver or I Love This Yarn).
- Large Plush Size (approx. 8″ L x 12″ W x 5″ H): Super Bulky Blanket Yarn.
- Crochet Hook: 4.0mm hook for standard yarn OR 6.0mm hook for blanket yarn.
- Safety Eyes: 2x 12mm safety eyes (or 18mm for plush blanket yarn).
- Stuffing & Extras: Polyfil stuffing, yarn needle, pink yarn for blush cheeks, and bobby pins or stitch markers.
Stitch Abbreviations & Preparation
This project uses standard US crochet terms. Review the abbreviations below before starting:
- ch: chain
- sc: single crochet
- inc: increase (2 sc in the same stitch)
- dec: decrease (sc 2 stitches together)
- sl st: slip stitch
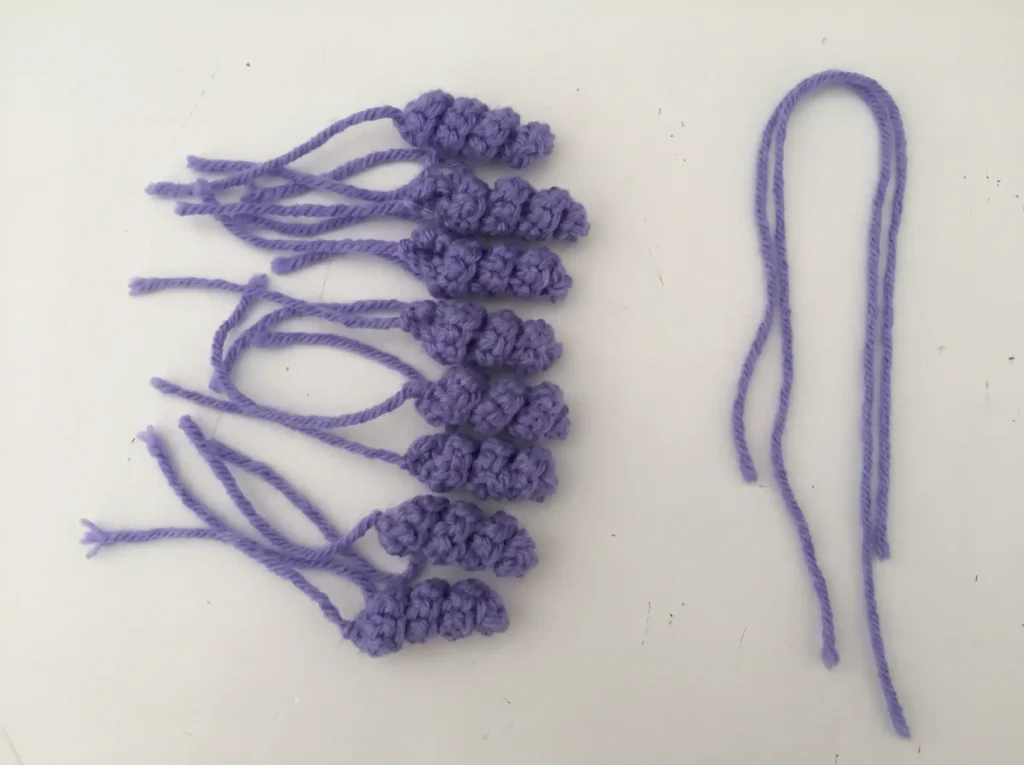
Important Preparation Step: Before starting the main body round, cut two 14-inch pieces of yarn. You will use these strands later to crochet the spider’s fangs.
Step 1: Crocheting the 8 Curly Legs
To keep this project 100% no-sew, we crochet all 8 legs separately first and secure them to the body using yarn tails.
- Row 1: Chain 15.
- Row 2: Single crochet (sc) into the 2nd chain from the hook, then work an increase (inc) into each of the remaining 13 chains.
- Finish: Fasten off, leaving a long tail for securing the legs to the body later.
Step 2: Crocheting the Head and Body
The head and body are worked continuously in one piece from front to back using continuous spiral rounds.
- Round 1: 6 sc in magic ring [6]
- Round 2: (inc) repeat 6 times [12]
- Round 3: (sc, inc) repeat 6 times [18]
- Round 4: (2 sc, inc) repeat 6 times [24]
- Round 5: (3 sc, inc) repeat 6 times [30]
- Rounds 6–8: sc in all 30 st [30]
- Round 9: (3 sc, dec) repeat 6 times [24] (forms the neck indent)
- Round 10: (2 sc, dec) repeat 6 times [18]
- Round 11: (2 sc, inc) repeat 6 times [24] (expands into abdomen)
- Round 12: (3 sc, inc) repeat 6 times [30]
- Round 13: (4 sc, inc) repeat 6 times [36]
- Rounds 14–18: sc in all 36 st [36]
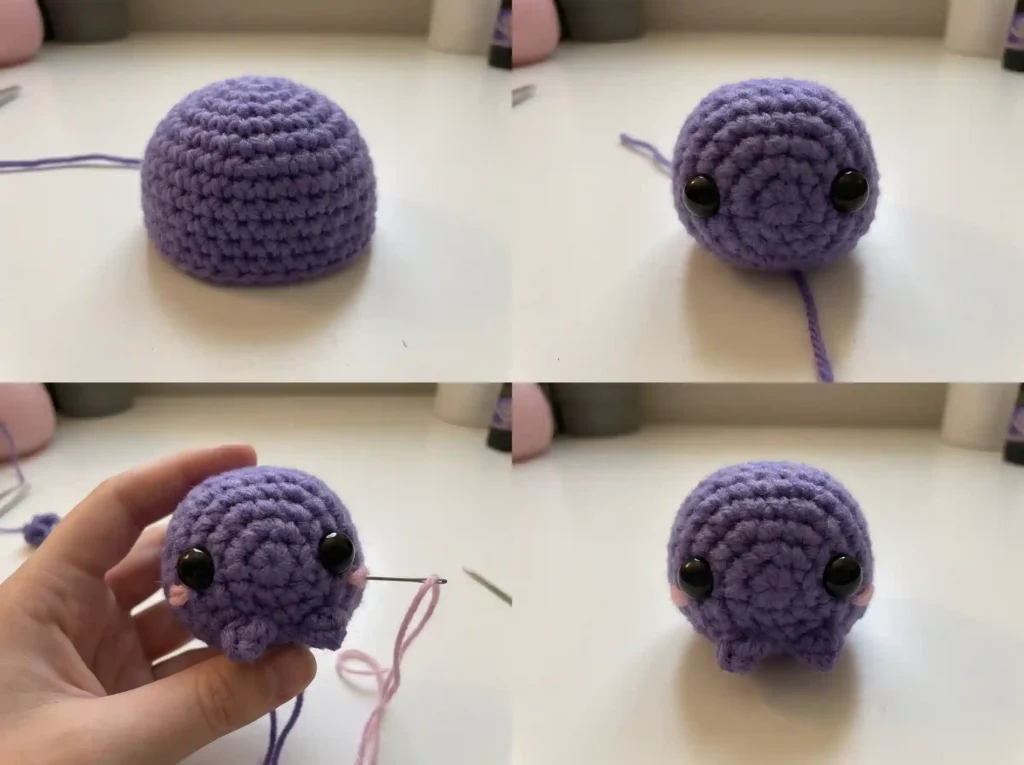
Step 3: Adding Fangs, Eyes & Attaching Legs
Before closing up the back of the spider body, we add the facial details and attach our 8 pre-made legs.
- Safety Eyes & Pink Cheeks: Insert safety eyes between Rounds 6 and 8 on the front head piece. Use pink yarn and an embroidery needle to stitch simple blush lines under each eye.
- Crocheting the Fangs: Use bobby pins or stitch markers to center the fangs on the bottom of the face. Starting from top to bottom, sl st into your marked spot, work 3 single crochets (sc) into the exact same stitch, fasten off, and pull remaining yarn tails inside.
- Securing the 8 Legs: Use bobby pins to mark 4 leg spots on each side of the body, spacing them out every 2 rounds. Pull the leg yarn tails through the body holes to the inside and tie securely.
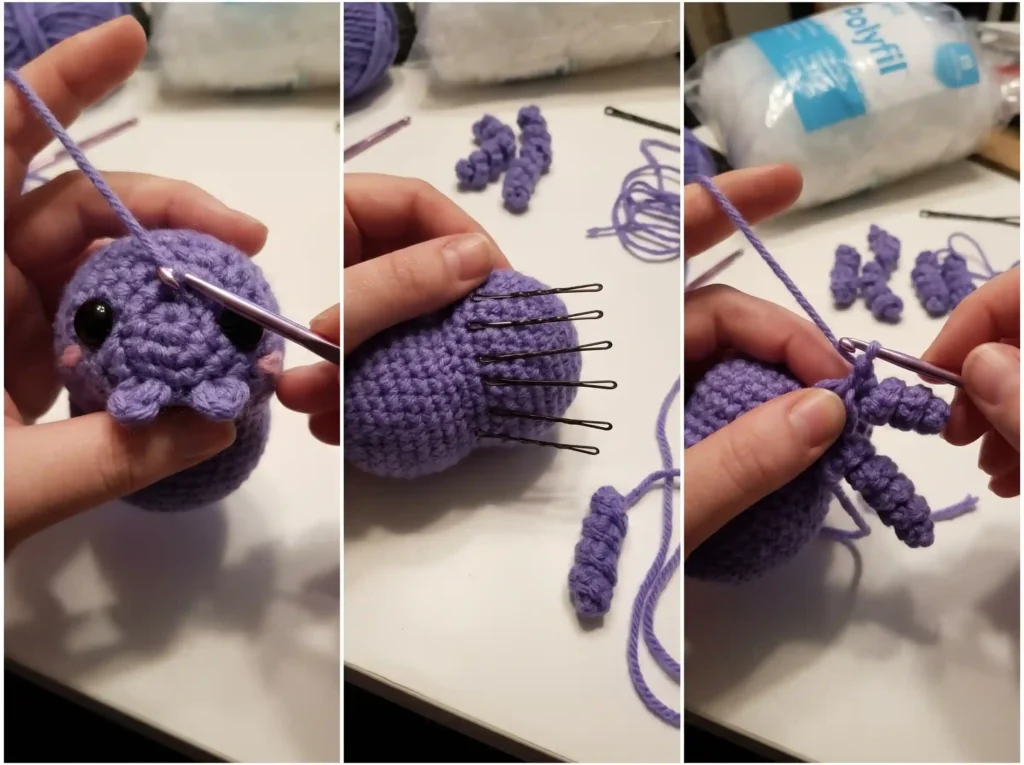
Step 4: Stuffing & Closing the Body
Fill the body partially with Polyfil stuffing. You can add more stuffing right before completing the final decrease round.
- Round 19: (4 sc, dec) repeat 6 times [30]
- Round 20: (3 sc, dec) repeat 6 times [24]
- Round 21: (2 sc, dec) repeat 6 times [18]
- Round 22: (1 sc, dec) repeat 6 times [12]
Fasten off, leaving a long yarn tail. Weave the yarn tail through the remaining 12 front loops with a yarn needle, pull tight to seal the opening, and weave in your ends.
Conclusion
Crocheting your own amigurumi spider has never been this fun or straightforward! Because this project requires absolutely no tricky sewing assembly for the limbs, it makes for a fantastic weekend craft or a wonderful batch-making project for craft fairs and gifts. Experiment with different yarn colors and textures to build your own colorful spider family. Happy crocheting!
One Comment