
How to Hubble the crochet pattern amigurumi: Free Beginner Amigurumi Pattern (Step-by-Step)
How to crochet pattern amigurumi: Free Beginner Amigurumi Pattern (Step-by-Step)
Free step-by-step Hubble the Squid crochet pattern amigurumi. Beginner-friendly, 45cm finished size, with DK yarn and detailed photo tutorials for every step.
How to Crochet Hubble the Squid: Free Beginner Amigurumi Pattern (Step-by-Step)

Table of Contents
Meet Hubble the Squid — the cutest beginner-friendly amigurumi crochet pattern by Projectarian! This adorable 45 cm squid is soft, floppy, and absolutely irresistible. With 8 little legs, 2 longer tentacles tipped with fluffy pompoms, and the sweetest smile, Hubble makes the perfect handmade gift or a fun weekend crochet project.
Whether you are new to amigurumi or looking for a relaxing beginner project, this step-by-step guide will walk you through every single stitch — from the magic ring to the final pompom. Let’s dive in!
What You Will Need

Yarn
- Body Colour: Miss La Motte DK merino, Glacé – 62g / 130m
- Eye Black: Elle Pure Gold DK acrylic, Caviar – 0.5g / 1.5m
- Eye White: Elle Pure Gold DK acrylic, Lily – 1.5g / 4m
- Pompoms: Combination of Body Colour and White – 6.5g / 13.5m
Tools & Supplies
- 3 mm crochet hook (for the eyes)
- 5 mm crochet hook (for the body, legs & tentacles)
- Scissors
- Yarn sewing needle
- Soft toy stuffing — approximately 4g
- 2 pins with large heads
- 45 mm pompom maker
Abbreviations
- R — row/round | SS — slip stitch | SC — single crochet
- HDC — half double crochet | ch — chain | st — stitch
- incr — increase (2 sts in same space) | decr — decrease
- MR — magic ring | FLO/BLO — front/back loop only
- WS/RS — wrong side / right side
Gauge
9SC x 9 rows = 5 x 5 cm. Hubble is designed to be soft and floppy — a loose mesh gives the body its squishy feel and lets the tentacles drape beautifully.
Tip: Make all matching pieces in the same sitting to avoid tension differences between the two eyes or legs.
Necessary Skills
- Working in the round (in a spiral)
- Using a running stitch marker
- Basic sewing
- Invisible decrease
Part 1 — The Eyes (Make 2)
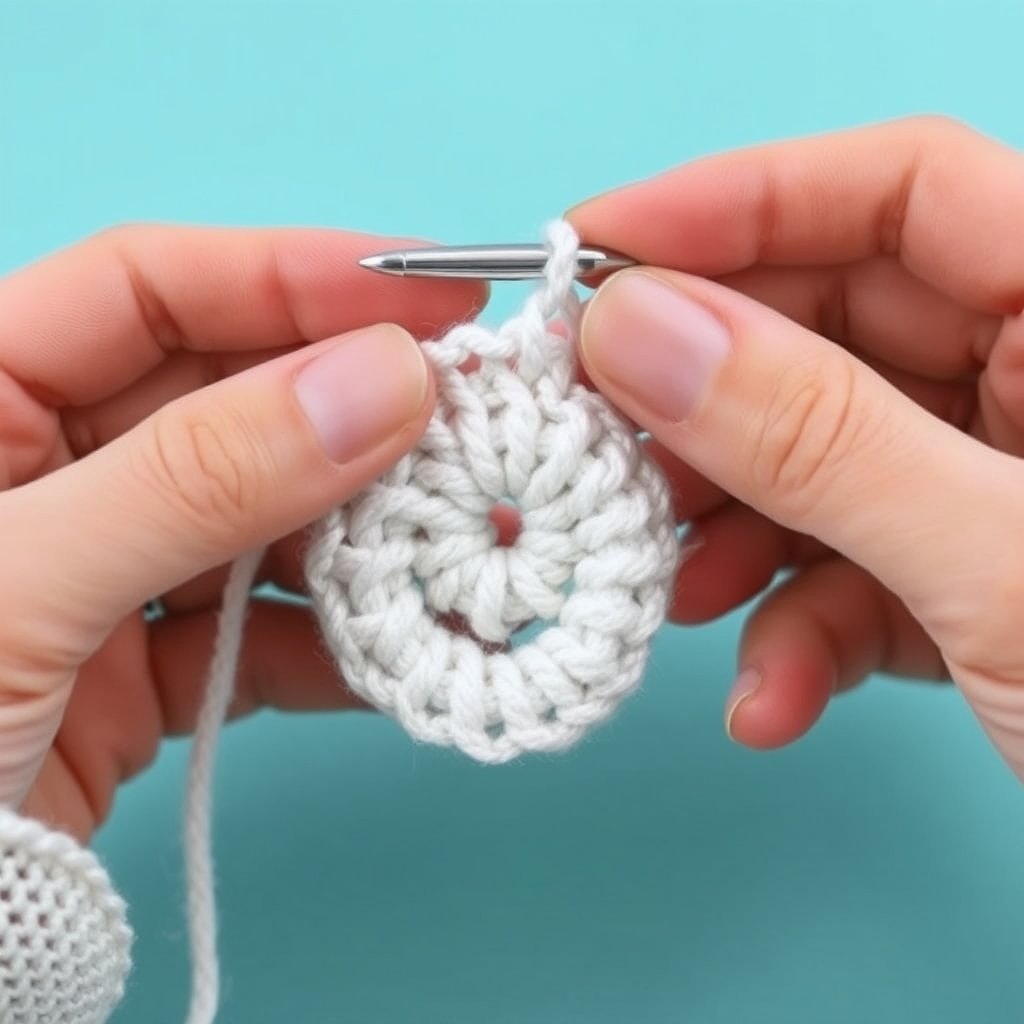
Use a 3 mm hook and White yarn.
- R1: 6SC in magic ring. SS in 1st SC. (6)
- R2: Ch1. SC-incr x 6. SS in 1st SC. (12)
Tie off without a knot, leaving a 30 cm thread for sewing. Weave in the starting thread at the magic ring to secure it, then cut close.

Adding the Smile / Sleep Line
Use Black yarn. Insert your hook at any stitch on R1. Place Black yarn on your hook with a slip knot. Draw up the loop through the eye.
- SS in next 4 sts. (4)
Tie off without a knot, leaving a 10 cm thread. Pull the loose end through to the back of the eye. Tie both Black loose ends together in a secure knot while keeping the eye flat. These ends will be hidden inside the body later.
Tip: Rotate each eye to be either smiling or sleeping — both looks are adorable!
Part 2 — The Legs (Make 8)

Use a 5 mm hook and Body Colour yarn.
- R1: Ch32. HDC in 3rd ch from hook. HDC in next 28 ch. 4HDC in last ch. Working along the other side of the chain, HDC in remaining 29 ch. (62)
Ch1 and tie off, leaving a 10 cm thread to be tucked inside the body later. Do not count the starting chain as a stitch. To weave in the loose end, sew it in the opposite direction into the sts running down the other side of the chain — the change in direction locks the thread in place.

Part 3 — The Tentacles (Make 2)
Use a 5 mm hook and Body Colour yarn. The tentacles are longer than the legs.
- R1: Ch42. HDC in 3rd ch from hook. HDC in next 38 ch. 4HDC in last ch. Working along the other side of the chain, HDC in remaining 39 ch. (82)
Ch1 and tie off, leaving a 10 cm thread. Secure the loose end in the same manner as the legs.
Note: Using different yarn weights or hook sizes may cause the tentacles to curl — this can look extra cute! To intentionally create curling tentacles, use a smaller hook or thicker yarn.
Part 4 — The Body
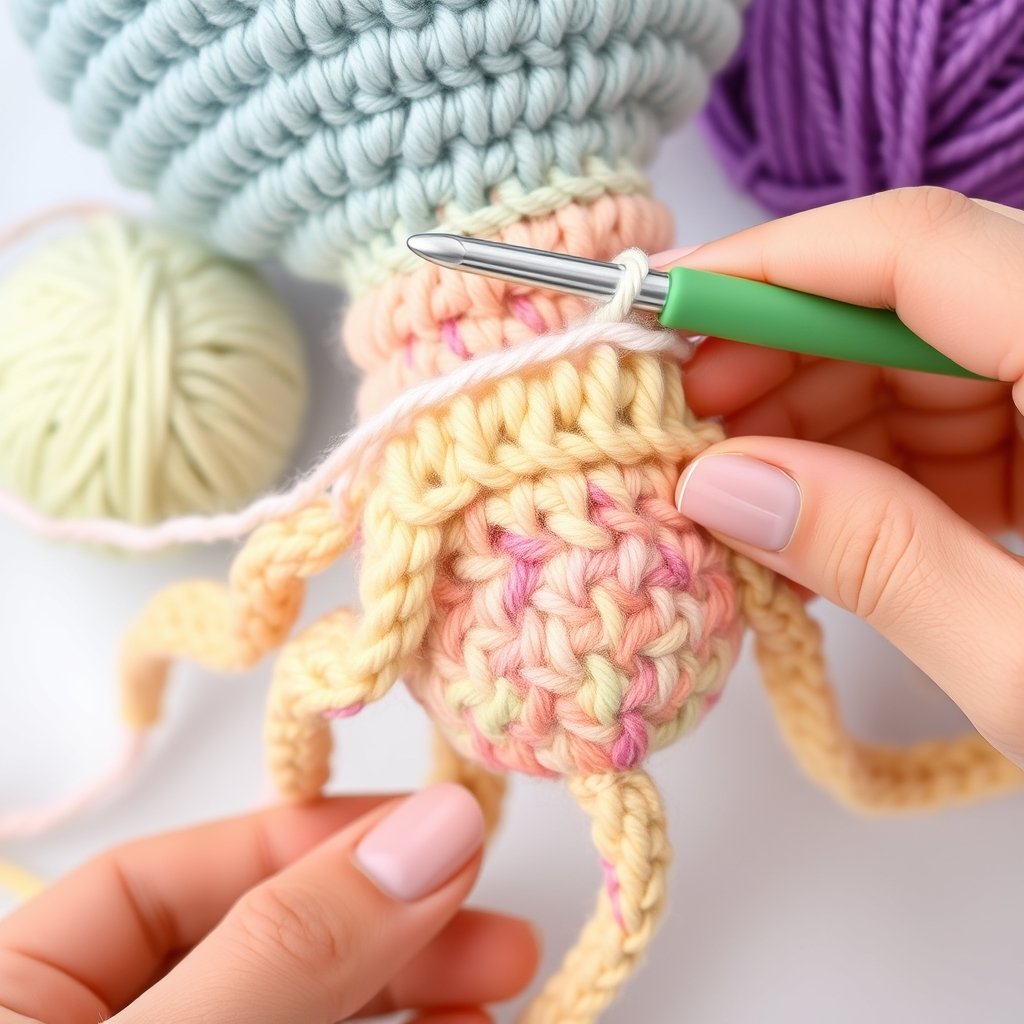
Use a 5 mm hook. Work in a continuous spiral using a running stitch marker.
- R1: 4SC in magic ring. (4)
- R2: SC-incr x 4. (8)
- R3: *SC-incr x 2, 2SC* x 2. (12)
- R4: *SC-incr x 2, 4SC* x 2. (16)
- R5: *SC-incr x 2, 6SC* x 2. (20)
Weave in the starting thread at the magic ring.

Lay the body flat with the increases of R5 on either side, right side facing up — this is the correct orientation.
- R6: 20SC. (20)
- R7: *SC-decr, 8SC* x 2. (18)
- R8: *SC-decr, 7SC* x 2. (16)
- R9: *SC-decr, 6SC* x 2. (14)
- R10: *SC-decr, 5SC* x 2. (12)
- R11: *SC-incr, 2SC* x 4. (16)
- R12: 16SC. (16)
- R13: *SC-incr, 3SC* x 4. (20)
- R14: 20SC. (20)
- R15: *SC-incr, 4SC* x 4. (24)
- R16: 24SC. (24)
- R17: *SC-incr, 5SC* x 4. (28)
- R18-23: 28SC. (28)
- R24: *SC-decr, 5SC* x 4. (24)
- R25: 24SS. (24)
- R26: 24SC in BLO of R24. (24)
- R27-30: 24SC. (24)
- R31: 1SC in each st until you reach the side of the body. Leave remaining sts un-worked. Do not tie off.
Part 5 — Attaching the Eyes

Flatten and turn the body so your last stitch is on the left-hand side with the open end facing you. The face is the area below the ridge created by the slip stitches of R25.
Place the eyes symmetrically on the face — centered with a space of 2 stitches between them, and 1 stitch on either side. Insert your hook from inside the body so it comes out under the center of each eye. Hook the loose Black ends and pull them inside the body. Check the position and pin the eyes in place.
Unpin each eye before sewing (pins can distort the shape). Sew with a whipstitch, working into the sts directly beneath the eye. Once sewn all around, push your needle inside the body, secure with a couple of hidden knots, and leave the loose end inside. Sew the 2nd eye in the same manner.
Important: Eyes must be perfectly centered — when you attach the legs they will be evenly distributed across 12 sts at the open edge. Off-center eyes will misalign the legs.
Part 6 — Attaching the Legs & Tentacles

Turn the body upside down. Continue from where you left off after 7SC on R31. Place a leg with wrong side facing up so its 1st and last stitch lay on top of your next available body stitches.
Insert your hook through the WS of the 1st st on the leg and the RS of the next body st — work 1SC to join. Continue working through both layers using 3 body sts per leg. Tuck the loose end of each leg inside the body. Repeat for all 8 legs, evenly distributed across all 24 body sts.
- R32: *2SC, SC-decr* x 6. (18) — Do not tie off.
Part 7 — Stuffing the Body

Stuff the body softly and lightly. Leave the top part (R1-10) completely empty and flat. Place a couple of handfuls of soft springy stuffing inside — enough to pad it but keep the body more flat than round. Do not compress the stuffing; keep it light and fluffy all the way to the open end.
- R33: 3SC.
Attach the tentacles now in the same manner as the legs — WS facing up, 3 sts per tentacle, working through both layers.
- SC-decr x 4, 1SC. (14)
- R34: SC-decr x 7. (7)
Tie off without a knot, leaving a 20 cm thread. Sew the last row closed by weaving your needle into the FLO of each stitch and pulling the opening closed like a drawstring. Sew around one more time to secure, then weave in the loose end inside the body. Remove the running stitch marker.
Tip: If tentacles appear off-center due to spiraling, work the last few rounds as rows instead (ch1, crochet the row, join with SS at end).
Part 8 — Making the Pompoms (Make 2)

Use a 45 mm pompom maker. Wrap both halves full with a random combination of White and Body Colour yarn to make a dense, full pompom. Close the pompom maker and cut the threads all around the circumference. Tie the pompom with a 45 cm thread, leaving two ~20 cm tails for attaching to the tentacles. Remove from the maker and trim to a perfect sphere.

Attaching the Pompoms
Separate the tentacles from the legs (the tentacles are the 2 longer ones). Thread one loose end into one of the sts at the tip of a tentacle. Tie the loose ends together in multiple tight knots to secure. Weave the ends into the pompom and trim to the same length. Attach the 2nd pompom in the same manner.
Hubble is Complete!

Congratulations — Hubble the Squid is ready for his first magical ocean adventure! Share your finished squid using #HubbleTheSquid on Instagram and Facebook and tag @Projectarian!
Tips & Troubleshooting
- Tight stitches? Go up one hook size for the body to keep it soft and floppy.
- Tentacles curling too much? Try a slightly larger hook or lighter yarn.
- Eyes not staying flat? Tie the Black loose ends securely at the back before sewing.
- Stuffing showing through? Use less stuffing — Hubble should be lightly padded, not tightly filled.
- Legs uneven? Double-check that the eyes are perfectly centered — they are your alignment guide.
Project Summary
- Difficulty: Beginner
- Finished size: 45 cm long
- Yarn weight: DK (Light Worsted / 8ply / 11wpi)
- Hook sizes: 3 mm (eyes), 5 mm (body, legs, tentacles)
- Gauge: 9SC x 9 rows = 5 x 5 cm
- Pattern by: Projectarian
One Comment