
Woven Stars: DIY Craft Guide & Decorative Ideas
Discover how to create beautiful woven stars with this step-by-step craft guide. Perfect for festive holiday decorations, home styling, and handmade gifts!
How to Knit Woven Stars: Free 5-Row Star Ornament Pattern (Step-by-Step Guide)
Looking for a lightning-fast, high-impact scrap-yarn knitting project? Learning how to knit woven stars is one of the most delightful holiday crafts you will ever discover! each eye-catching 3D six-pointed star requires less than 5 grams of yarn and just five quick rows of knitting per triangle.
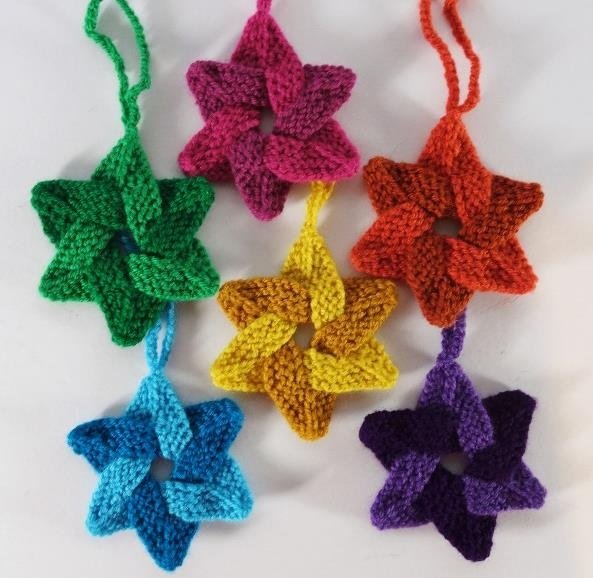
Table of Contents
Why You Will Love This Woven Stars Pattern
Unlike bulky or complex holiday knitting patterns, these woven stars rely on a clever geometric construction that looks like an intricate Celtic weave while remaining remarkably simple to execute:
- Only 5 Rows per Piece: The entire star consists of two identical hollow triangles knitted flat. You can knit both pieces in under 30 minutes!
- The Ultimate Scrap-Buster: Uses under 5 grams (around 15 yards) of yarn total—the perfect project for using up leftover bits of DK or sock yarn.
- No Double-Pointed Needles Needed: Knitted back and forth on standard straight needles using simple increases and decreases.
- Multipurpose & Gift-Ready: Hang them on Christmas tree branches, tie them to holiday gift packages, string them into a mantel garland, or sell them to raise funds for your favorite charity!
Pattern Specifications & Sizing Options
You can easily scale your woven stars by choosing different yarn weights and needle pairings:
| Version | Yarn Recommendation | Needle Size | Crochet Hook (Hanging) | Finished Star Width |
|---|---|---|---|---|
| Standard DK Star | Stylecraft Special DK (or any DK scrap yarn; ~5g total) | 3.25 mm (US Size 3) | 3.5 mm hook | ~9 cm / 3½ inches |
| Miniature 4-Ply Star | Thin 4-ply / Sock Yarn (~400 m / 100g) | 2.25 mm (US Size 1) | 2.5 mm hook | ~6 cm / 2¼ inches |
Pro Tip: Choose needles slightly smaller than the yarn ball-band suggests to achieve a firm, structured fabric that holds its star points crisply when hung.
Materials You’ll Need
- Yarn: Approx. 5g of DK weight yarn (or 4-ply yarn). Using two contrasting shades of one color (or two distinct colors) highlights the woven effect beautifully.
- Knitting Needles: 3.25 mm (US 3) straight knitting needles for DK, or 2.25 mm (US 1) for 4-ply.
- Crochet Hook: 3.5 mm (for DK) or 2.5 mm (for 4-ply) to make the hanging loop.
- Tapestry Needle: For sewing the triangles and securing the joints.
- Blocking Supplies: Rust-proof t-pins and a blocking mat or folded towel.
Abbreviations & Special Stitches Explained
- K: Knit
- P: Purl
- K2tog: Knit two stitches together as one (right-leaning decrease).
- SSK (Slip, Slip, Knit): Slip two stitches knitwise one at a time to the right needle, insert the tip of the left needle into the fronts of both stitches from left to right, and knit them together (left-leaning decrease).
- S2KP2 (Centered Double Decrease): Slip two stitches together as if to knit them together, knit the next stitch, then pass the two slipped stitches over the knit stitch (decreases 2 stitches symmetrically, leaving a prominent central ridge).
- sl 1 pwise wyif: Slip one stitch purlwise with the working yarn held in the front of your work.
Step-by-Step Instructions: How to Knit Woven Stars
Step 1: Knit the First Triangle
Using the long-tail cast-on method, cast on 63 stitches (this provides 21 stitches for each of the three sides of your triangle):
Row 1: K9, (S2KP2, K18) twice, S2KP2, K9 — (57 sts remaining).
Row 2: K7, (SSK, sl 1 pwise wyif, K2tog, K14) twice, SSK, sl 1 pwise wyif, K2tog, K7 — (51 sts remaining).
Row 3: K7, (S2KP2, K14) twice, S2KP2, K7 — (45 sts remaining).
Row 4: K5, (SSK, P1, K2tog, K10) twice, SSK, P1, K2tog, K5 — (39 sts remaining).
Row 5: K5, (S2KP2, K10) twice, S2KP2, K5 — (33 sts remaining).
Notice how each row decreases exactly six stitches—two at each corner point. The right side of the work displays distinct vertical knit lines running into the corners!
Cast Off (Bind Off):
Cast off following this sequence: K3, (SSK, P1, K2tog, K6) twice, SSK, P1, K2tog, K3.
Seam Triangle 1:
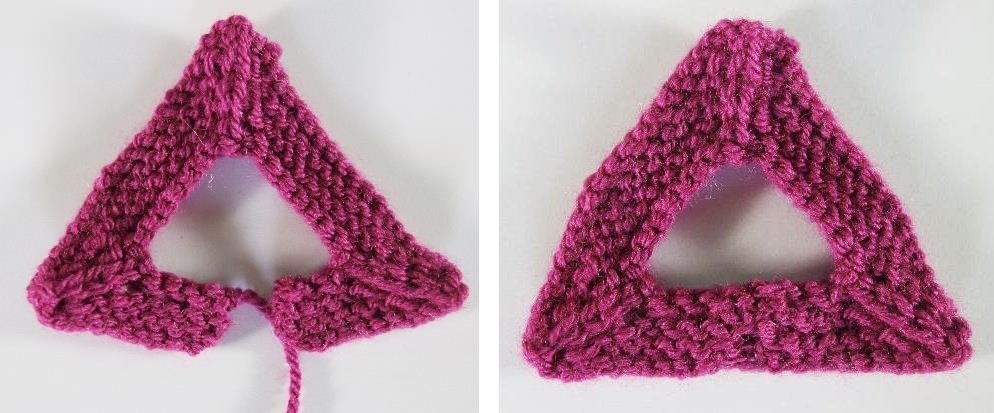
With the right sides facing together, whipstitch / oversew the two narrow ends of the strip together using your tapestry needle to form a closed triangle. (Don’t worry about making this seam invisible—it will be concealed once woven!)
Step 2: Knit the Second Triangle
Knit an exact replica of the first triangle by repeating Rows 1 through 5 and casting off in pattern. Important: Leave a long tail of yarn when casting off, and do not seam the ends together yet!
Step 3: The Interlocking Weave
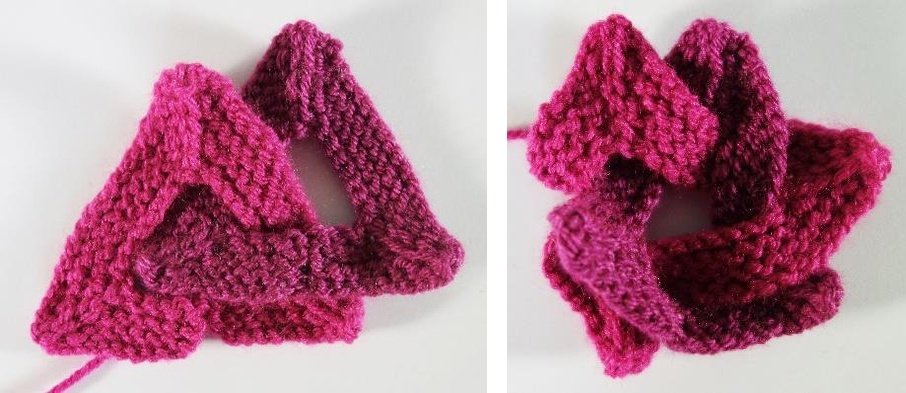
1. Lay your first closed triangle flat on your work surface.
2. Take the end of the second unsewn strip that does not have the long tail.
3. Thread this free end over and under each of the three sides of the first triangle in turn.
4. When you reach the third side, pull the knitting gently to bring the two ends together. Ensure your strip has not twisted, then oversew the two ends together to close the second triangle ring.
5. Gently ease and adjust the two interlocked triangles with your fingers until they settle into a balanced, symmetrical six-pointed star.
Step 4: Securing the Star Points
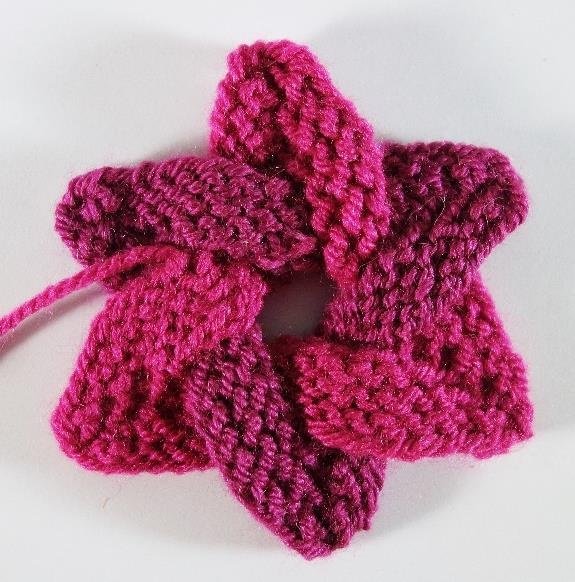
To keep your star from shifting out of alignment when handled or hung:
1. Flip the star over to the wrong side.
2. Thread your remaining yarn tail onto a tapestry needle.
3. Sew the two triangles together with one small, invisible stitch at each of the six crossing points (as shown in the reference guide).
4. Simply pass your needle under the arms of the star to travel between points without cutting the yarn. Fasten off securely.
Step 5: Add the Hanging Loop & Block
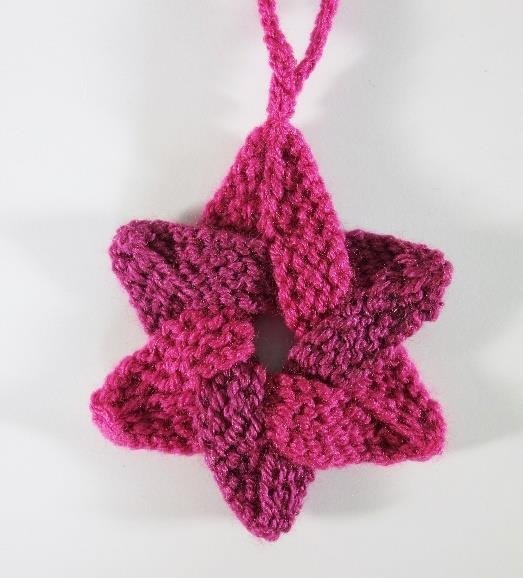
1. Crochet the Hanging Chain: Using your crochet hook and matching yarn, crochet a chain of about 40 stitches (approx. 15 cm / 6 inches long). Fold in half and sew both ends to one of the upper star points.
2. Wet Blocking: For truly crisp, geometric points, spritz the finished star with cool water and pin it out on a blocking mat by each of its six tips, with the right side facing down. Allow to dry completely before unpinning.
Creative Variations & Styling Ideas
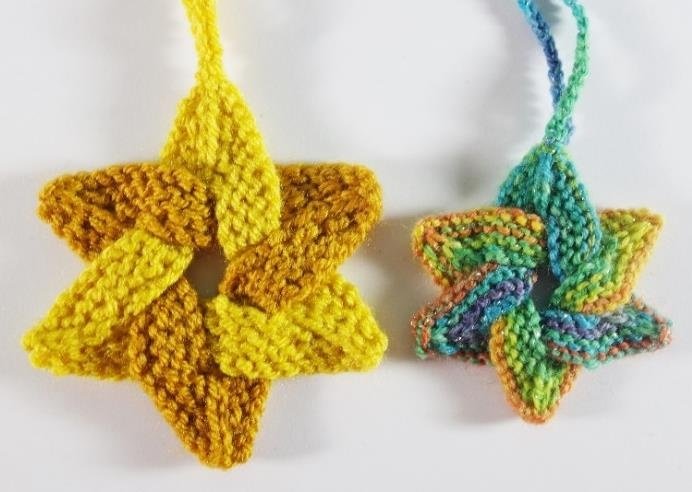
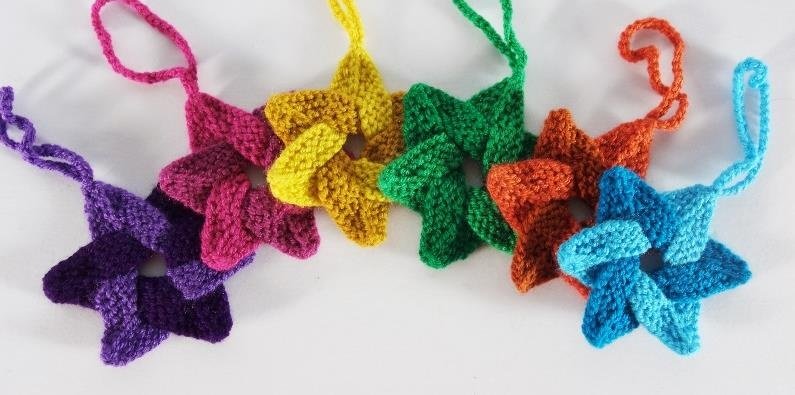
- Two-Tone Contrast: Knit Triangle 1 in light pink and Triangle 2 in dark magenta (or navy and cream) to emphasize the woven interlacing.
- Self-Striping & Variegated Yarns: When using variegated sock yarn, the natural color changes will produce two subtly different triangles from the exact same skein!
- Festive Sparkle: Sew miniature glass beads, golden sequins, or tiny wooden buttons at the center intersections or along the points.
Frequently Asked Questions (FAQ)
How long does it take to knit a woven star?
Because each triangle only requires five short rows, most knitters finish an entire woven star in 25 to 35 minutes from cast-on to final blocking.
Can I make these stars without a crochet hook?
Yes! Instead of a crocheted chain, you can make a braided yarn cord, a simple twisted loop, or attach a metallic ribbon or ornament hook directly to one of the star tips.
Can I sell finished woven stars?
According to designer Frankie Brown’s copyright notice, items made from this pattern may be freely sold to raise money for charity, but should not be sold for personal commercial profit.
Conclusion
Creating handmade woven stars is a wonderful way to add rustic charm and personal warmth to your home decor or holiday celebrations. Whether you are crafting them as festive hanging ornaments, table centerpieces, or thoughtful handmade gifts, these timeless decorative pieces are both rewarding and delightful to make. Grab your materials and start weaving your own custom creations today!


One Comment