
Backpack Pets School Bag – Free Crochet Pattern with Peek Hole for Pet Pal Stuffies
If you have a Pet Pal stuffie and want to take it everywhere, this is the pattern you need. The Backpack Pets School Bag is a chunky, quick-to-crochet mini backpack designed with a special “Pringie Peek Hole” — a shaped opening right at the front so your stuffie can pop its head out and come along for the adventure.

Made with size 6 blanket yarn and an 8mm hook, this works up fast. The bag features a fold-over flap with a button closure, your choice of scalloped or straight edges, adjustable shoulder straps, a handle, and an optional side pocket. A bonus mini tumbler accessory pattern is also included — it hooks right onto your Pet Pal’s paw!

💡 Before You Start: This pattern is worked in continuous rounds (do not chain 1 between rounds). Use the YU/YO technique throughout. For colour changes, switch to the new colour on the final pull of the stitch before the change — this gives you a clean, crisp colour line every time.
Table of Contents
Materials & Tools
For the Backpack
- Blanket Yarn (size 6) — main colour (MC) and contrast colour (CC)
- 8mm crochet hook
- 1 button — 1 inch diameter
- Needle and thread (to sew button)
- Darning needle
- Scissors
- Stitch markers (multiple colours recommended)
For the Bonus Mini Tumbler
- Polyester Chenille Yarn (size 5) — main colour + small amount of grey and white
- 5mm crochet hook
- A little polyester fiberfill stuffing
Abbreviations (US Crochet Terms)
| Abbreviation | Meaning |
|---|---|
| MC | Magic Circle |
| sc | Single Crochet |
| hdc | Half Double Crochet |
| dc | Double Crochet |
| inc | Increase (2 sc in one stitch) |
| dec | Invisible Decrease |
| hdc inc | Half Double Crochet Increase |
| hdc2tog | HDC Two Together (decrease) |
| sc4tog / sc2tog | SC Four / Two Together |
| sl st | Slip Stitch |
| ch | Chain |
| FO | Fasten Off |
| FLO | Front Loop Only |
| BLO | Back Loop Only |
| 3LO | Third Loop Only — insert hook into the single loop directly behind the two loops where you normally crochet |
| BPO | Back Post Only — insert hook into the post of the stitch instead of under the two loops |
| sm | Stitch Marker |
| sk st | Skip Stitch |
| CC | Colour Change |
| ( ) | Repeat the indicated number of times |
Step 1: Backpack Base
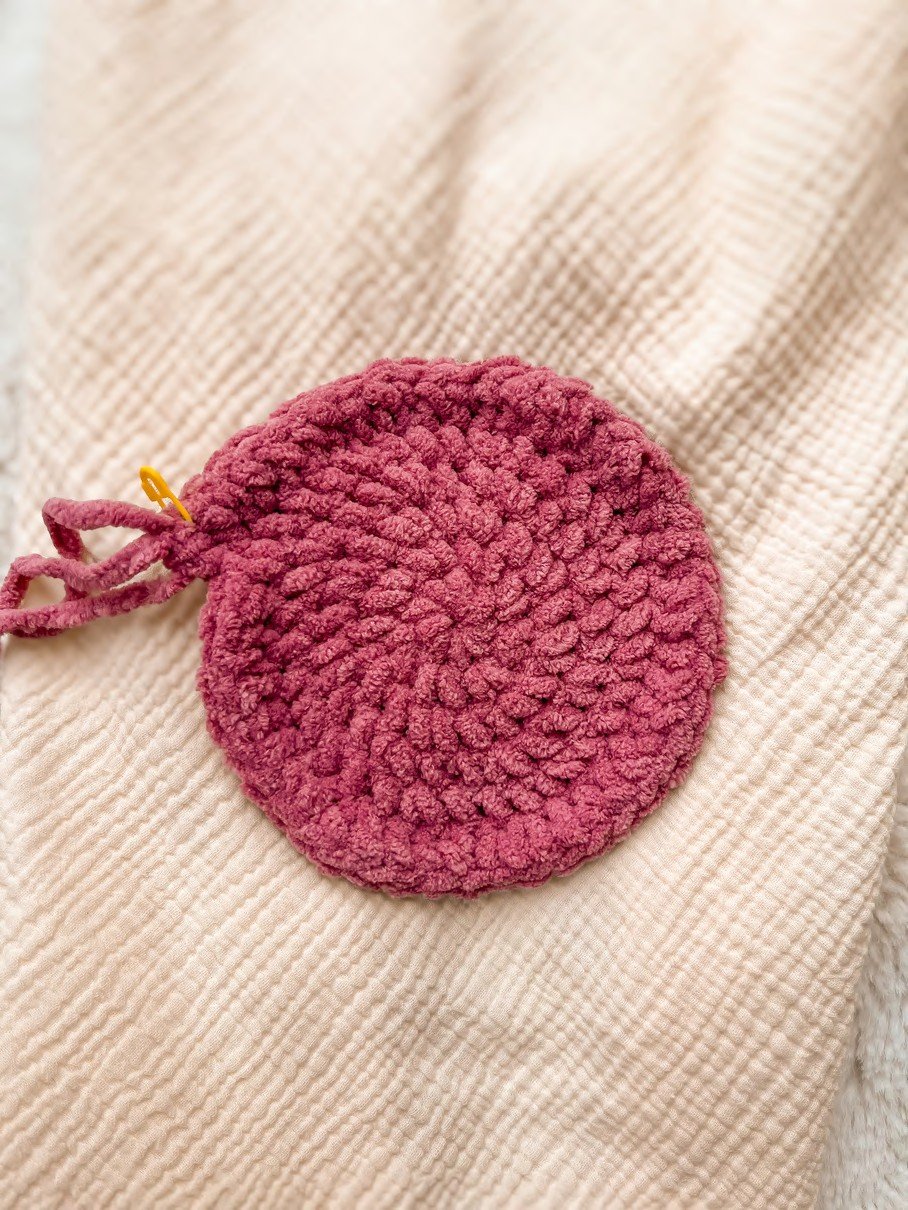
Hook: 8mm | Yarn: Main colour (MC). Work in continuous spiral rounds.
📌 3LO (Third Loop Only): Insert your hook into the single loop directly behind the two loops where you normally crochet. You’ll see a horizontal ridge appear — this is what gives the base its defined, structured edge.
- Round 1: 8 sc in a magic circle (8)
- Round 2: inc around (16)
- Round 3: (sc, inc) × 8 (24)
- Round 4: (sc, inc, sc) × 8 (32)
- Round 5: (3 sc, inc) × 8 (40)
- Round 6: (2 hdc, hdc inc, 2 hdc) × 8 (48) — worked in HDC
- Round 7 (in 3LO): sc around (48) — pull tight after each sc to avoid gaping
Step 2: Backpack Body
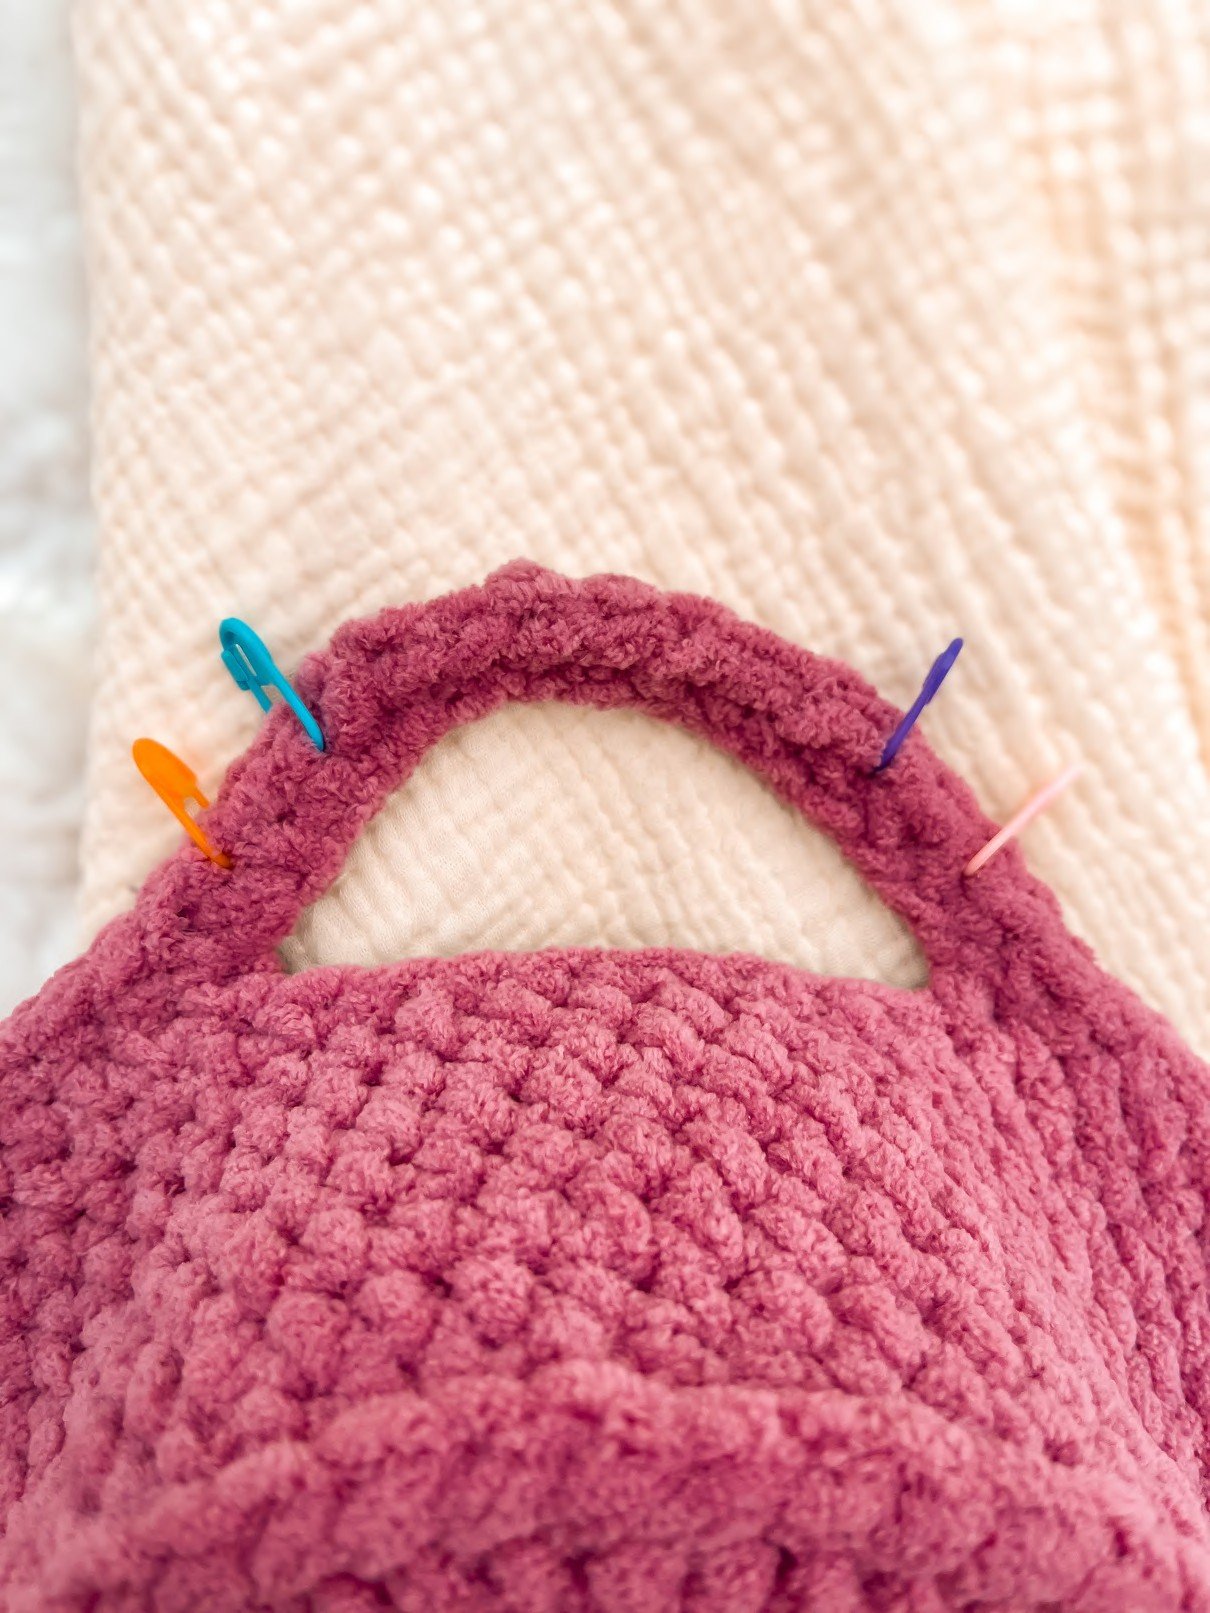
Continue in MC, working straight sc rounds on the 48-stitch tube.
- Rounds 8–14: sc around (48) — 7 rounds / 336 stitches total
- Round 15: 20 sc, ch 15, skip 8 stitches, 20 sc (55 stitches including chain) — this creates the Peek Hole opening
- Round 16: sc around, working sc into each chain stitch (55)
Pause here. Using different coloured stitch markers, mark the following stitches:
- Stitch 22 — pink marker
- Stitch 24 — purple marker
- Stitch 33 — blue marker
- Stitch 35 — orange marker
Step 3: The “Pringie Peek Hole”

The rows below shape and clean up the peek hole opening. Keep your stitch markers in place throughout — do not remove them until instructed.
Partial Round
Work 22 sc (last sc lands in the pink marker stitch). Turn — do not chain.
Peek Hole Rows
- Row 1: 43 sc (last sc into the orange marker stitch on the other side of the hole). Turn — do not chain.
- Row 2: 15 sc, (sc, dec) × 4, 16 sc, skip stitches with pink marker posts, 2 sc (last sc into purple marker stitch). Turn — do not chain.
- Row 3: 41 sc, skip orange marker post stitches, 2 sc (last sc into blue marker stitch). Turn — do not chain.
- Row 4: Mark your first sc with a yellow marker. 43 sc, skip purple marker post stitches, sc, dec × 3, sc, skip blue marker post stitches, 1 sc into yellow marker stitch. Continue in the round (rounds reset here for convenience).
After Peek Hole Rows
- Rounds 1–2: sc around (48)
- Round 3: 7 sc, dec × 2, 19 sc, dec × 2, 14 sc (44)
- Round 4: sc around (44)
- Add sc until you reach the back corner (approx. 9 sc) so the colour change lands at the bag’s back.
- Round 5 (CC to contrast colour, in BLO): sc around (44)
Invisible fasten off. Weave in ends.
✂️ Invisible Fasten Off: Standard FO first, then thread the tail onto a darning needle. Insert under both loops of the 2nd stitch (outside to inside), then insert into the back loop of the stitch where the tail came from. Pull gently to form a false stitch — completely seamless!
Clean Up the Peek Hole
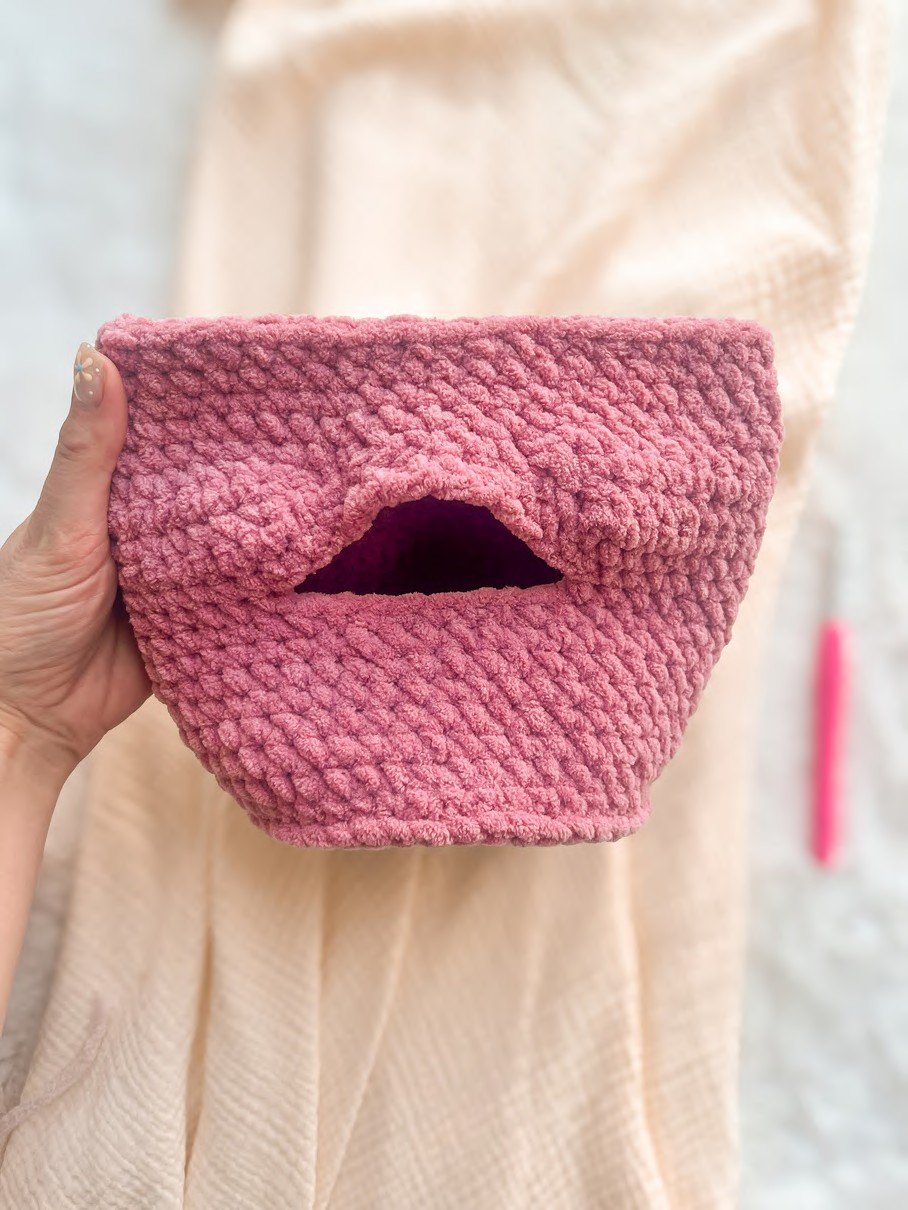
Using main colour yarn, work around the peek hole opening:
- Sl st into the bottom left of the hole opening.
- hdc2tog in the corner.
- 15 hdc across the top of the hole.
- hdc2tog in the second corner.
- 8 hdc across the bottom of the hole.
- Sl st into the first stitch. Invisible FO.
Step 4: Backpack Flap
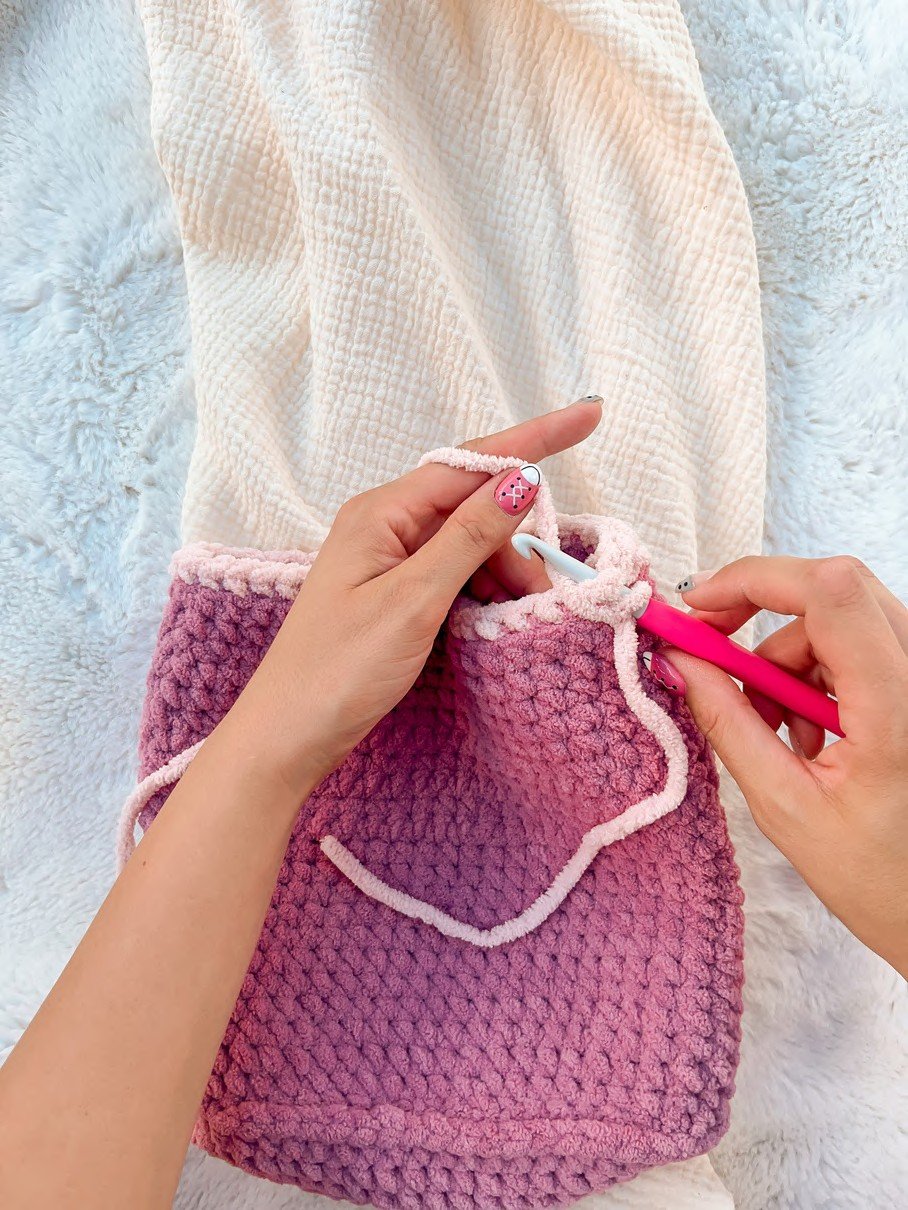
Hook: 8mm | Yarn: Contrast colour (CC). The flap is worked flat in rows. Turn after each row — do not chain.
Fold the backpack closed with the peek hole facing away from you. Use stitch markers to mark the two corner stitches where the sides meet. Count the stitches between the markers — there should be exactly 20, including the marked corners. Attach yarn at the right corner using a standing single crochet.
📌 Standing Single Crochet: Begin with a slip knot on your hook. Enter the stitch, pull up a loop. YO and pull through both loops on your hook. This avoids a starting chain and gives a clean edge.
- Row 1: Standing sc, 19 sc across the back (20). Turn.
- Rows 2–5: sc across (20). Turn. — 4 rows / 80 stitches
- Row 6 (buttonhole): 9 sc, ch 2, skip 2, 9 sc (20). Turn.
- Row 7: sc across (20). FO, weave in ends.
Sew the button to the top middle of Round 4 (the last round before the CC colour change on the bag body).
Flap Finishing Edge — Choose Your Style

Attach yarn at the same right corner where you started the flap (marked with sm). Choose one finishing style:
Option A — Scalloped Edge
- Sl st into the right corner.
- Make 5 sc up the right side of the flap.
- Working across the front flap edge: hdc inc, 2 hdc, (3 dc in the same stitch, sk st, sl st, sk st) × 3, 3 dc in the same stitch, 4 hdc.
- Make 5 sc down the left side, sl st.
- FO and weave in ends.
Option B — Straight Edge
- Sl st into the right corner.
- Make 5 hdc up the right side of the flap.
- Working across the front flap edge: 20 hdc.
- Make 5 hdc down the left side, sl st.
- FO and weave in ends.
Step 5: Straps

Hook: 8mm | Yarn: Contrast colour (CC).
The strap lengths below are sized for toddler to small child. Adjust as needed for a larger size.
Shoulder Straps (Make 2)
Choose one style:
- Scalloped (“Bkay Scallop”): Repeat this sequence 15 times — ch 3, hdc into the first chain, FO. Leave an 8-inch tail.
- Straight: Ch 40, work 39 sc back down the chain. FO, leaving an 8-inch tail.
Handle Strap (Make 1)
- Scalloped: Create 5 scallops using the Bkay Scallop method above.
- Straight: Ch 15, work 14 sc back down the chain.
💡 Before Attaching: Using a darning needle and an 8-inch piece of matching yarn, knot additional tails to each strap end so you have two yarn tails at each end before you start attaching. This gives you enough to secure the knots firmly.
Use stitch markers to set the strap attachment points on the bag:
- Shoulder straps: Attach 7–8 stitches apart at the top, 10–12 stitches apart at the bottom.
- Side bag style: Use one strap (doubled in length) with attachment points shown in the photo for a crossbody/side-bag look.
Step 6: Securing the Straps
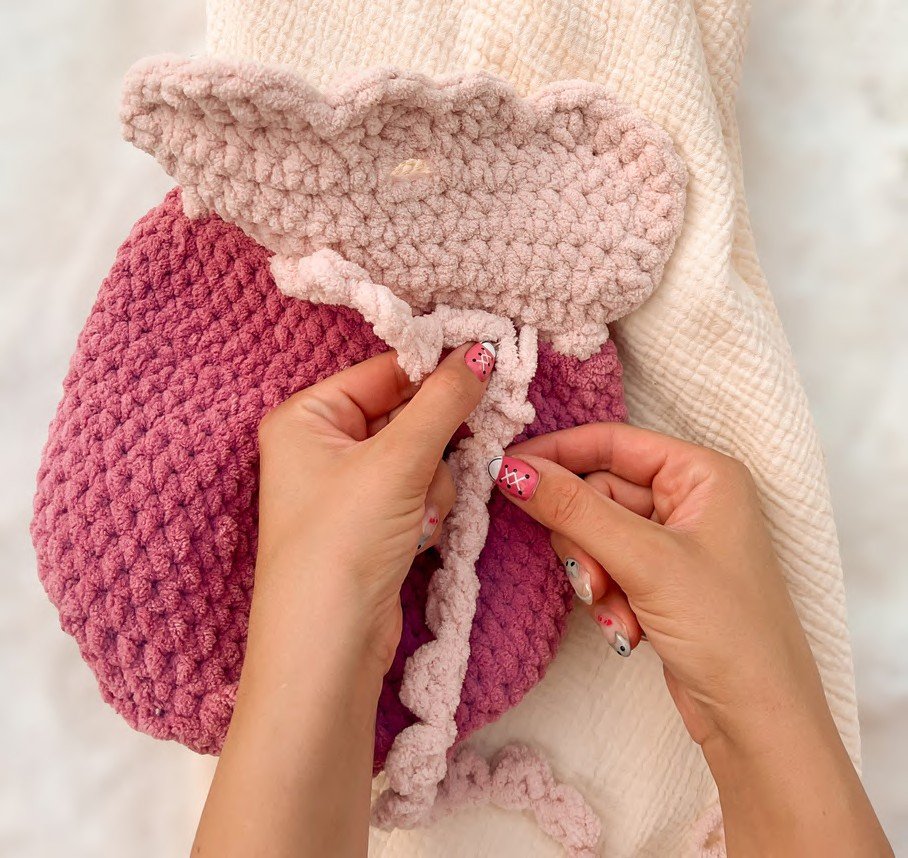
Simply weaving in strap ends is not sufficient — use knots to secure them properly. Follow these steps for every strap attachment point:
- Using a darning needle or crochet hook, pull both tail ends of the strap (one at a time) from the outer side of the backpack to the inner side.
- Knot the two tails together on the inner side. Pull them back through to the outer side.
- On the outer side, knot the tails together again.
- Pull the tails back to the inner side one more time and knot together.
- Weave in or trim the remaining tail ends.
Repeat steps a–e for all strap attachments and the handle.
Step 7: Optional Side Pocket

Hook: 8mm | Yarn: Main colour (MC). Work in rows, turning after each row — do not chain.
- Row 1: Ch 9, work 8 sc down the chain. Turn.
- Rows 2–6: 8 sc across. Turn. — 5 rows
FO, leaving a long tail. Whip stitch the pocket onto the side of the bag. Weave in all tail ends.
Optional: Clean Up the Inner Edge
The inner edge of the bag where the flap meets the base may show visible knots from the strap attachment. To tidy this up: join yarn at the inner corner with a sl st, then work surface sc evenly across the entire inner edge. Sl st to finish, FO, and weave in ends.
Bonus: Mini Tumbler Accessory

Hook: 5mm | Yarn: Polyester Chenille (size 5) in main colour + grey + white. Stuff firmly.
Tumbler Body
- Round 1: 8 hdc in a magic circle
- Round 2 (in 3LO): sc around (8)
- Rounds 3–4: sc around (8)
- Round 5: (sc, inc) × 4 (12)
- Round 6 (in FLO): sc around (12)
- Rounds 7–10: sc around (12)
- CC to grey: Round 11: sc around (12)
- CC to white: Round 12 (in BLO): sc around (12)
- Round 13 (in BPO): sc around (12)
FO — weave the tail end through the remaining front loops and pull gently to close the top. Hide the tail end inside.
Using a lighter shade of the main colour, embroider a small line two stitches wide, one stitch below the grey colour change, for the lid detail.
Handle
Sl st directly under the grey colour change. Ch 8. Sl st directly above the FLO ridge from Round 6. FO, hide tails.
Straw Holder
Sl st on one side of the white top. Ch 3. Sl st directly across. FO, hide tails.
Straw
Sl st off to the side and under the straw holder. Ch 2. Sl st into the 2nd chain from your hook. Sl st into the same starting stitch. FO, hide tails.
Finished!
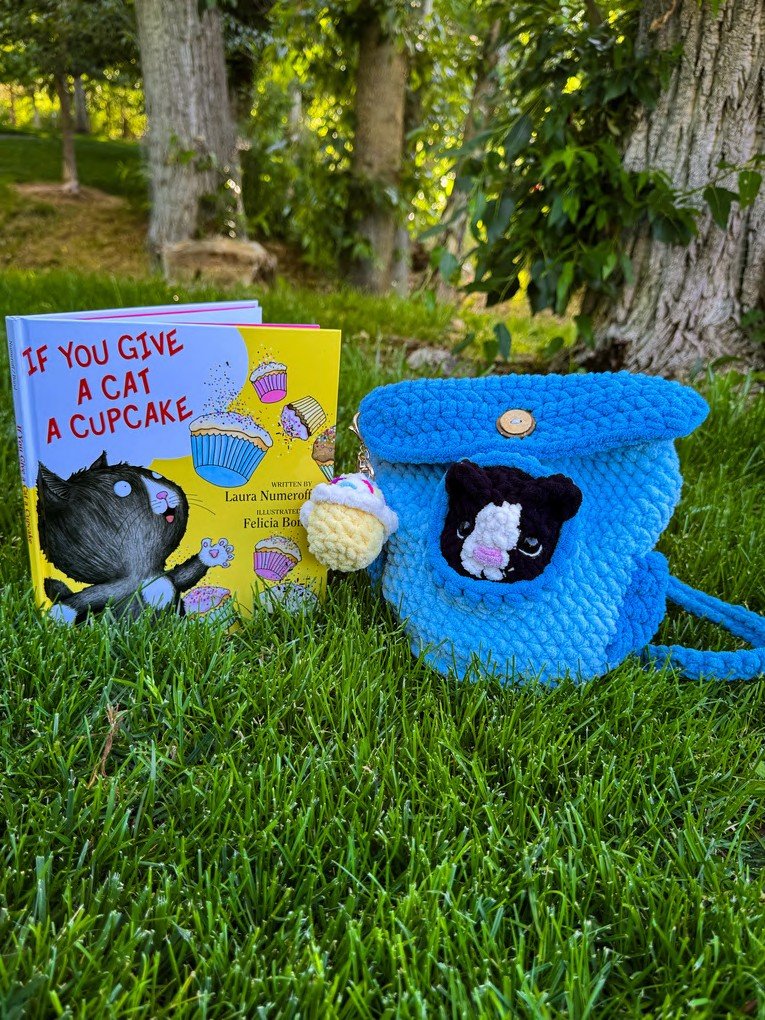
Pop your favourite Pet Pal stuffie into the bag so their head peeks through the Pringie Peek Hole — and your School Bag is ready for its first adventure! 🎒
Frequently Asked Questions
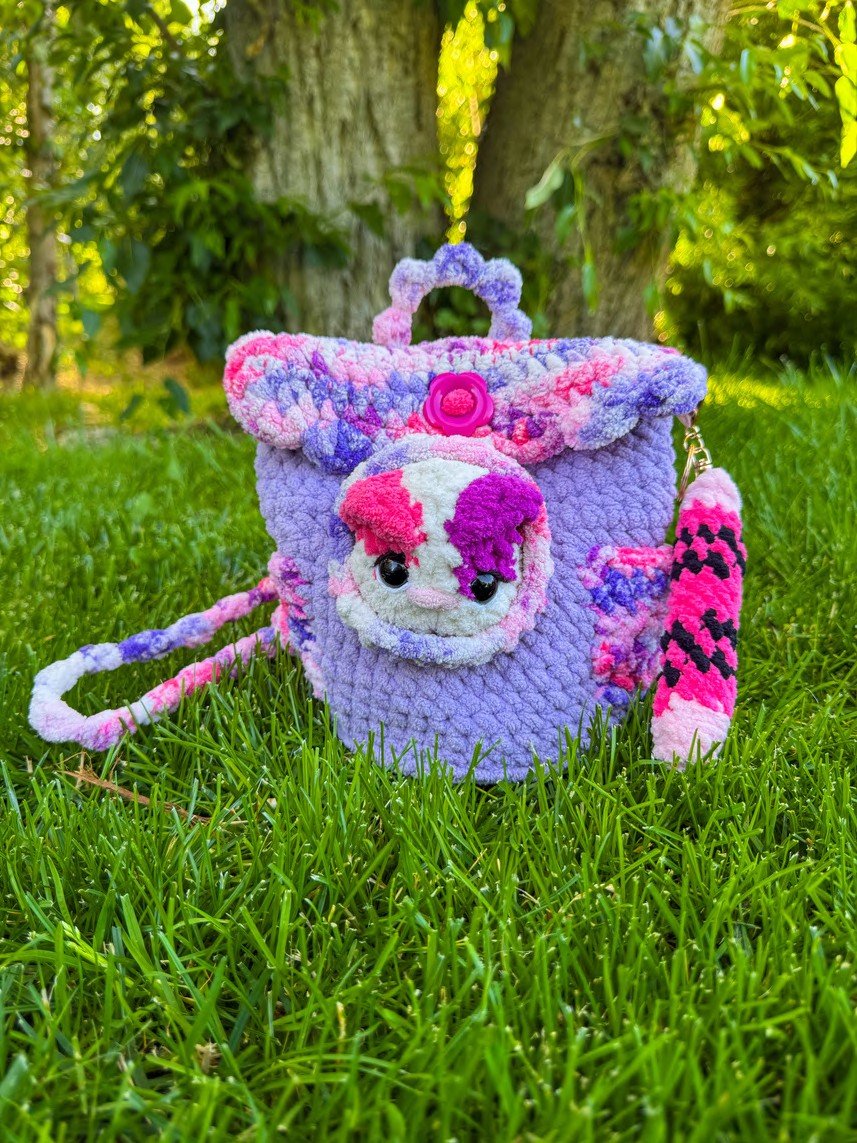
What size is the finished backpack?
Made with size 6 blanket yarn and an 8mm hook, the finished bag is sized for a toddler to small child. The strap length is adjustable — simply add or remove chain stitches (straight style) or scallop repeats (scalloped style) to fit any size.
What Pet Pal stuffies fit through the peek hole?
The peek hole is specifically designed for the Pet Pals stuffie collection by Pringie Pal Crochet (patterns sold separately). The opening is sized so the stuffie’s head pops through snugly without falling in.
Can I use a different weight yarn?
Yes — testers have used size 6 blanket yarn with both 7mm and 8mm hooks with great results. Some testers found a 7mm hook gave a slightly tighter, more structured fabric. Use whichever hook gives you a dense, even fabric that doesn’t gap.
Do I need to stuff the bag?
No — the backpack body is not stuffed. The blanket yarn is thick enough to hold its shape on its own. The only stuffed piece is the optional mini tumbler accessory.
Conclusion
As you embark on your next creative fiber arts journey, crafting your own adorable Backpack Pets School Bag brings immense joy and personality to everyday style. Whether you are stitching a playful companion for a little one heading off to class or adding a charming touch to your own handmade collection, bringing these delightful characters to life is a wonderful way to showcase your crafting skills. Grab your favorite yarn and hooks to start your next creative project today!

One Comment