

Bonnie crochet doll Free Pattern – Boo from Monsters Inc Amigurumi
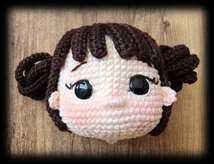
If you love Monsters, Inc., this Bonnie crochet doll amigurumi pattern is going to be your new favorite project. Bonnie is an adorable little character wearing her iconic Monsters costume — a pink blouse, purple shorts with shoulder straps, teal monster shoes, two classic hair buns, a unicorn-style monster hairband, and she even carries a tiny Mike Wazowski bag!

The pattern is fully wired, which means Bonnie can stand on her own and her arms are poseable. She’s worked almost entirely in 2.00 mm hook with Catania cotton yarn, giving her a beautifully smooth, firm finish.
This is an intermediate amigurumi pattern — if you’re comfortable with magic rings, increases, decreases, and basic assembly, you’ll handle this with ease. Let’s get started!
💡 Note: If you don’t have Baby Smiles Lenja Soft yarn, use your regular yarn split into 2 strands for the hairband and shoes sections. Using full-weight regular yarn for those parts will make them come out larger than intended.
Table of Contents
Materials & Tools
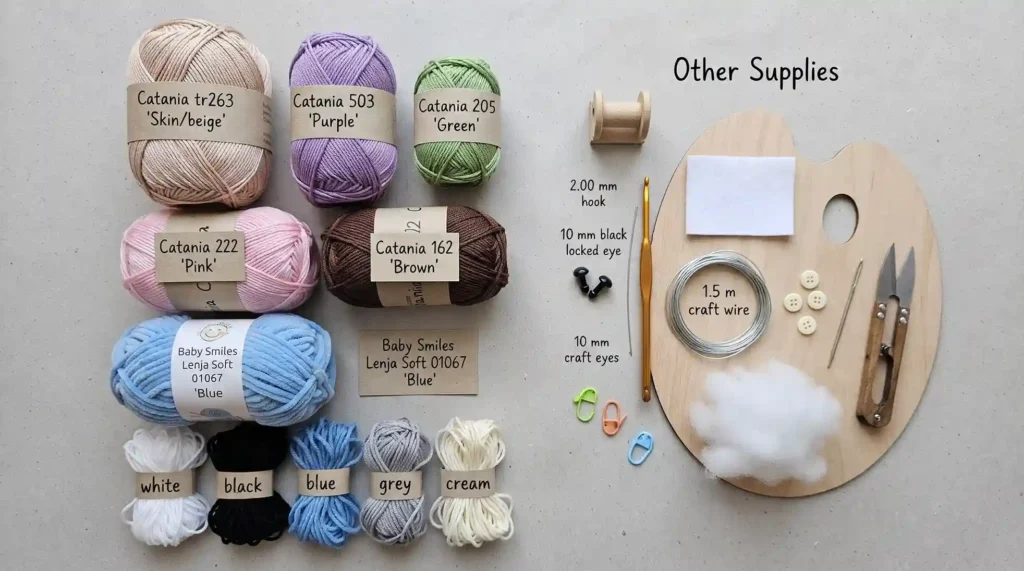
Yarn Colors
- Catania tr263 — Skin / beige (body, head, arms, legs)
- Catania 503 — Purple (shorts and bucket hat detail)
- Catania 205 — Green (Mike Wazowski bag)
- Catania 222 — Pink (blouse)
- Catania 162 — Brown (hair)
- Baby Smiles Lenja Soft 01067 — Blue (shoes, hairband)
- Small amounts: white, black, blue, grey (bag details), cream (blouse collar)
Other Supplies
- 2.00 mm crochet hook
- 10 mm black locked safety eyes, preferably flat (× 2)
- 1.5 meters of 2.5 mm craft wire (full body frame)
- White felt (for hairband horns and shoe teeth)
- 3 small buttons (shorts straps)
- Polyester fiberfill stuffing
- Tapestry needle and scissors
- Stitch markers
Abbreviations
| Abbreviation | Meaning |
|---|---|
| mr | Magic Ring |
| sc | Single Crochet |
| hdc | Half Double Crochet |
| dc | Double Crochet |
| ch | Chain |
| inc | Increase (2 sc in one stitch) |
| dec | Invisible Decrease |
| w | 3 sc in the same stitch |
| m | Decrease 3 stitches together |
| slst | Slip Stitch |
| flo | Front Loop Only |
| blo | Back Loop Only |
| iss | In same stitch |
| hdc(inc) | Increase with HDC |
| hdc(dec) | Decrease with HDC |
| * | Repeat the section the stated number of times |
Step 1: Head

Yarn: Skin / beige (Catania tr263) — 2.00 mm hook. Work in continuous spiral rounds.
- Rnd 1: MR 6 sc (6)
- Rnd 2: 1 inc in each stitch (12)
- Rnd 3: (1 sc, 1 inc) × 6 (18)
- Rnd 4: (2 sc, 1 inc) × 6 (24)
- Rnd 5: (3 sc, 1 inc) × 6 (30)
- Rnd 6: (4 sc, 1 inc) × 6 (36)
- Rnd 7: (5 sc, 1 inc) × 6 (42)
- Rnd 8: (6 sc, 1 inc) × 6 (48)
- Rnd 9: (7 sc, 1 inc) × 6 (54)
- Rnds 10–17: 54 sc (8 rounds)
- Rnd 18 (eye holes): 23 sc, ch 1 skip 1, 8 sc, ch 1 skip 1, 21 sc (54)
- Rnd 19 (cheek expansion): 21 sc, 4 inc, 6 sc, 4 inc, 19 sc (62)
- Rnds 20–23: 62 sc (4 rounds)
- Rnd 24: 21 sc, 4 dec, 6 sc, 4 dec, 19 sc (54)
- Rnd 25: 3 sc, 1 dec, (7 sc, 1 dec) × 5, 4 sc (48)
- Rnd 26: (6 sc, 1 dec) × 6 (42)
- Rnd 27: 2 sc, 1 dec, (5 sc, 1 dec) × 5, 3 sc (36)
- Rnd 28: (4 sc, 1 dec) × 6 (30)
- Rnd 29: 1 sc, 1 dec, (3 sc, 1 dec) × 5, 2 sc (24)
- Rnd 30: (2 sc, 1 dec) × 6 (18)
- Rnd 31: (1 sc, 1 dec) × 6 (12)
Insert safety eyes through the Rnd 18 holes. Stuff the head firmly. Fasten off with a long tail for sewing. Add small ear pieces: work 6 sc into a magic ring and sew flat to the sides of the head.
👁 Eye Pulling Tip: For extra expressiveness, you can pull/sink the eyes deeper into the head using a needle and thread after inserting the safety backs. This creates a gorgeous recessed look! Search for “amigurumi eye pulling technique” for a visual reference.

Step 2: Arms (Make 2)

Yarn: Skin / beige — 2.00 mm hook. Work in spiral rounds.
- Rnd 1: MR 6 sc
- Rnd 2: 6 inc (12)
- Rnds 3–4: 12 sc (2 rounds)
- Rnd 5: 1 sc, 1 dec, 4 sc, 1 dec, 3 sc (10)
- Rnd 6: 1 sc, 2 dec, 5 sc (8)
- Rnds 7–22: 8 sc (16 rounds)
Insert wire through the arm before stuffing. Stuff lightly and fasten off. Make 2.
Step 3: Legs (Make 2)
Yarn: Skin / beige — 2.00 mm hook. Work in spiral rounds.
- Rnd 1: Ch 7. From the 2nd ch: 1 inc, 4 sc, 1 w (3 sc in same st), 5 sc (14)
- Rnd 2: 1 sc, 1 inc, 4 sc, 3 inc, 4 sc, 1 inc (19)
- Rnd 3 (BLO): 19 sc
- Rnd 4: 19 sc
- Rnd 5: 6 sc, 4 dec, 5 sc (15)
- Rnd 6: 5 sc, 3 dec, 4 sc (12)
- Rnd 7: 12 sc
- Rnd 8: 1 inc, 11 sc (13)
- Rnd 9: 13 sc
- Rnd 10: 1 sc, 1 inc, 11 sc (14)
- Rnd 11: 4 sc, 1 inc, 8 sc, 1 inc (16)
- Rnd 12: 16 sc
- Rnd 13: 2 sc, 1 inc, 13 sc (17)
- Rnds 14–16: 17 sc (3 rounds)
- Rnd 17: 1 sc, 1 dec, 2 sc, 1 dec, 10 sc (15)
- Rnd 18: 2 sc, 2 dec, 3 sc, 3 inc, 3 sc (16)
- Rnd 19: 16 sc
- Rnd 20: 1 sc, 1 inc, 1 sc, 1 inc, 12 sc (18)
- Rnds 21–23: 18 sc (3 rounds)
- Rnd 24: 2 sc, 1 inc, 2 sc, 1 inc, 12 sc (20)
- Rnds 25–27: 20 sc (3 rounds)
Right leg only — Rnd 27: Work 10 sc and leave the rest unworked; you will join both legs in the next step.
Step 4: Body

Yarn: Skin / beige (switch to skin color at Rnd 7) — 2.00 mm hook. Work in spiral rounds.
Align both legs side by side with the backs of the legs facing you. Join the right leg to the left leg using 2 chains.
- Rnd 1: 20 sc, 2 sc over 2 ch, 20 sc, 2 sc over 2 ch (44)
- Rnds 2–5: 44 sc (4 rounds)
- Rnd 6: 4 sc, 1 dec, 3 sc, 1 dec, 4 sc, 1 dec, 10 sc, 1 dec, 4 sc, 1 dec, 3 sc, 1 dec, 4 sc (38)
- Rnd 7 (switch to skin color): 8 sc, 1 dec, 17 sc, 1 dec, 9 sc (36)
- Rnds 8–17: 36 sc (10 rounds)
- Rnd 18 (attach arms): 8 sc, 3 sc with first arm, 15 sc, 3 sc with second arm, 7 sc (36) — align arms exactly at the sides
- Rnd 19: 8 sc, 5 sc from arm, 15 sc, 5 sc from arm, 7 sc (40)
- Rnd 20: 40 sc
- Rnd 21: 7 sc, 1 dec, 3 sc, 1 dec, 13 sc, 1 dec, 3 sc, 1 dec, 6 sc (36)
- Rnd 22: 6 sc, 1 dec, 1 m, 1 dec, 11 sc, 1 dec, 1 m, 1 dec, 5 sc (28)
- Rnd 23: 3 sc, 4 dec, 6 sc, 4 dec, 3 sc (20)
- Rnd 24: (1 sc, 1 dec) × 6, 1 dec (13)
- Rnd 25: 4 sc, 1 dec, 5 sc, 1 dec (11)
- Rnds 26–28: 11 sc (3 rounds — neck tube)
Insert wire up through the body and neck. Stuff the body and neck firmly. Fasten off. Sew the head to the neck opening.

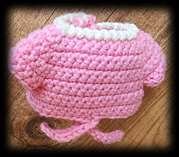
Step 5: Pink Blouse

Yarn: Pink (Catania 222) — 2.00 mm hook. Work in rows; make 1 ch at the end of each row and turn.
- Row 1: Ch 29. Skip 5 ch (buttonhole). 4 sc, 1 w, 2 sc, 1 w, 8 sc, 1 w, 2 sc, 1 w, 4 sc (32)
- Row 2: 5 sc, 1 w, 4 sc, 1 w, 10 sc, 1 w, 4 sc, 1 w, 5 sc (40)
- Rows 3–4: 40 sc
- Row 5: Ch 5 skip (buttonhole). 6 sc, 1 w, 6 sc, 1 w, 12 sc, 1 w, 6 sc, 1 w, 6 sc (48)
- Row 6: 48 sc
- Row 7 (sleeve openings): 7 sc, ch 5 skip 10 stitches, 14 sc, ch 5 skip 10 stitches, 7 sc
- Rows 8–11: 38 sc (4 rows)
- Row 12 (collar detail): 19 sc, make 9 ch — from the 2nd: 3 slst, 3 sc, 2 hdc — 11 ch — from the 2nd: 3 slst, 3 sc, 3 hdc, ch 1 skip 1 stitch, 1 sc to base, 16 sc
Collar: With cream yarn: ch 1, work slst along the side stitches of the collar row to create a clean edge.
Sleeves (work 2)
- Row 1: Pick up 16 stitches around the sleeve opening made in Row 7.
- Row 2: 16 sc
Step 6: Purple Shorts with Straps
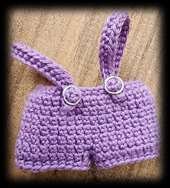
Yarn: Purple (Catania 503) — 2.00 mm hook. Use the wheat crochet technique (pull each sc out of the hook in two movements) for texture.
- Row 1: Ch 43. Skip 5 ch (buttonhole). 38 sc, join with slst.
- Rows 2–3: 38 sc
- Row 4: Join with slst at end of row, move up with 1 ch. 38 sc.
- Rows 5–6: 38 sc
First Cuff
- Row 1: Crochet 19 sc, join to starting point with 2 ch.
- Row 2: 19 sc, 2 sc over ch (21)
- Row 3: FLO 21 sc (regular sc — not wheat technique)
Second Cuff
- Row 1: Attach yarn to back part. 1 sc, 2 sc over ch, 18 sc.
- Row 2: 21 sc
- Row 3: FLO 21 sc
Straps: Ch 31 from the 2nd: 30 sc. Make 2. Sew one strap to the front and one to the back of the shorts waistband. Attach a button to each strap end.
Step 7: Hair

Yarn: Brown (Catania 162) — 2.00 mm hook. Join with slst at the end of rows; ch 1 and turn.
Hair Cap
- Rnd 1: MR 6 sc
- Rnd 2: 6 inc (12)
- Rnd 3: (1 sc, 1 inc) × 6 (18)
- Rnd 4: (2 sc, 1 inc) × 6 (24)
- Rnd 5: (3 sc, 1 inc) × 6 (30)
- Rnd 6: (4 sc, 1 inc) × 6 (36)
- Rnd 7: (5 sc, 1 inc) × 6 (42)
Long Hair Strands (attach around the cap edge)
- 17 times: Ch 22 from the 2nd — 21 hdc, skip 1 stitch, 1 slst back to cap
- 7 times: Ch 11 from the 2nd — 10 hdc, 1 slst back to cap
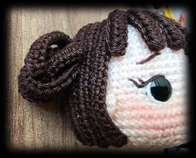
Side Hair Tails (Make 2 — for the buns)
- Rnd 1: MR 6 sc
- Rnd 2: 6 pieces — ch 13 from the 2nd: 12 hdc, slst back to center
Gather each side tail into a bun shape and sew to the sides of the hair cap.
Step 8: Monster Hairband (Unicorn Crown)
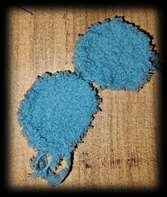
Yarn: Blue (Baby Smiles Lenja Soft 01067) — 2.00 mm hook. Make all pieces, then assemble.
Main Circles (Make 2)
- Rnd 1: MR 6 sc
- Rnd 2: 1 inc in each stitch (12)
- Rnd 3: (1 sc, 1 inc) × 6 (18)
- Rnd 4: (2 sc, 1 inc) × 6 (24)
- Rnd 5: (3 sc, 1 inc) × 6 (30)
- Rnd 6: (4 sc, 1 inc) × 4 (24) — fasten off
Big Polka Dots (Make 2)
- Rnd 1: MR 8 hdc
- Rnd 2: 8 hdc inc (16)
Small Polka Dots (Make 4)
- Rnd 1: MR 8 hdc
Bow
- Row 1: Ch 16 from the 2nd: 15 hdc
- Rows 2–6: 15 hdc — wrap yarn around the center 4–5 times to cinch into a bow shape
Wire Base (holds the hairband on the head)
Cut 12–15 cm of wire (measure it on the doll’s head first!). Work sc into a magic ring and continue sc until the wire is fully covered. Fasten off. Bend wire to curve.
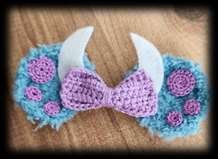
Cut horn shapes from white felt and assemble everything as shown in the photos: circles as the main “ear” shapes, polka dots glued/sewn on, horn felt pieces attached between the circles, and the bow at the front center.
Step 9: Shoes (Make 2)
Yarn: Start in Purple (Catania 503), switch to fluffy blue yarn for the fur effect — 2.00 mm hook. Join with slst at end of rows; ch 1 and turn.
- Row 1: Ch 7 from the 2nd: 1 inc, 4 sc, 1 w, 5 sc (14)
- Row 2: 1 sc, 1 inc, 4 sc, 3 inc, 4 sc, 1 inc (19)
- Row 3: 2 sc, 1 inc, 4 sc, (1 sc, 1 inc) × 3, 5 sc, 1 inc (24)
- Row 4 (switch to fluffy blue yarn, BLO): 24 sc
- Rows 5–7: 24 sc (3 rows)
- Row 8: 8 sc, 4 dec, 8 sc (20)
- Rows 9–11: 20 sc (3 rows)
Embroider 3 paw print shapes on the shoe using a contrasting color. Add a small amount of grey yarn tufts to the top of the shoe for the fur detail.
Step 10: Mike Wazowski Bag
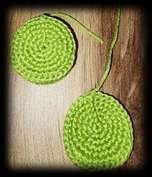
Yarn: Green (Catania 205) — 2.00 mm hook. Make 2 matching pieces.
Each Bag Piece (Make 2)
- Rnd 1: MR 6 sc
- Rnd 2: 6 inc (12)
- Rnd 3: (1 sc, 1 inc) × 6 (18)
- Rnd 4: (2 sc, 1 inc) × 6 (24)
- Rnd 5: (3 sc, 1 inc) × 6 (30)
- Rnd 6: 9 sc, (1 hdc(inc), 1 hdc) × 2, 4 sc, (1 hdc, 1 hdc(inc)) × 2, 9 sc (34)
- Rnd 7 (BLO): 34 sc
- Rnds 8–9: 34 sc — work only the first piece to this stage
For the second piece, stop after Rnd 6. Sew both pieces together. Stuff lightly. Embroider the mouth and sew on buttons for the eyes.
Mike’s Eye (for the bag face)
- With black: MR 8 sc
- With blue: (1 sc, 1 inc) × 4 (12)
- With white: (2 sc, 1 inc) × 4 (16)
Bag Hood / Flap
- Row 1: Ch 6 from the 2nd: 1 inc, 3 sc, iss. 4 sc, 3 sc, 1 inc (14)
- Row 2: 1 inc, 5 sc, 2 inc, 5 sc, 1 inc (18)
- Row 3: 2 inc, 5 sc, 4 inc, 5 sc, 2 inc (26)
- Rows 4–5: 26 sc
- Row 6: 3 hdc, 7 sc, 6 hdc, 10 sc (26)
Bag Eyes (for the hood — Make 2)
- Rnd 1: With black: MR 6 sc
- Rnd 2: Switch to white: (1 sc, 1 inc) × 3 (9)
- Rnd 3: (2 sc, 1 inc) × 3 (12)
- Rnd 4: 12 sc
- Rnd 5: Switch to purple FLO: 12 sc
- Rnd 6: 12 sc — stuff lightly with fiberfill
- Rnd 7: (2 sc, 1 dec) × 3 (9)
- Rnd 8: (1 sc, 1 dec) × 3 (6) — leave yarn long, gather and tighten
Insert wire at the base of each eye, wrap with purple yarn, and secure inside the hood from the bottom. Cut tooth shapes from white felt and glue along the bottom edge of the hood.
Bag strap: Make a chain long enough to go over Bonnie’s shoulder and attach both ends to the sides of the bag.
Final Assembly
- Sew the completed head onto the body neck opening (use wire inside neck for support).
- Dress Bonnie in the pink blouse — insert through the arm holes.
- Put on the purple shorts and adjust the straps over the shoulders, securing with buttons.
- Slide the shoes onto the feet.
- Sew the hair cap onto the head, making sure the buns sit naturally on each side.
- Place the monster hairband across the top of the head.
- Hang the Mike Wazowski bag over one arm.
- Embroider cheeks with pink thread or apply soft blush makeup for a rosy finish.
Frequently Asked Questions
How big is the finished Bonnie doll?
Made with a 2.00 mm hook and Catania yarn, Bonnie stands approximately 20–25 cm (8–10 inches) tall, with an oversized head in classic amigurumi proportions.
Does she need to be fully wired?
The pattern is designed for a full wire armature — it lets Bonnie stand independently and gives her poseable arms. If you prefer a softer toy (for young children), you can skip the wire and just stuff firmly, or use wire only in the neck for head support.
What if I can’t find Baby Smiles Lenja Soft yarn?
Split any similar weight yarn into 2 strands for the shoes and hairband sections. Using full-weight yarn will make these parts noticeably larger than intended.
Can I sell dolls made from this pattern?
Yes! You are welcome to sell finished dolls made from this pattern. The designer (@lorthobby) is happy for you to tag them on your posts so they can see and share your work.
Is this pattern good for beginners?
This is an intermediate level pattern — best for crocheters who already know magic rings, sc/hdc/dc, increases and decreases, and basic assembly. The wire work adds an extra challenge that first-timers may find tricky.
Conclusion
Bringing a handmade Bonnie crochet doll to life is an immensely satisfying and rewarding project for any fiber artist. From shaping the detailed amigurumi features and stitching her custom outfit to assembling the wire armature for stable posing, every step allows you to showcase your crochet skills and creativity. Whether you are crafting this adorable character as a cherished gift, a collector’s display piece, or a fun addition to your own handmade toy collection, your finished Bonnie doll will be a treasured creation filled with love and craftsmanship. Grab your hook, stitch with confidence, and enjoy the wonderful world of doll making!

One Comment