
Gingerbread Man Amigurumi – Free Crochet Pattern with Full Step-by-Step Instructions
This adorable Gingerbread Man Amigurumi is a festive crochet doll perfect for the holiday season. Standing 17 cm tall, this charming character features a golden-tan body, white icing cap with colorful sprinkles, a bright red scarf, a red hat, and cute peppermint buttons — all the hallmarks of a classic gingerbread cookie brought to life in yarn.
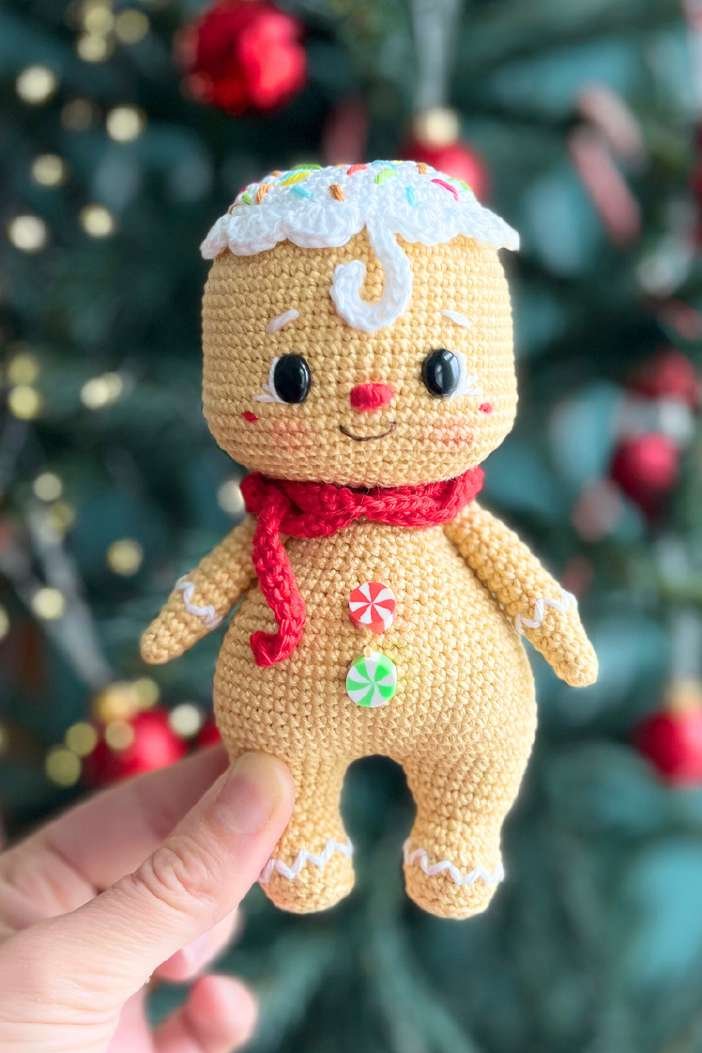
This pattern is designed for experienced crocheters. It combines single crochet shaping, wire armature, and hand embroidery to create a richly detailed holiday decoration or handmade gift.
Table of Contents
Materials & Tools
- Yarn: Catania Schachenmayr 100% Cotton, 50g/125m — Light Brown #206, White #106, Red #115, plus small amounts of colored yarn
- Hook: Size 3 (2.20 mm)
- Eyes: 8×10 mm black oval safety eyes
- Wire: 40 cm long, 2.5 mm thickness (for neck stability)
- Fiberfill stuffing
- 2 colored buttons (peppermint-style for belly)
- Dark brown embroidery floss
- Needle, scissors, tape, glue, stitch markers
Abbreviations
| mr = magic ring | sc = single crochet | inc = increase | dec = decrease |
| blo = back loop only | flo = front loop only | hdc = half double crochet | tr = treble crochet |
| dc = double crochet | dc-inc = dc increase | slst = slip stitch | ch = chain |
| w = 3sc in same stitch | m = sc3tog | bpsc = back post sc | hdc-w = 3hdc in same st |
Step 1: Arms (Make 2)
The arms are crocheted in light brown yarn and left unstuffed so they hang naturally at the sides. Leave a long yarn tail at the top for sewing onto the body.
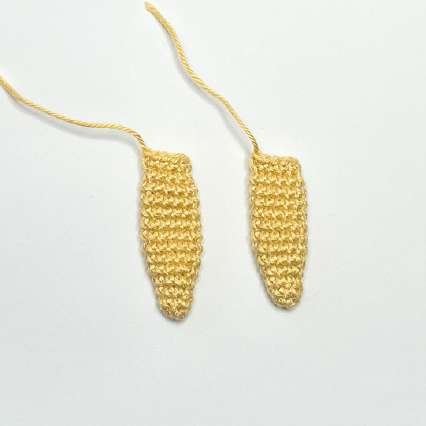
- Round 1: (L.Brown) mr, 6sc — [6]
- Round 2: (2sc, 1inc) × 2 — [8]
- Round 3: 8sc — [8]
- Round 4: (3sc, 1inc) × 2 — [10]
- Round 5: (4sc, 1inc) × 2 — [12]
- Rounds 6–12: 7 rounds of 12sc — [12]
- Round 13: (4sc, 1dec) × 2 — [10]
- Round 14: 10sc — [10] — Finished. Do not stuff.
Step 2: Feet (Make 2)
Make the right foot first, cut the yarn and set aside. Then make the left foot — do NOT cut the yarn; you’ll continue directly into the body.
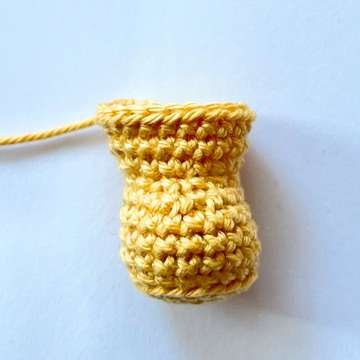
Right Foot:
- Round 1: mr, 6sc — [6]
- Round 2: 6inc — [12]
- Round 3: (1sc, 1inc) × 6 — [18]
- Round 4: blo 18sc — [18]
- Rounds 5–7: 18sc — [18]
- Round 8: 7sc, 2dec, 7sc — [16]
- Round 9: 6sc, 2dec, 6sc — [14] — add fiberfill
- Round 10: (1sc, 1inc) × 7 — [21]
- Rounds 11–12: 21sc, slst — Finished. Cut yarn. Skip 5sc, place stitch marker.
Left Foot: Rounds 1–12 same as right foot. Round 13: 17sc — Finished. Do NOT cut yarn. Continue to body.
Step 3: Body
The body is built upward from the two joined legs. Arms are worked directly into body rounds — no separate sewing needed for them. Add fiberfill and the wire as you go.

- Round 1: Join to right leg with 3ch. 21sc (right leg), 3sc into ch, 4sc (left leg) — [30]. Place marker.
- Round 2: 48sc — [48]
- Round 3: (5sc, 1inc) × 8 — [56]
- Round 4: 11sc, (1inc, 2sc) × 8, 21sc — [64] — increases align with belly
- Rounds 5–11: 64sc — [64]
- Round 12: (6sc, 1dec) × 8 — [56]
- Round 13: 56sc — [56]
- Round 14: (5sc, 1dec) × 8 — [48]
- Round 15: 48sc — [48]
- Round 16: (6sc, 1dec) × 6 — [42] — add fiberfill
- Round 17: 42sc — [42]
- Round 18: (5sc, 1dec) × 6 — [36] — sew buttons onto belly now
- Round 19: (4sc, 1dec) × 6 — [30]
- Round 20: 6sc, 2sc with arm, 13sc, 2sc with arm, 7sc — [34] — arms sit at the sides
- Round 21: 6sc, 8sc (arm), 13sc, 8sc (arm), 7sc — [42]
- Round 22: (5sc, 1dec) × 6 — [36]
- Round 23: 2sc, 1dec, (4sc, 1dec) × 5, 2sc — [30] — insert wire and fiberfill
- Round 24: (3sc, 1dec) × 6 — [24]
- Round 25: (2sc, 1dec) × 6 — [18]
- Round 26: (1sc, 1dec) × 6 — [12] — add fiberfill
- Rounds 27–38: 12sc — [12] — 5 cm neck tube, do NOT stuff this section
- Round 39: 6 slst — Finished.

Step 4: Head
The head is the largest piece. Round 20 creates chain gaps where the safety eyes are inserted — attach the eyes before closing the head completely. Complete all face embroidery after round 28.
- Round 1: (L.Brown) mr, 8sc — [8]
- Round 2: 8inc — [16]
- Round 3: (1sc, 1inc) × 8 — [24]
- Round 4: 1sc, 1inc, (2sc, 1inc) × 7, 1sc — [32]
- Round 5: (3sc, 1inc) × 8 — [40]
- Round 6: 2sc, 1inc, (4sc, 1inc) × 7, 2sc — [48]
- Round 7: (7sc, 1inc) × 6 — [54]
- Round 8: (8sc, 1inc) × 6 — [60]
- Round 9: (9sc, 1inc) × 6 — [66]
- Rounds 10–19: 66sc — [66]
- Round 20: 28sc, 1ch skip 1sc, 8sc, 1ch skip 1sc, 28sc — [64] — attach eyes into chain gaps
- Round 21: 19sc, (1sc, 1inc) × 5, 8sc, (1inc, 1sc) × 5, 19sc — [76] — make 1 inc into each ch gap
- Rounds 22–26: 76sc — [76]
- Round 27: (2sc, 1dec) × 19 — [57]
- Round 28: (17sc, 1dec) × 3 — [54] — complete face embroidery now (see Step 5)
- Round 29: (7sc, 1dec) × 6 — [48]
- Round 30: 3sc, 1dec, (6sc, 1dec) × 5, 3sc — [42]
- Round 31: (5sc, 1dec) × 6 — [36]
- Round 32: 2sc, 1dec, (4sc, 1dec) × 5, 2sc — [30]
- Round 33: (3sc, 1dec) × 6 — [24] — add fiberfill
- Round 34: (2sc, 1dec) × 6 — [18]
- Round 35: blo 18sc — [18]
- Rounds 36–42: 18sc — [18] — Finished.
Step 5: Face Embroidery
Complete all face details before fully closing the head. Use dark brown embroidery floss for the brows and mouth, and red yarn for the nose.
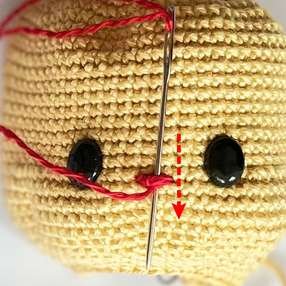
- Eyes: 8×10 mm black oval safety eyes in the round 20 chain gaps
- Nose: (Red yarn) embroider a small 2-stitch oval centered below the eyes
- Mouth: (Dark brown floss) small curved smile below the nose
- Eyebrows: (Dark brown floss) short horizontal stitches above each eye
- Blush: Apply soft pink chalk or blush to cheeks once the doll is finished
Step 6: Leg & Arm Embroidery
Use white yarn to add decorative “icing” trim at the wrists and ankles, mimicking the look of royal icing on a real gingerbread cookie.
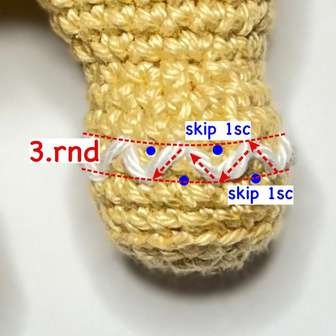
- Legs: (White yarn) skip 1sc, embroider on the 7th round
- Arms: (White yarn) skip 1sc, embroider on the 6th round
Step 7: Attaching the Head to the Body
Use 2 strands of light brown yarn. Follow the needle path carefully to get a secure, straight-sitting head. Take your time — this step determines how the finished doll looks.

- Insert needle from the top of the head, exit from the bottom.
- Pass through the neck of the body.
- Pass back through the bottom of the head.
- Exit from the side of the head, 1sc from the top.
- Re-enter through a few rounds to the side.
- Exit from the bottom of the head, pass through the neck again.
- Enter from the bottom of the head, exit from the side (1sc from top).
- Fit the head into position, make knots, and trim the ends.
Step 8: Cream Icing Cap
The white icing cap sits on top of the head with a scalloped edge and a little curl drooping over the forehead. Embroider colorful sprinkles in red, yellow, blue, and green after crocheting.
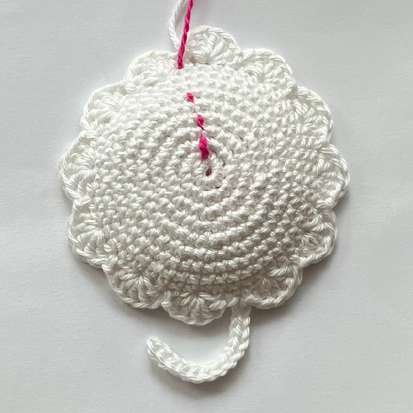
- Round 1: (White) mr, 8sc — [8]
- Round 2: 8inc — [16]
- Round 3: (1sc, 1inc) × 8 — [24]
- Round 4: 1sc, 1inc, (2sc, 1inc) × 7, 1sc — [32]
- Round 5: (3sc, 1inc) × 8 — [40]
- Rounds 6–7: 2sc, 1inc, (4sc, 1inc) × 7, 2sc — [48]
- Rounds 7–9: 48sc — [48]
- Round 10: (skip 1sc, 5dc in same sc, skip 1sc, 1slst) × 5, 15ch, skip 1sc, 14slst, 1slst, (skip 1sc, 5dc in same sc, skip 1sc, 1slst) × 6 — Finished. Leave a long tail for sewing.
- Embroider colorful sprinkles with short straight stitches in red, yellow, blue, and green.
- Sew the cream cap securely to the top of the head.
Step 9: Hat & Scarf
Hat:
- Round 1: (Red) mr, 6sc — [6]
- Round 2: 6sc — [6]
- Round 3: (1sc, 1inc) × 3 — [9]
- Round 4: (2sc, 1inc) × 3 — [12]
- Round 5: (3sc, 1inc) × 3 — [15]
- Round 6: (4sc, 1inc) × 3 — [18]
- Round 7: (White) blo 18sc — [18]
- Round 8: 18hdc — [18] — Finished.
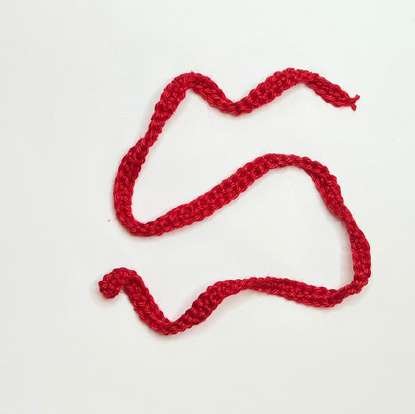
Scarf: Chain 110 with red yarn. Skip 1ch, work 109sc back along the chain. Finished. Tie around the neck with a loose knot.
Your Gingerbread Man is Ready!
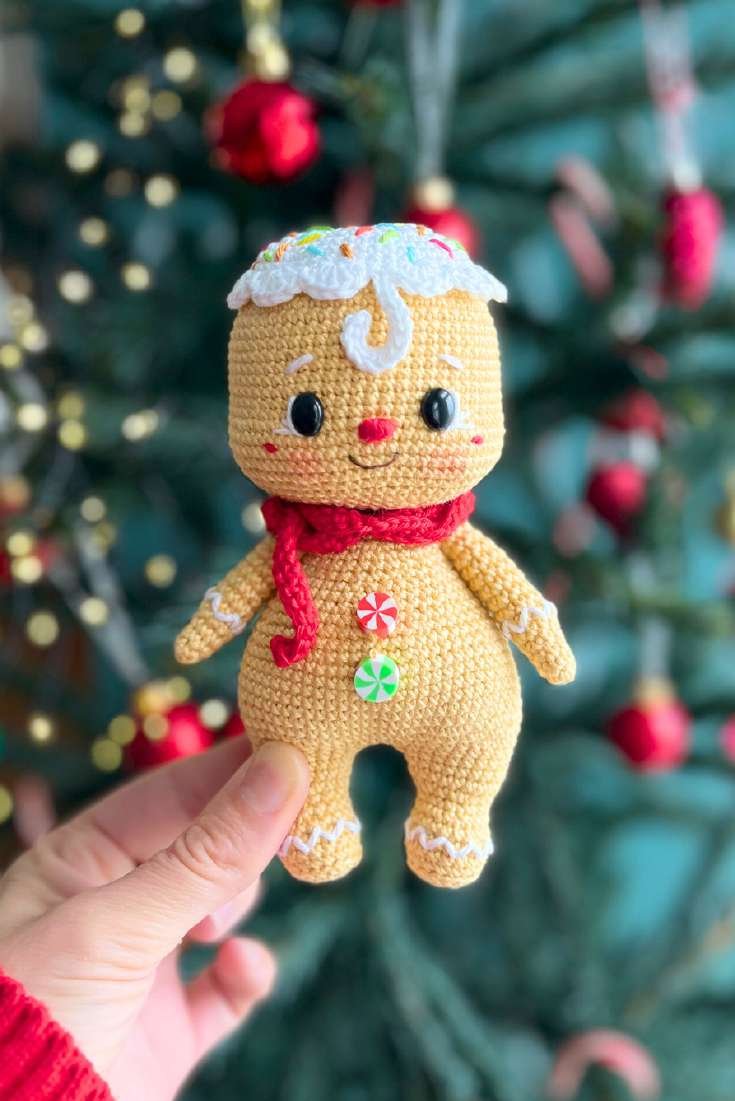
If you’ve followed all the steps, you now have an adorable 17 cm Gingerbread Man ready to display or give as a gift! Place the hat on top of the icing cap, wrap the scarf around the neck, and your little cookie character is complete.
Share your finished creation and tag @magicinkitchen — we’d love to see your version! 🎄
Frequently Asked Questions
What skill level is this pattern?
This is an advanced pattern designed for experienced crocheters. Beginners may find the wire insertion and embroidery details challenging.
Can I use a different yarn?
Yes — any smooth DK-weight cotton yarn will work. Using a different yarn may slightly change the finished size.
What is the wire for?
The 40 cm wire (2.5 mm thick) runs through the neck section, keeping the head stable and upright. Wrap the wire ends with tape before inserting to avoid poking through the yarn.
Can I sell dolls made from this pattern?
The original pattern is for personal use only. Check with the original designer @dilekshome for questions about selling finished items.
Conclusion
Ultimately, this Gingerbread Man Amigurumi is more than just a quick holiday crochet project—it’s a little bundle of festive cheer that brings instant warmth to any seasonal display. With its charming frosting details and beginner-friendly shaping, it’s a delightful way to practice your amigurumi skills while handcrafting a treasured keepsake. Whether you’re stringing up a garland, filling a holiday stocking, or gifting a handmade sweet treat that will never melt, this cuddly little character is sure to make your holiday season a whole lot cozier.

One Comment